The Only Way to Refresh Dirty Tile Grout That Really Works
Inside: Dirty grout lines getting you down? The best way I’ve found to restore old grout to its former glory!

I’ve spent way too much time over the years on my hands and knees scrubbing grout with a toothbrush. Because in my slightly OCD cleaning nerd mind, if the tile floor looks dirty, it is dirty. Even if I know it isn’t.
I’ve used a bleach pen, a steam cleaner, and specialty grout cleaners. I’ve tried hydrogen peroxide, baking soda with white vinegar, and even toilet bowl cleaner. While all of this elbow grease cleaned the grout, it still didn’t seem clean.
And it doesn’t matter if you keep your house as sterile as a hospital ward, over time tile grout will become some shade of brown.
When we moved into this house, the slate and brick floors were frankly a hot mess. And there was 16 years worth of dirt ground into the grout. I’m not even sure what the original grout color was. But I needed to bring some lightness to that sea of dirt brown.
This post contains Amazon and other affiliate links for your convenience. As an Amazon Associate I earn from qualifying purchases. If you purchase something through any link, I may receive a small commission, at no extra charge to you. I only recommend products that I love or would purchase for myself. See my full disclosure here.

If you love some good “what were they thinking” house photos, be sure to check out the before and after of this room in the posts “Modern French Country Makeover: The Kitchen Transformation” and “Southern Traditional Family Room Transformation“.
I was searching good old Google for a solution when I ran across a before and after of a slate floor almost exactly like mine in a foyer (I’d love to give credit but now I have no idea where I saw it). The transformation was amazing!

The solution all along was not actually a cleaner at all. They had used a product called Polyblend Grout Renew. I made a beeline to our Home Depot to get some. And I want to shout from the rooftops what a game changer this discovery was!
This $14 bottle saved this floor when I thought the only solutions would cost a fortune—to have it professionally cleaned, regrouted, or just rip it out and start over. None of which were going to happen.
What is Grout Renew?
First, let me say this is not a sponsored post. It’s me simply wanting to share a product that solves a problem that so many of us deal with.
Grout Renew is a specialized grout colorant, kind of like a grout paint. It’s intended to revive the color and includes a grout sealer to protect it from future stains.
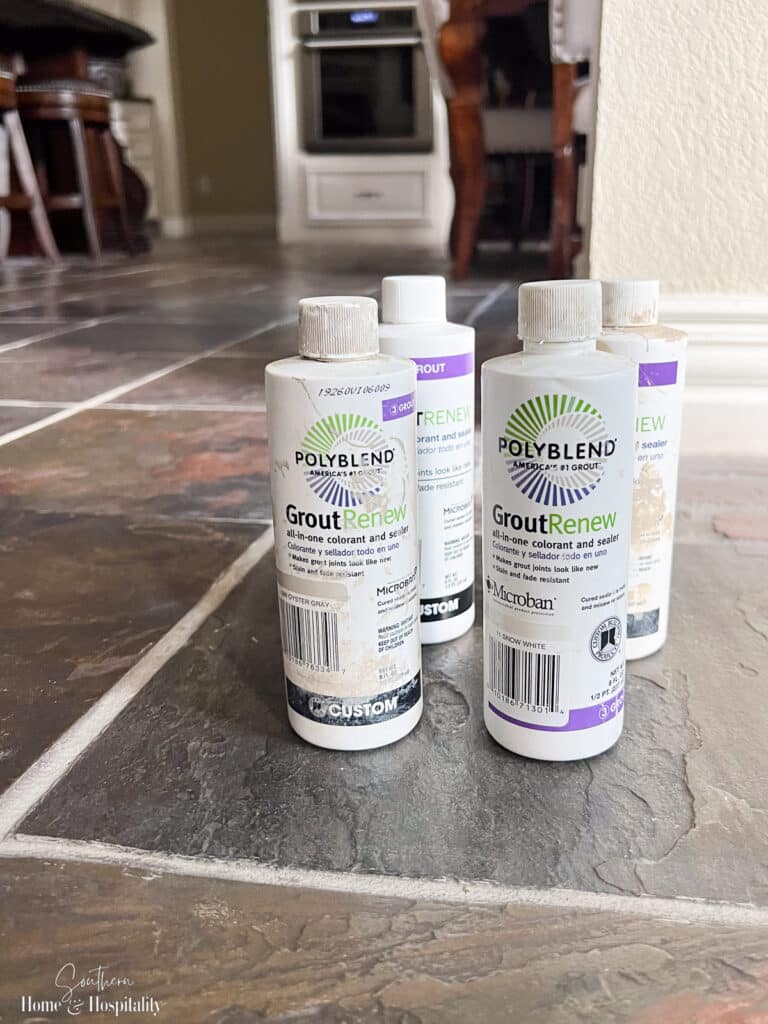
Since I didn’t put any of the tile floors in this home, I didn’t get to choose the grout colors and don’t know what they were. So most of my Grout Renew color choices were made with lightening up the grout in mind. I’ve now used this product not only on the family room floor and kitchen floor, but also in some of the bathrooms and the laundry room.
All these rooms have different kinds of tile. Here’s how I restored the grout on the four different types of floor tiles:
How to refresh grout on a slate floor.
First up, is this kitchen and family room floor. The uniqueness of the slate with the brick inlays really drew me in as a feature of this house. But it wasn’t just dirty. To add insult to injury, someone had put a shiny varnish on it that had yellowed.

To offset the yellow cast and lighten up the now brownish grout, I chose to use Grout Renew in Oyster Gray. I hated the yellow dinginess so much that I was willing to paint every last line in this large open living area. To get through these two rooms I tackled it in small sections and it did take me several days.

Looks like a different floor, right??
Not only did it lighten the floor grout, I used it as kind of a whitewash on the tiles themselves as I was wiping away the excess. The gray helped fix the tint of the slate tiles from too warm and dark to a bit more neutral. (You probably won’t want to do this, unless someone has put yellowed varnish on your floor too.)
For a dark floor like this, I would not recommend using a white or light grout colorant! This oyster gray is a midtone color and you can see how much the light and dark contrast. I believe a lighter color would definitely make the floor look “painted”.
I’d always battled getting my slate floor clean. If you have this issue too, see what I’ve learned over the 20 years of having them in the post “The Best Tips I’ve Learned to Clean Rough Slate Floors.”
How to clean white grout on a tile floor.
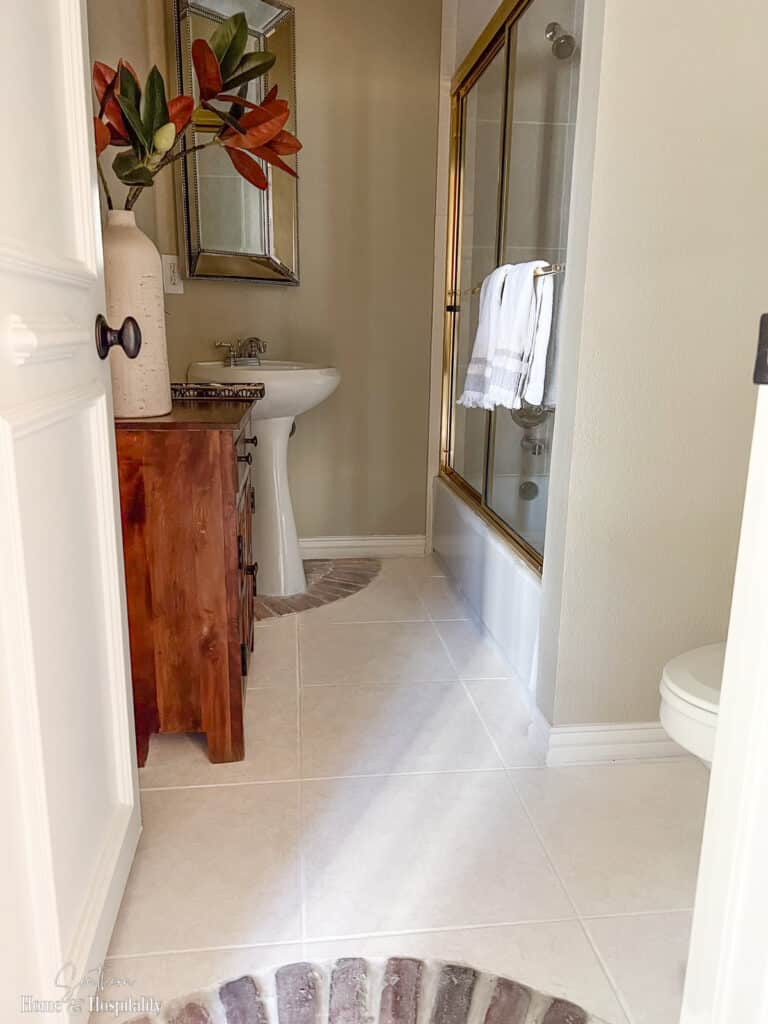
Out of all the tile grout I’ve used this product on, this porcelain tile bathroom floor is the easiest because its non porous material was so easy to clean the excess product off of. Plus, it’s a small area so I was able to do the entire floor in one session.
This is a pic from when we moved in:
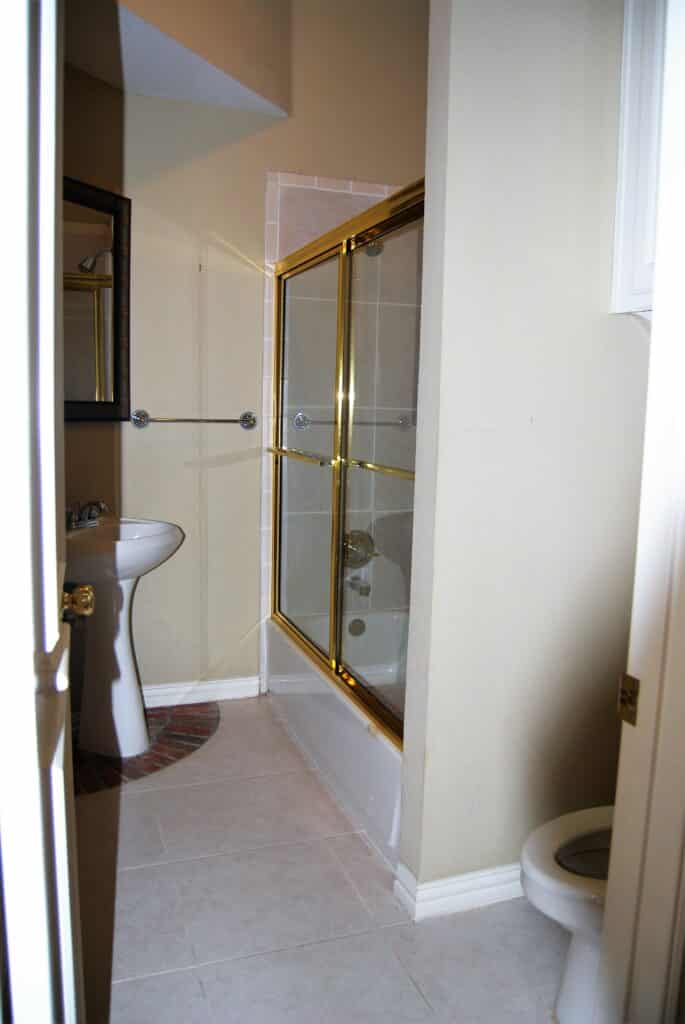
It’s super gratifying on a light floor too, because I was able to use one of the white color choices called Snow White. And nothing says clean like white!✨
How to renew grout on a travertine floor.
While the grout on the travertine floor wasn’t awful when we moved in (below), over time it got darker from daily use. It’s one of those things you really don’t notice until it’s restored to its original color again!

After the success on my other tile floors, I touched up the grout in the primary bathroom with Grout Renew in Linen:
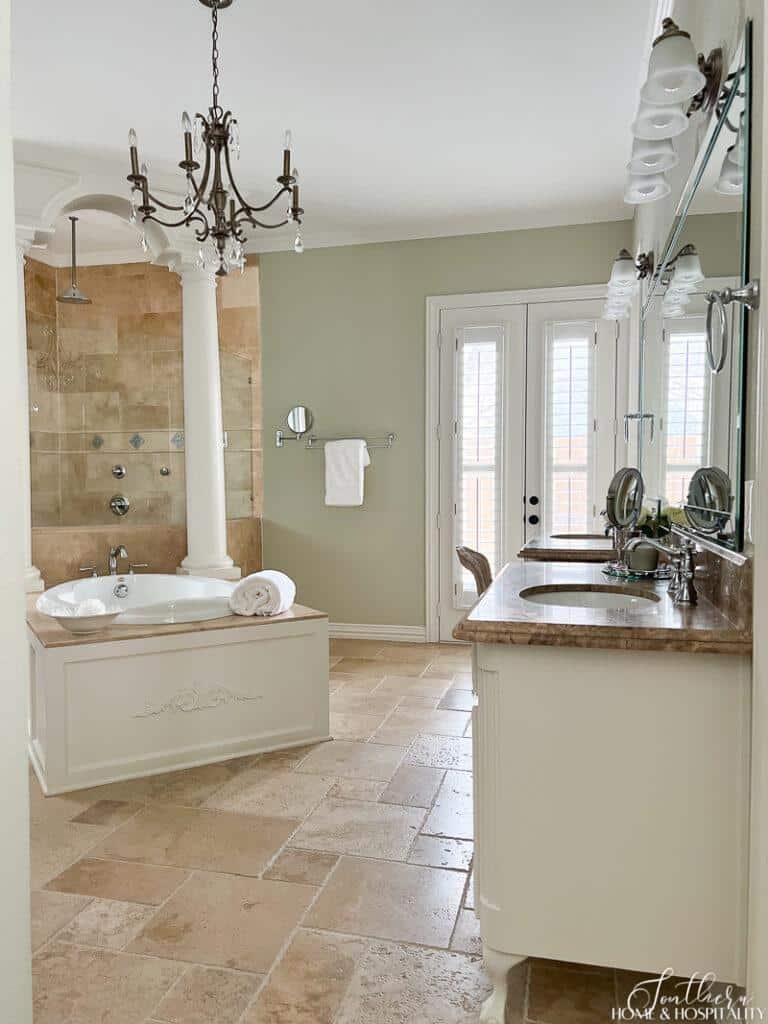
The result? It looks so much cleaner!
How to refresh grout on a brick floor.
I had always wanted brick floors somewhere, so I was thrilled to finally be getting them in this house. We have full brick floors in the laundry room, but they were dark, dirty looking, and yellowed.
Here’s a photo of the laundry room when we moved in:
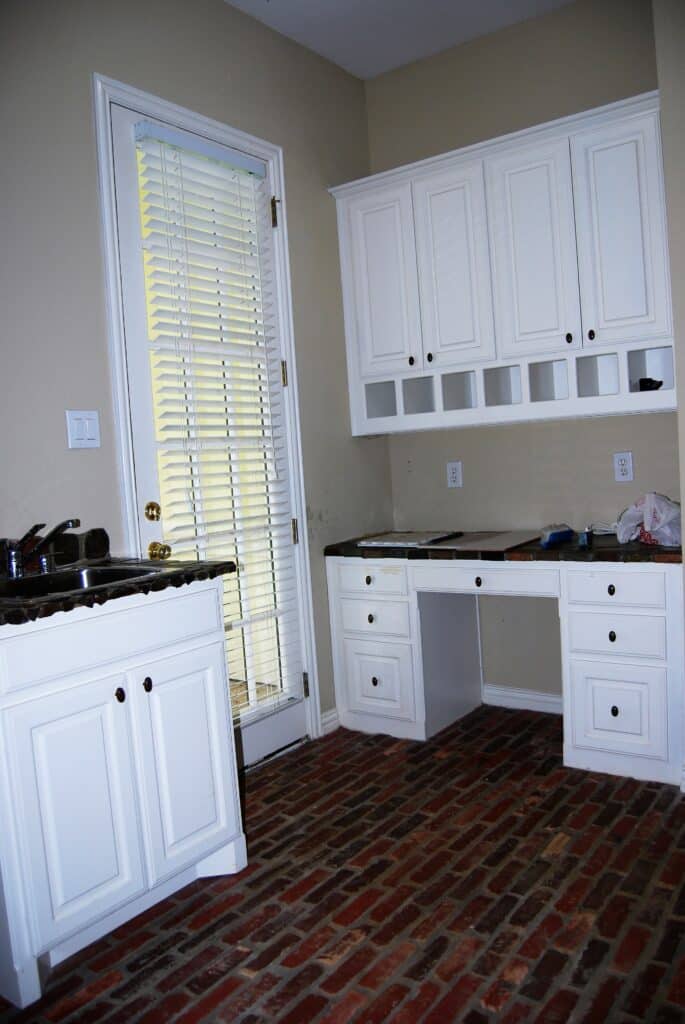
I’ll admit this isn’t the perfect product for this floor type, because there is so much grout and the lines are thick, I didn’t want to full-on paint the grout because I was going to use a lighter color than the original grout with the same “Oyster Gray” as the kitchen and family room.
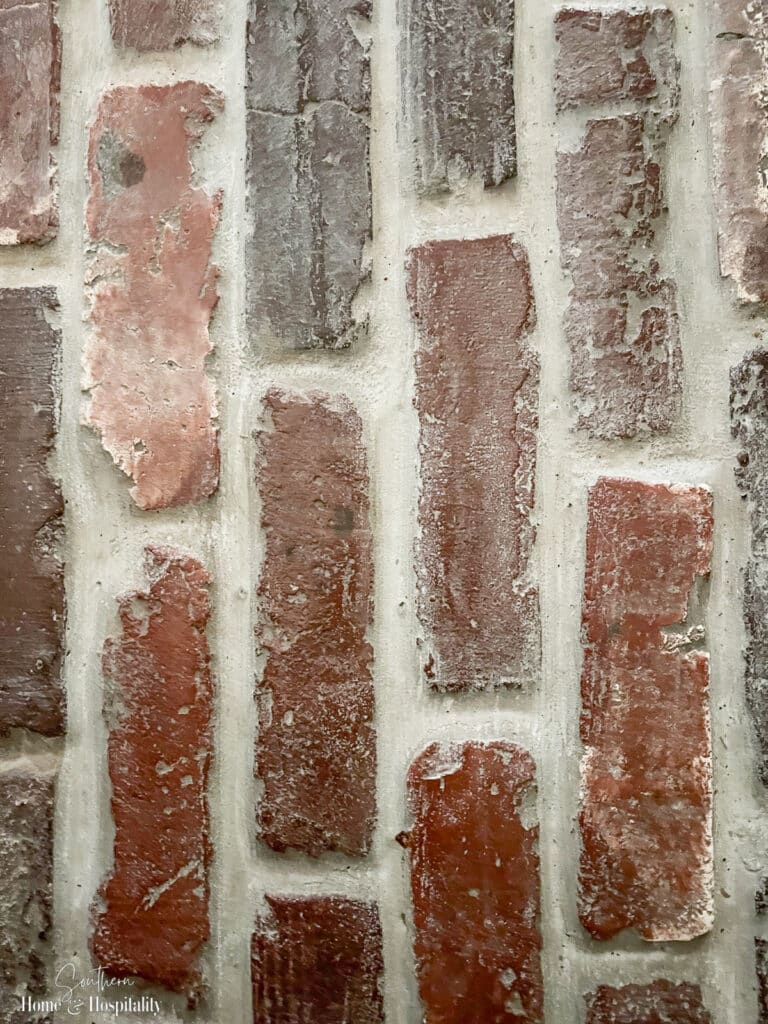
So I mixed the Grout Renew with some water to help avoid the painted look and did more of a whitewash just to lighten things up. Since I watered it down, I had to go back and do a second coat to make it like I wanted it.
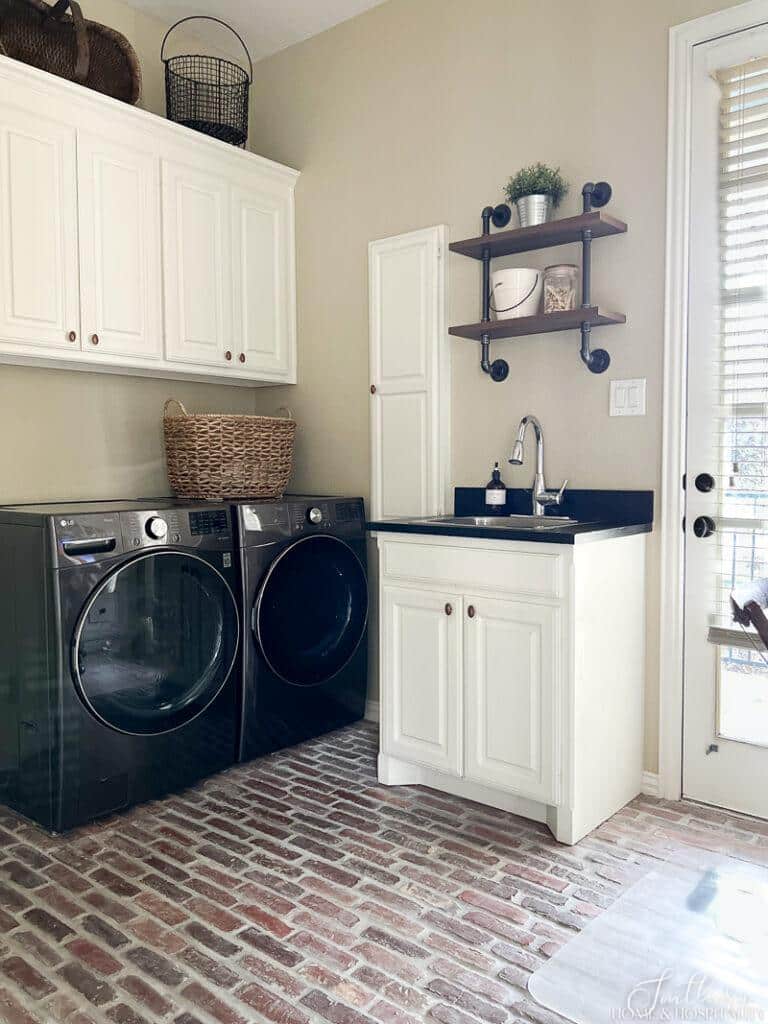
The result here is not uniform like the floors with smaller grout lines. But I like the lighter look more than I care about the nonuniformity. No one sits in here but me and most people don’t look at your floors as closely as you do. And the look of brick is rustic and not uniform anyway, right?
The step-by-step guide to restoring grout.
What You’ll Need:
- Grout Renew (available in over 30 colors)
- A small craft paint brush or artist brush (the size depending on grout line width)
- An old toothbrush or small scrub brush
- Lots of paper towels or several clean cloths dampened with water
Instructions:
1. Prepare the Grout.
Before applying Grout Renew, the first step is to make sure your grout lines are clean and dry. Start by cleaning the grout with a cleaning solution and water. For stubborn stains, you might need to scrub with an old toothbrush or grout brush. Allow it to dry thoroughly before proceeding.
2. Apply the Grout Renew.
Shake the Grout Renew bottle well. Using a small artist brush, paint the Grout Renew onto the clean grout lines starting with a small area of tiles, taking as much care as you can to keep it on the grout.
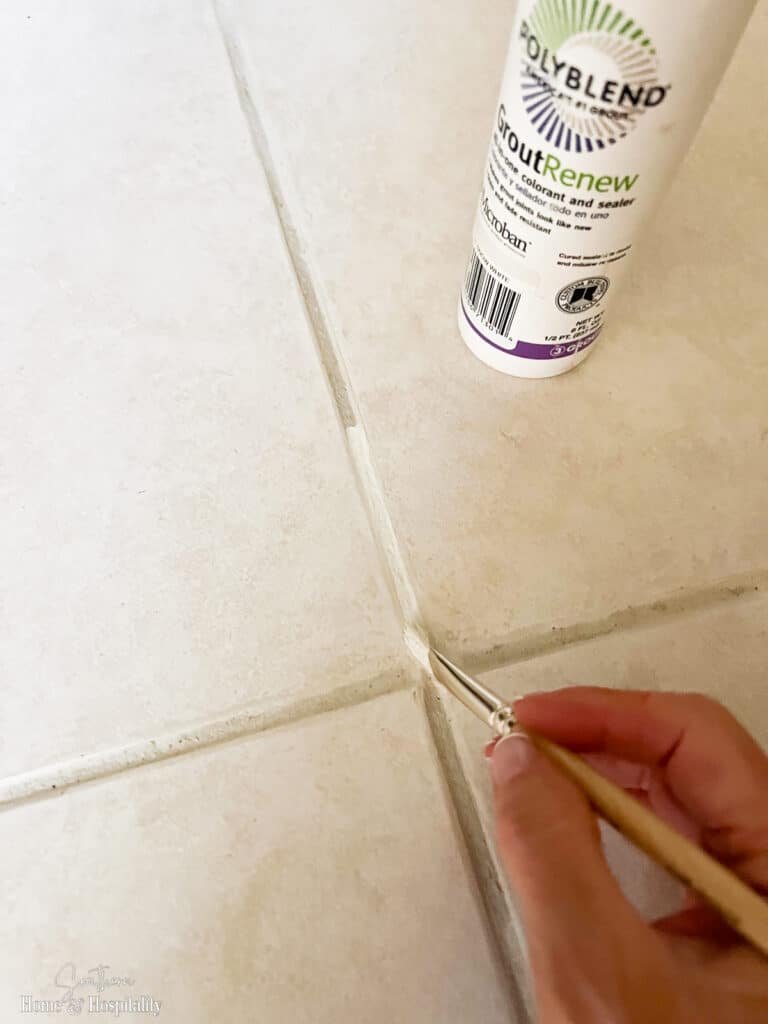
3. Wipe off the excess.
Once you’ve applied the Grout Renew to a small section, immediately wipe off any excess from the tiles with a cloth or paper towels dampened with plain water. You want the Grout Renew to only remain in the grout lines.
While it was easy for me to scrub off the excess I had missed with a magic eraser after it dried on the smooth tile, it was admittedly much harder on rustic natural stones like slate.
This project is a marathon and goes especially slow on natural stone. But the huge difference I saw kept me going!
4. Let it dry.
Allow the Grout Renew to dry for 24 hours. Make sure you have adequate ventilation during this time. It’s not super fumey, but it doesn’t smell great either.
5. Touch up and clean up missed areas.
After it’s dried, check your grout. If you see any areas where the grout color isn’t as uniform as you’d like, you can apply a second coat where a grout stain might be peeking through. Simply repeat the process in those areas.
Maintenance.
After I did the floors originally, I was curious if mopping would remove the Grout Renew. It has mostly stayed in place. The only maintenance for me has been touching up the high traffic areas, which over time get dirty again. But it hasn’t been necessary for me to redo the entire floor.
Learn from my own experiences with restoring grout. Cleaners are for cleaning but won’t cut it in hiding those ugly grout stains!

Before you go:
As always, I appreciate your visit, comments, and shares here on the blog! I’d love it if you also follow along with me on Pinterest, Instagram, Facebook, TikTok, and YouTube so you won’t miss any of my inspiration and ideas.
Don’t forget to sign up for updates to keep in touch.
If you’re not already a member of the SH&H family, I’d love to have you join me! You’ll not only get email updates, but you’ll have exclusive access to all the bonus materials in my free subscriber-only library, like this:
Pin it to remember it!
If you’ve enjoyed this post, please pin and share this on Pinterest:



Wow! Your floors now look great! Thank you for sharing the oh so helpful information. I really enjoy your posts.
Thank so much Nancy! I’m so happy to share these little discoveries that I wish I had known about before!!