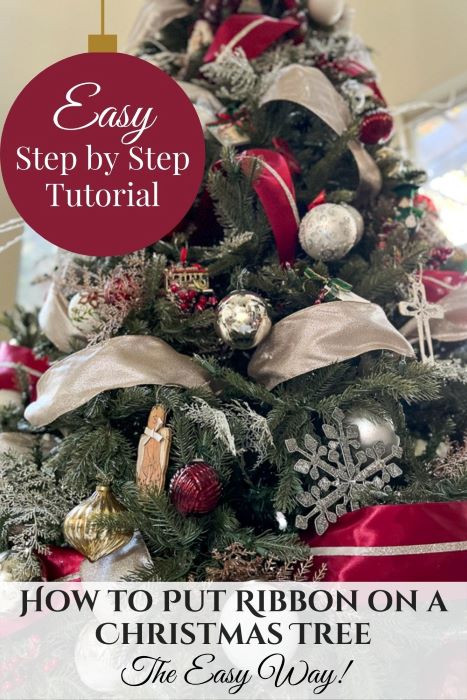
How to Put Ribbon on a Christmas Tree the Easy Way!
Inside: My two secrets for how to easily decorate your Christmas tree with ribbon for a professional, high-end look along with why you should use ribbon, what kind of ribbon to use, and a step-by-step tutorial!
Have you always wondered how professional Christmas tree decorators get the ribbon to cascade ever so perfectly down and around the tree?
Well, it’s usually because they have years of practice and as many rolls of beautiful ribbon as they desire.
This look can be intimidating for a novice tree decorator but it doesn’t need to be. If you’ve never tried putting ribbon on your tree before you should!
Because you can achieve the same designer look on your own tree if you just follow these two bits of advice.
And these two tips will save you a ton of frustration. Plus your tree will look lovely.😍
Secret #1: Cut the ribbon into pieces.
I wish this had dawned on me years ago because duh, it’s so obvious and so much easier! And not just easier, it also takes less ribbon.
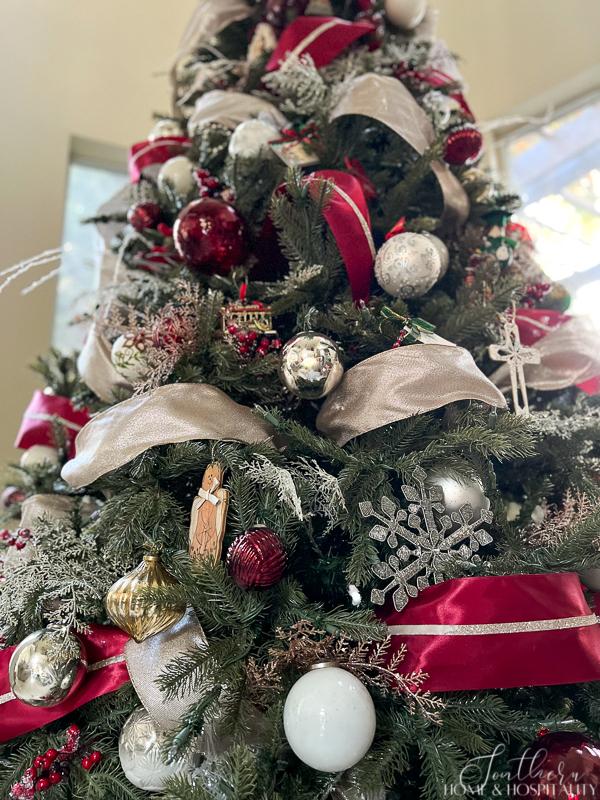
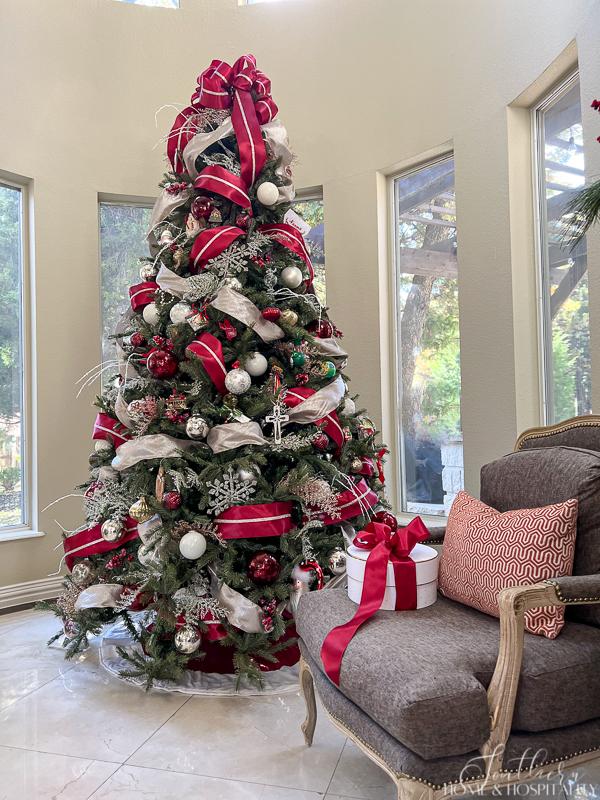
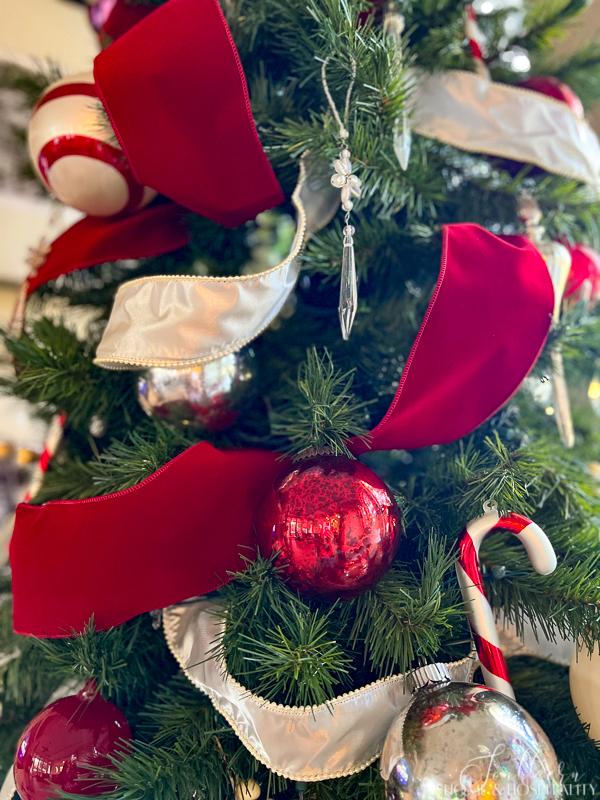
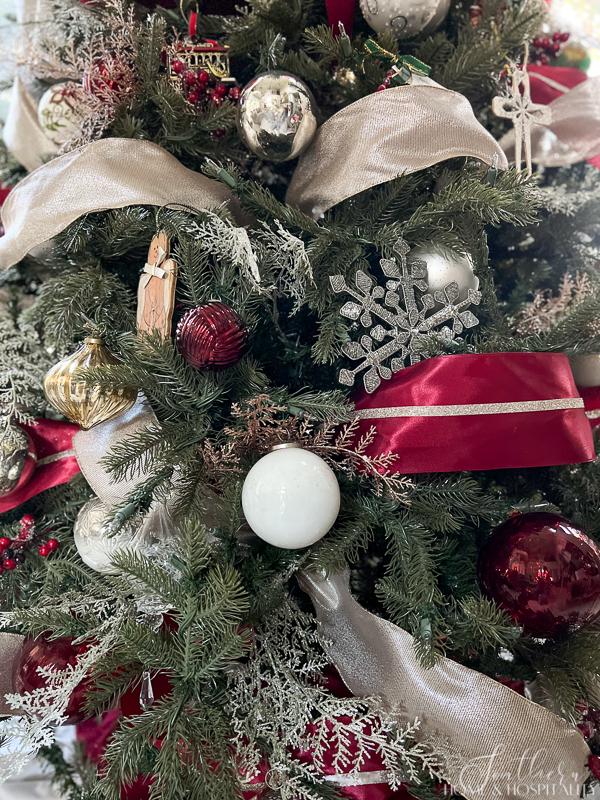
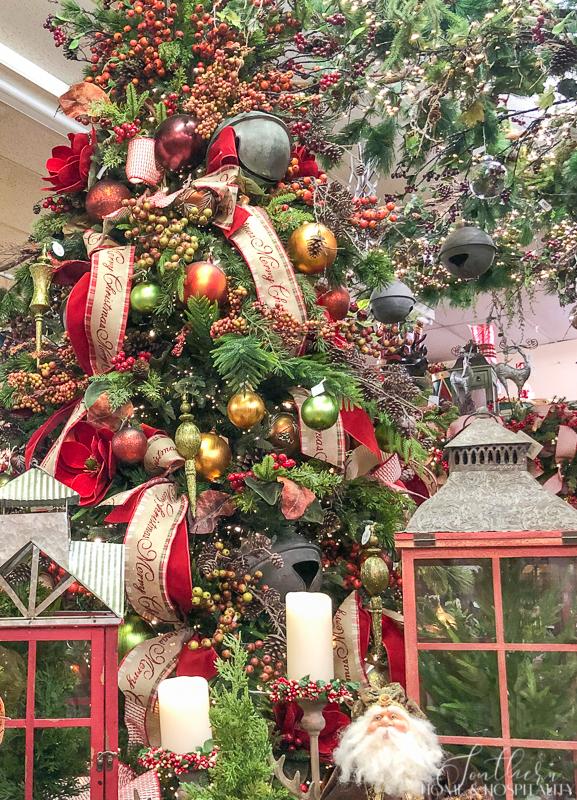
See this full tree with our family ornaments in the Christmas living room tour.
It used to take me so much longer to get the ribbon into place where I was happy with it because I was using really long lengths, or even the entire spool of ribbon. And if I didn’t like something, I had to take the whole thing off and start all over again.
Using ribbon pieces allows you to easily redirect any loops and target exactly where you want them to be.
Secret #2: Don’t aim for perfection.
The only other thing to remember is don’t get wrapped up in being perfect. There is no exact placement that is correct (bonus life lesson in there for you😁).
If you were actually able to make every swoop exactly the same size and exactly spaced out, it would ruin the natural flow.
So don’t overthink and overanalyze it. There is no wrong way. If you think it looks weird, also remember the tree really comes together after you add the Christmas tree decorations. You can’t mess this up.
How to add the ribbon to a Christmas tree.
Let’s first talk about the reason you are probably reading this post—how the heck do you actually put the ribbon on the tree?
There are lots of different tutorials out there on how to put ribbon on a Christmas tree and different looks.
This method is how I usually put ribbon on my own Christmas tree and I find this way really fast and easy for a beginner.
1. Fluff the tree and test or put on the lights.
Let’s get ready to ribbon! Some important prep work in this first step—separate the branches and make sure none are flat. This is crucial for a full, natural-looking tree and will allow your ribbon to lay better.
I usually form an “open hand” with the branches on the end of each piece. It fills out a lot of holes and makes for nice ornament hanging.
Next, test (or put on) your lights.
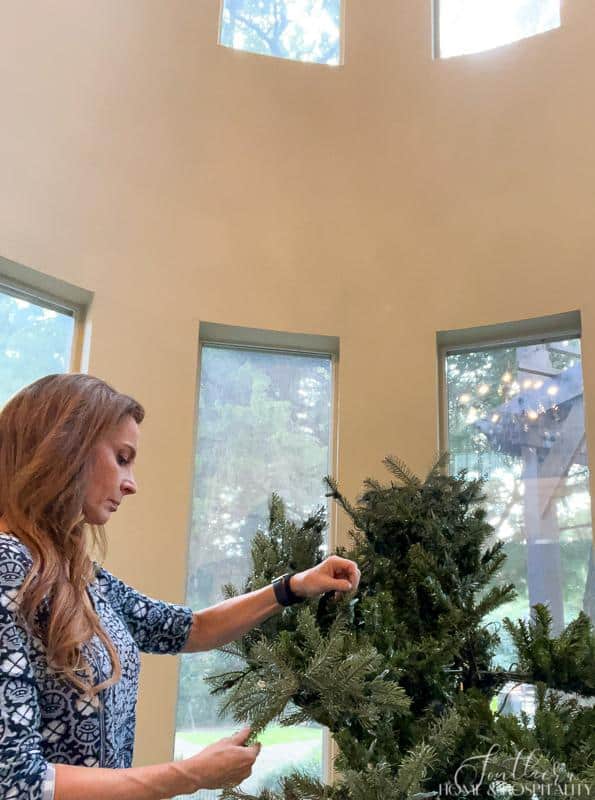
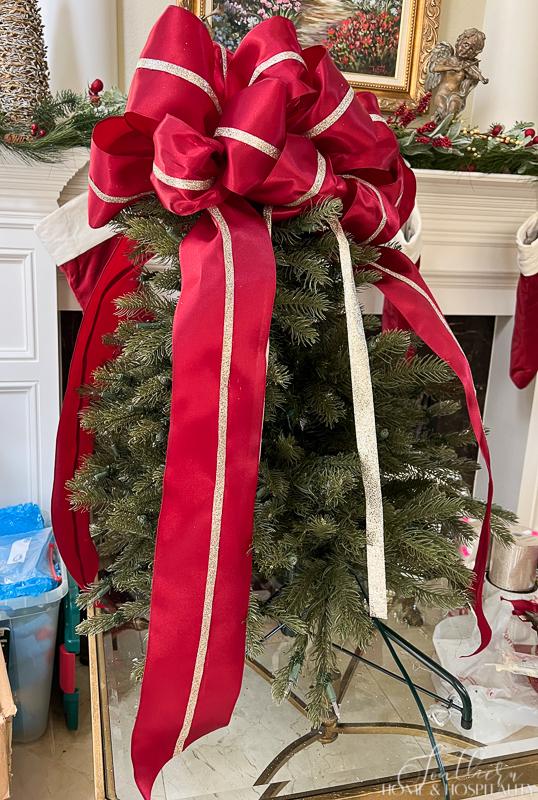
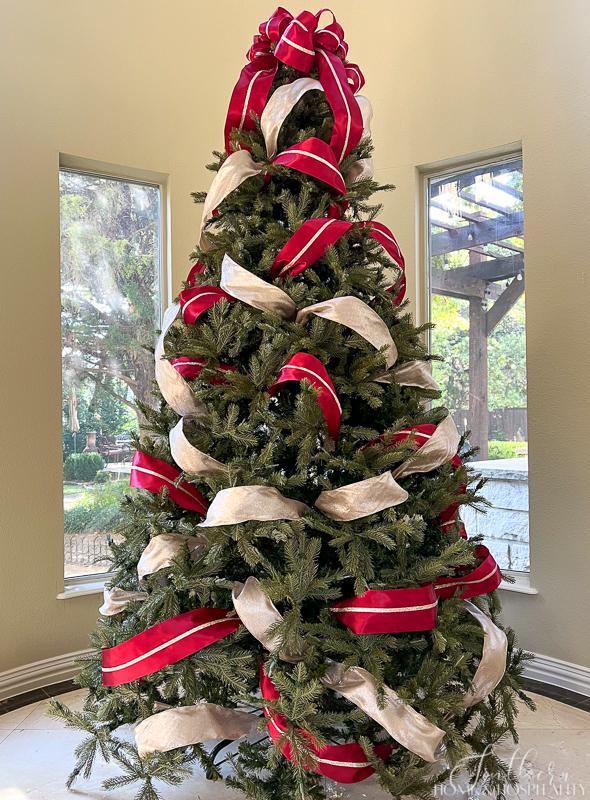
(For my tall nine-foot tree I like to put the tree topper bow onto the top section before I put it on the tree so that I don’t have the strain of standing on the ladder while zip tying above my head.)
2. Cut the ribbon into strips.
I know the next step feels wrong, but you have to cut the ribbon up into smaller pieces if you want to do this the easy way.
I cut ribbon strips in lengths to make two billows at a time. Another option is to cut the ribbon into lengths for individual billows. I just find it to be faster to do two at a time than attaching individual billows and the ribbon pieces are still very manageable.
For two billows I cut somewhere around 38″-42″ lengths of ribbon. This is just a guideline—remember this is not an exact science. The pieces don’t all have to be the same length. You may even want to combine longer pieces with some individual billows where you need them.
Tips
- Wider ribbon can make larger billows, narrower and more lightweight ribbons need shorter billows to hold their shape.
- Only cut your first piece to start and experiment with it to figure out the length that’s going to work best for you.
- Cut one spool of ribbon at a time. If you don’t use it all, you’ll be able to return the extra or use it somewhere else.
3. Attach and Place the Ribbon.
Now the fun begins!
Step One.
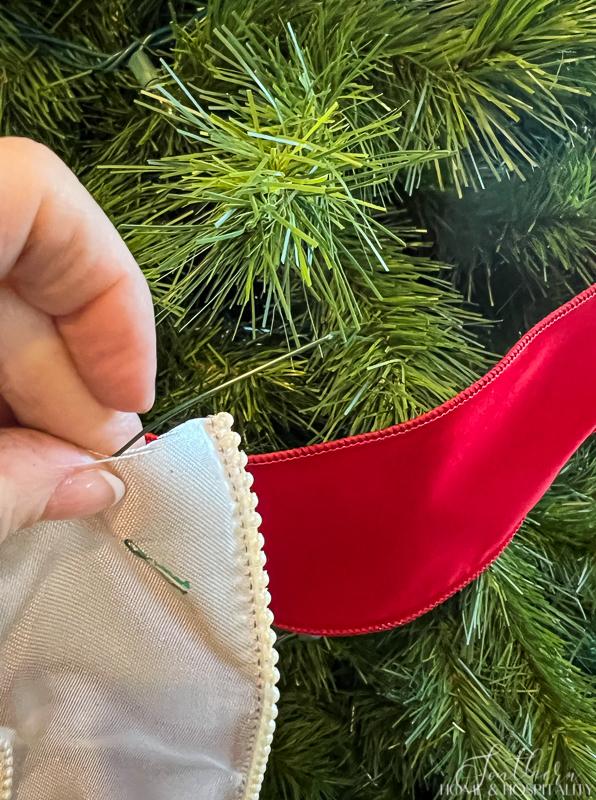
Start near the top of the tree with the first piece. Insert it into a hole in the tree and secure it by bending an inside wired branch of an artificial tree around it. If you’re decorating a real tree, you can use floral wire or a wire ornament hanger to hold it in place.
(Depending on the texture of the ribbon and tree needle type, you may not need to secure the pieces at all.)
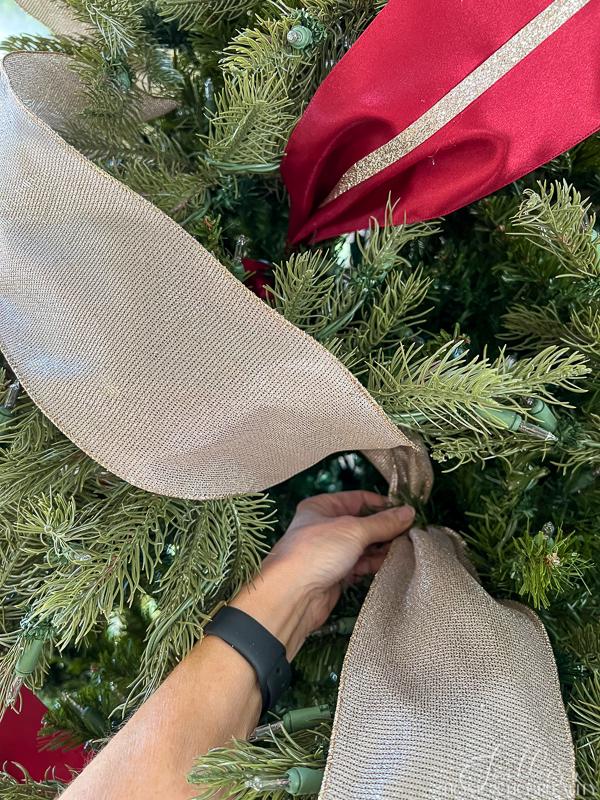
Step Two.
Then bring it down at a slight diagonal either to the left or the right billowing it out just beyond the tree branches and bringing the middle back inside the tree, securing it again with an inside branch. Make sure the pouf is not too tight around the branches and not so loose that it sags. Billow out the rest of the piece in the same direction and tuck the end of the ribbon back inside of the tree.
Step Three.
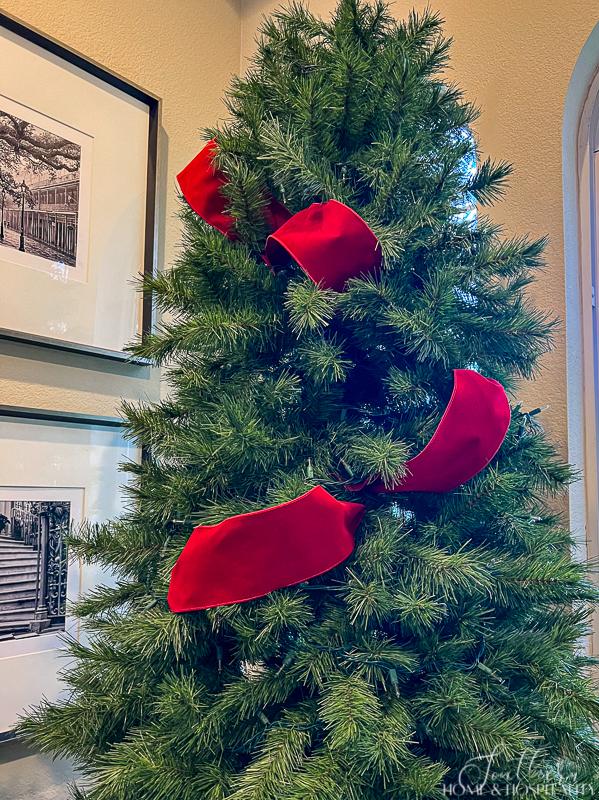
Insert the next piece into the tree close to the end of the first ribbon. This makes it look like it’s one piece that has briefly disappeared into the tree. I usually start the next piece further down diagonally and cascade it out the other direction. This creates an illusion that the ribbon is weaving itself in and out all around the tree.
If you’re a visual learner here is the process on my smaller family room tree:
Step Four.
Decide what direction you want to go with the next piece and repeat steps one and two.*
I stand back between placing each section of two billows to see where the ribbon might wind naturally and which areas need ribbon. The goal is that the ribbon loops should move the eye around the tree and create movement.
Don’t laugh, but as I study the ribbon placement, I can’t help but picture two little fairytale blue birds carrying the ribbon and winding it in and out, transforming the tree. (Only if there were, I’d also have them finish decorating the house while I wear a crown.)
Step Five.
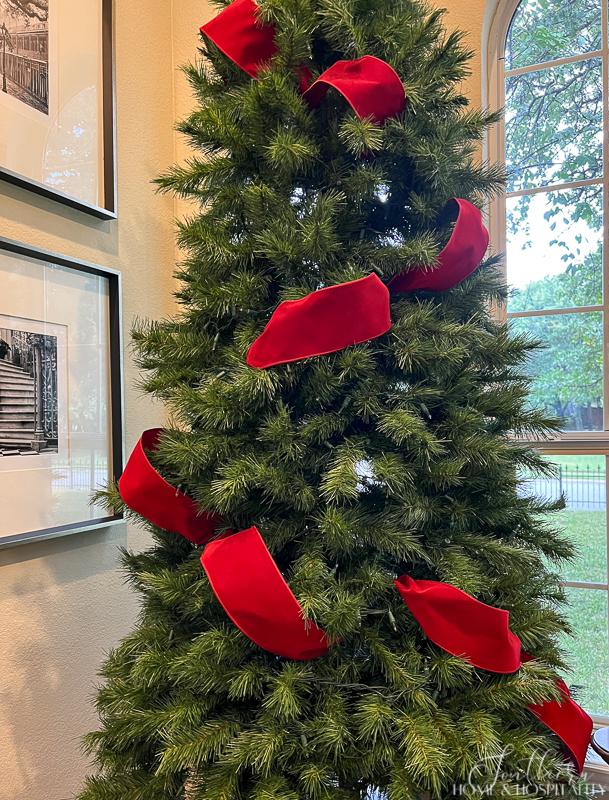
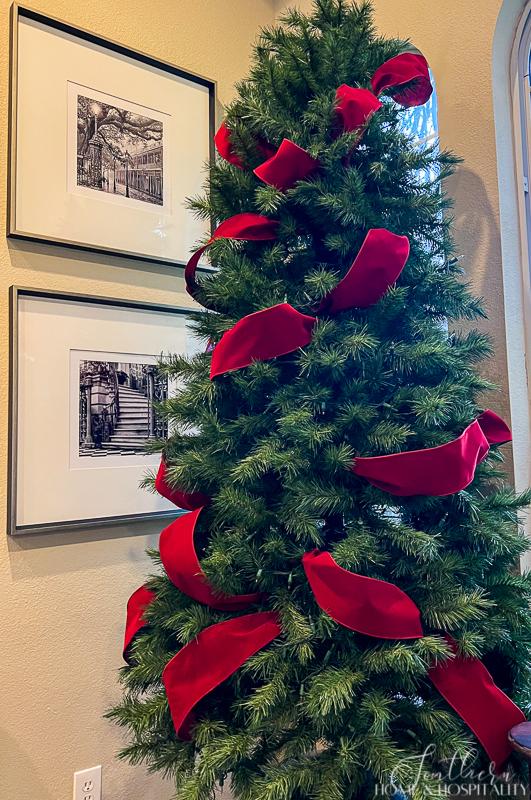
Repeat with ribbon pieces until the billows are consistently spread out across the visible parts of the tree adding as much or little as you’d like and filling in spaces as needed with some individual one-billow pieces.
Step Six. (Optional)
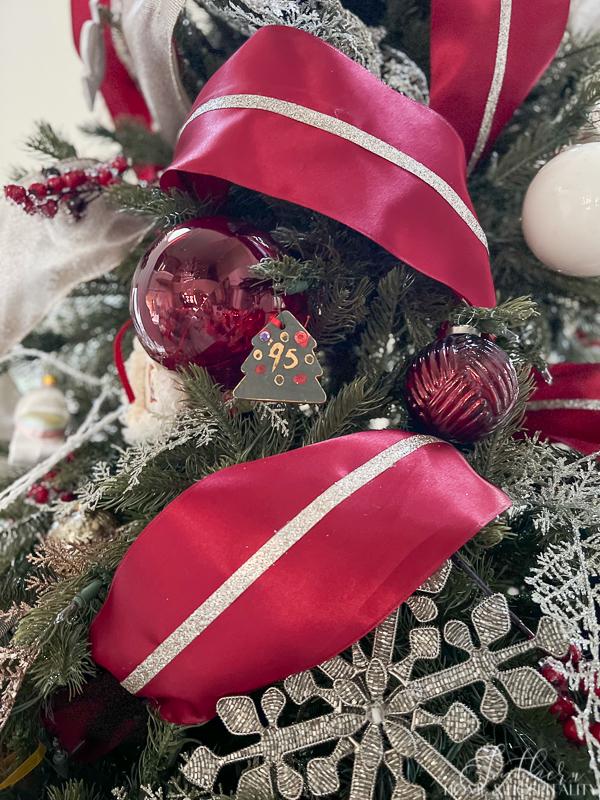
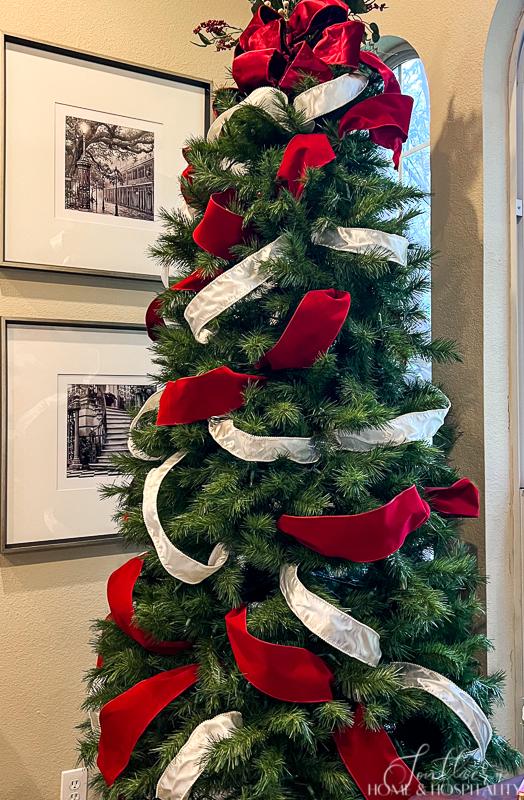
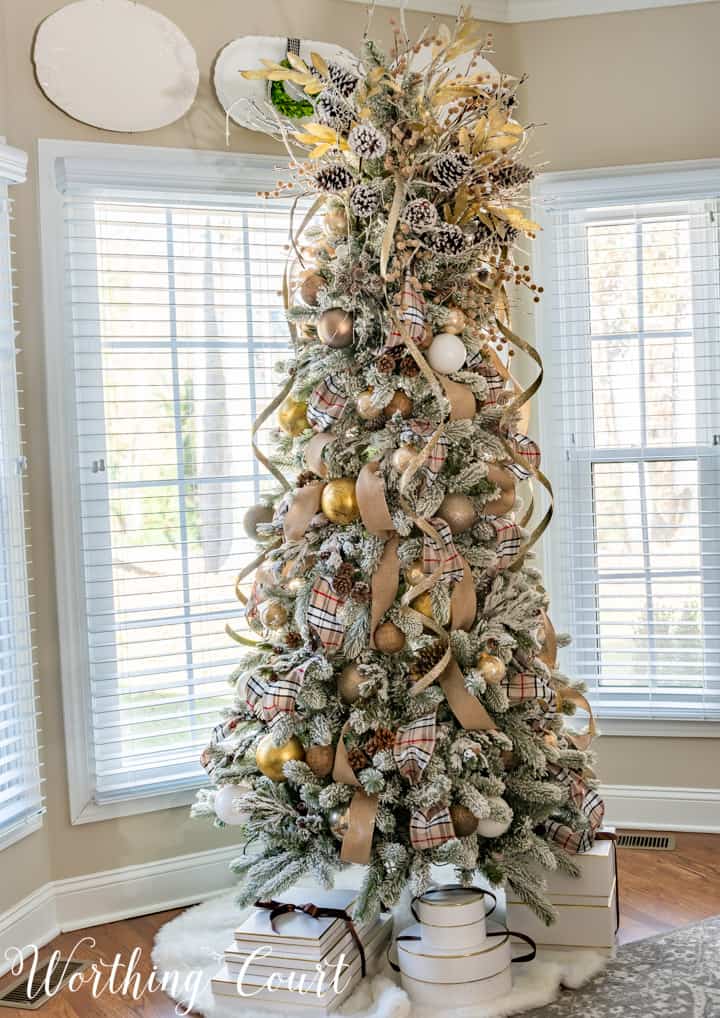
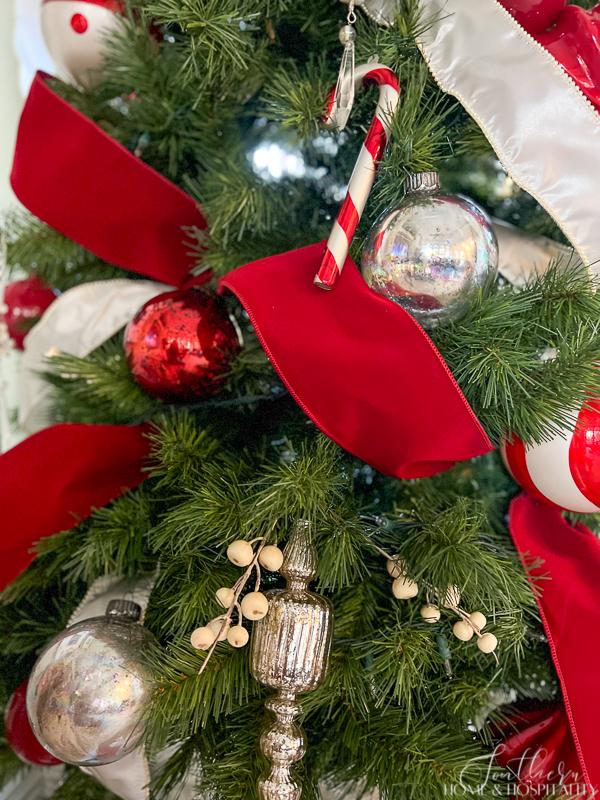
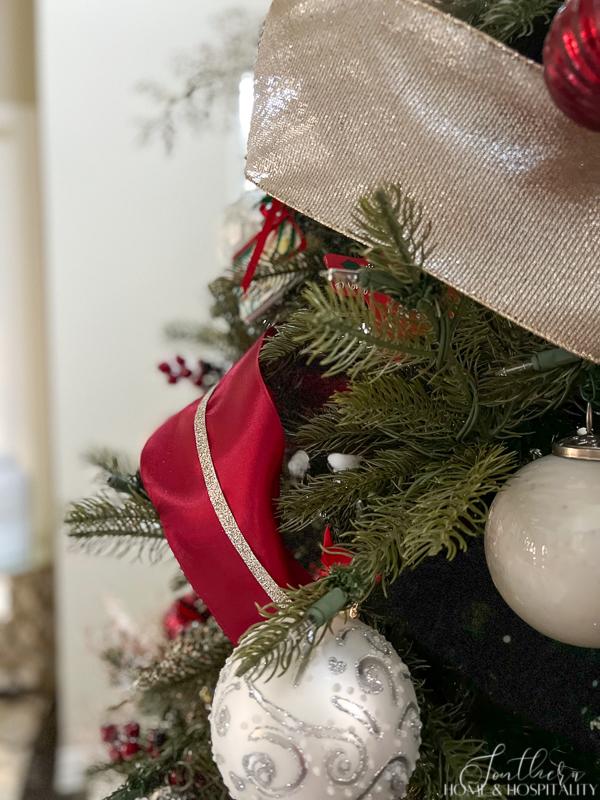
Repeat steps 1-5 with a coordinating ribbon. I used two kinds of ribbon in my Christmas decor color theme here in different widths, textures, and colors. You can even use three different ribbons if you’d like and really layer on the visual interest!
If you add coordinating ribbon, put your widest on first and spread it out so that you leave enough area for the next ribbons. Again, your placement is whatever is pleasing to you when you stand back and take it in. You can follow the same paths or fill in other areas like I’ve done.
In just a few easy steps these two trees are now ready for picks and then ornaments. But they are already looking more full and interesting.
You can place your ribbon entirely vertical, horizontal, or diagonal, following a straight line or even offset. All of the different ways are equally beautiful!
Just don’t strive to make the billows and placing too uniform or it will end up looking stuffy and staid, and lack movement. You’ll still follow these same steps with any of these patterns. Just make sure they’re evenly spread out over the tree.

These trees layer the coordinating ribbon and tumble it straight downward for a different look.
My ribbon is mostly diagonal like it’s cascading somewhat downward, and organically in and out of the tree. I also fill in with some close-to-horizontal pieces mostly near the bottom. I find this look the easiest because I don’t have to follow any pattern.
See my inside look at the entire process and secrets for decorating a Christmas tree from a professional tree decorator in the post, “How to Decorate a Christmas Tree Like a Pro Step by Step!“
What type of ribbon to use on a Christmas tree.
Use wired ribbon.
It is best to use a wired ribbon to create this look because you can shape the loops and cascades—because who wants droopy loops?
But if you find a non-wired ribbon you absolutely love, there are other ways you can create a really pretty look, like attaching bows to the ends of some branches or letting individual pieces spiral loosely down the tree.
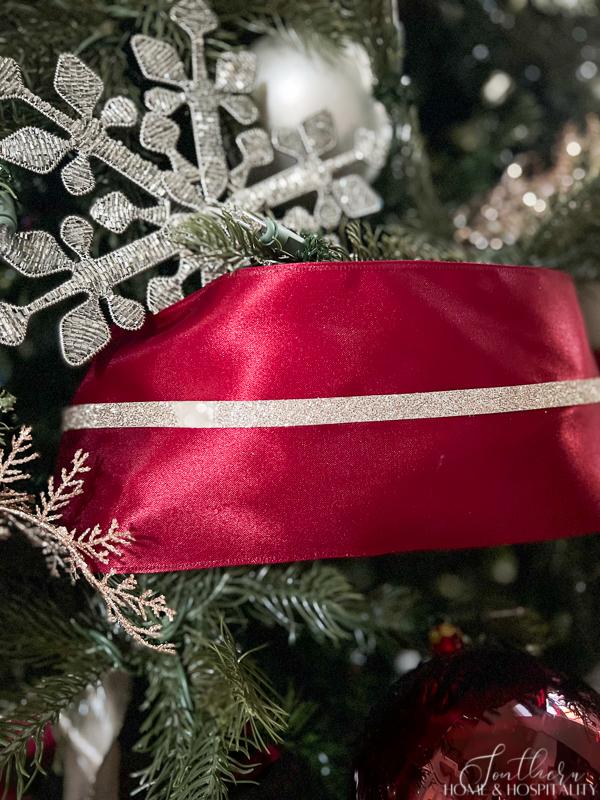
Use ribbon at least two inches wide.
My personal preference is to use 3″ or 4″ ribbon. The loops stand up better and the result looks more professional. If one of your coordinating ribbons is narrower, layering it over a wide ribbon is a good option.
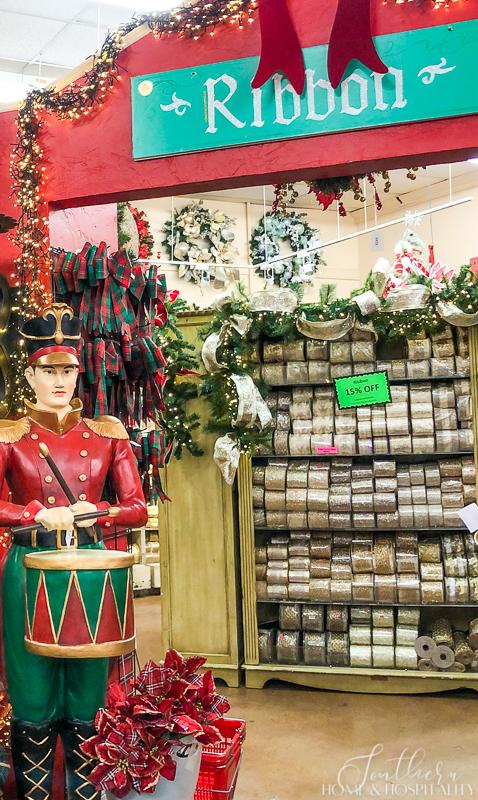
Last year I actually made my own 5″ ribbon when I couldn’t find a wide ribbon in the colors I wanted. I hot glued 2 1/2″ ribbon together and covered the seam with a narrow ribbon in my coordinating color:
How much ribbon you’ll need.
You’ll see some guides out there for how much ribbon you need for different height trees. But how much ribbon you add to your tree will really depend on:
- The height and fullness of the tree
- The width of the ribbon
- The coverage you want to achieve
- If you decorate the back
To give you an idea, on my nine foot tree I used two 30 ft. length rolls of each color. And on the six foot tree I used one 30 ft. roll (not including the bows).
SH&H Tip: Buy at least one more roll of each than you think you need and return what you don’t use (remember to cut one spool at a time!) Plus you might want to use any leftover ribbon in other decor to coordinate with your tree.
Use ribbon that will stand out on your tree.
You don’t want to go all out on decorating the tree with ribbon to not even notice it. So make sure the colors and size don’t blend in. Lay a long strip across the tree and stand back to see how it looks before you begin. Sometimes dark, sheer, or too-narrow ribbons tend to disappear.
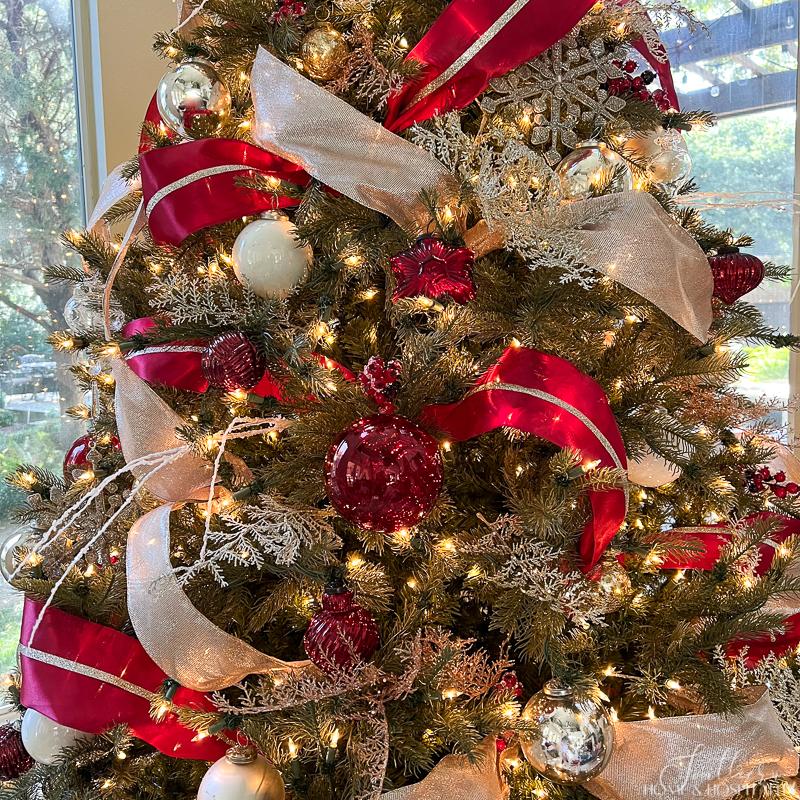
See this tree in my red and white classic Christmas family room and kitchen tour.
Reasons to use ribbon on the tree.
You’ll notice I use a lot of ribbon in my Christmas decorating. And when it comes to the tree:
- It’s the easiest way to set a color scheme and theme for the tree. You can change the look of the tree every year simply by changing the ribbon.
- It’s a fairly inexpensive way to make your tree look full, lush, and overflowing with ornaments.
- It’s just beautiful. It adds elegance and magical movement to the tree.
I’m no professional tree decorator, but I do know what made this process easy for me. And I have many people ask me how I do my ribbon so I’m all too happy to share what I’ve learned in all my years of trial and error.
I hope this takes some of the fear out of decorating your Christmas tree with ribbon this year. Share the holiday joy—I’d love to see your results and beautiful trees in the comments!
Happy tree trimming,

Before you go:
As always, I appreciate your visit, comments, and shares here on the blog! I’d love it if you also follow along with me on Pinterest, Instagram, Facebook, TikTok, and YouTube so you won’t miss any of my inspiration and ideas.
Don’t forget to sign up for updates to keep in touch.
If you’re not already a member of the SH&H family, I’d love to have you join me! You’ll not only get email updates, but you’ll have exclusive access to all the bonus materials in my free subscriber-only library, like this:
Pin it to remember it!
If you’ve enjoyed this post, please pin and share this on Pinterest:
This post contains Amazon and other affiliate links for your convenience. As an Amazon Associate I earn from qualifying purchases. If you purchase something through any link, I may receive a small commission, at no extra charge to you. I only recommend products that I love or would purchase for myself. See my full disclosure here.

Thanks! I’ll give it a whirl next year 2024!
Good! Let me know how it comes out!!
Thanks so much for sharing. That’s what Christmas is all about right😊
I’m inspired! On a tight budget, but I’m encouraged that I can create a beautiful Christmas atmosphere with a few additions to what we already have.
I also visited your red and white Christmas tour. Gorgeous, to say the least.
Thank you for your hospitality,
Texas
Thank you Ebony!!
I will use this lovely idea my trees will look beautiful this year Thank you 🙏 😊
Oh good. Let me know how they turn out!
thank you I can’t wait to go shopping for another roll of ribbon to see which ones I like when I put the tree up…..and this sounds so easy….I was going around and around and tucking in…omg way to hard that way
It is so easy. I’m glad you found my tip Coleen!
This is awesome! Thank you for sharing.
I could really use an entire flock of those fairytale blue birds here! Thanks for inspiration while i am surrounded with stacks of plastic bins full of Christmas decorations!
Cutting the ribbon into strips is brilliant! I wish I would have known this before last night. 😃 That is the most frustrating part of decorating for me! I will definitely give this a try next time! Thanks for sharing!