Make This Easy DIY Stacked Pumpkin Topiary to Welcome Fall
Inside: This quick DIY pumpkin stack is an easy way to welcome the autumn season with a stunning centerpiece for your home!
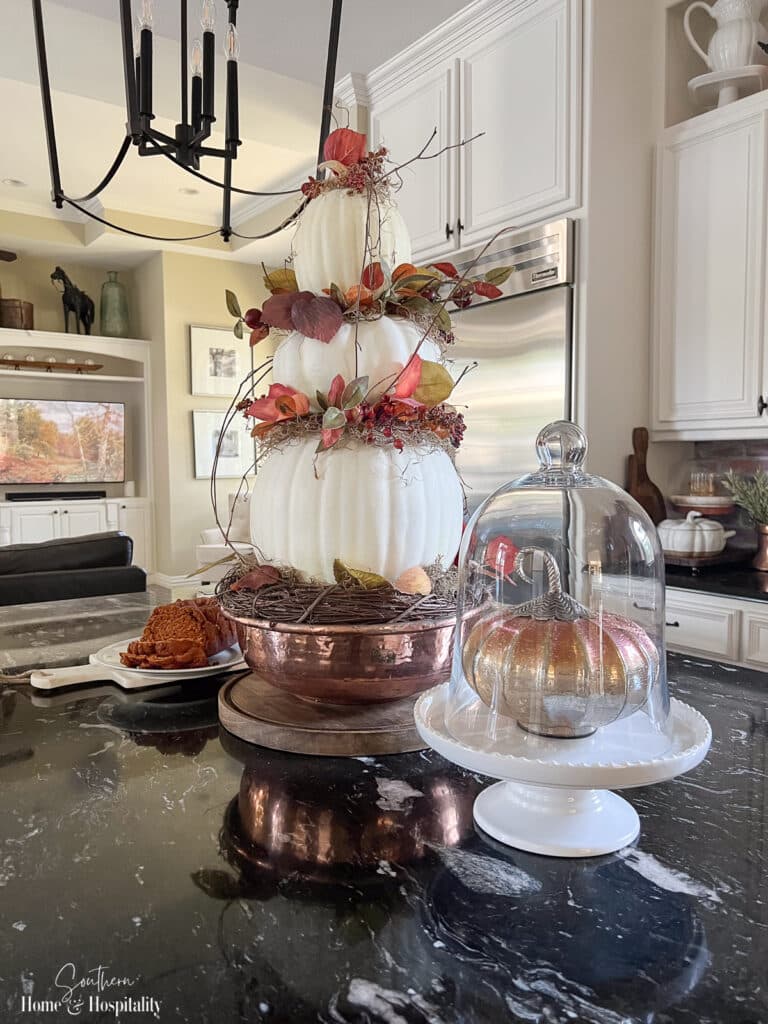
If there’s one single feature of our home that you could consider the very heart, it’s our large furniture-style kitchen island. That’s why a little seasonal decorating here has big impact.
So when I was Pinterest pondering on how to decorate this fall, I kept pinning photos of pumpkin topiaries, mostly donning pumpkin and mum-laden front porches.
But instead of putting one outside flanking the front door, the perfect place would be where I would see it all the time—smack dab in the middle of the kitchen.
This post contains Amazon and other affiliate links for your convenience. As an Amazon Associate I earn from qualifying purchases. If you purchase something through any link, I may receive a small commission, at no extra charge to you. I only recommend products that I love or would purchase for myself. See my full disclosure here.
Materials to make this stacked pumpkin topiary.
- Three faux pumpkins: a large pumpkin, a medium pumpkin, and a small pumpkin (make sure they are the foam craft pumpkins)
- Fall picks with fall leaves, berries, or a combination
- Spanish moss
- Grapevine wreath
- Grapevine pieces
- Bowl, urn, or pot
- Hot glue gun
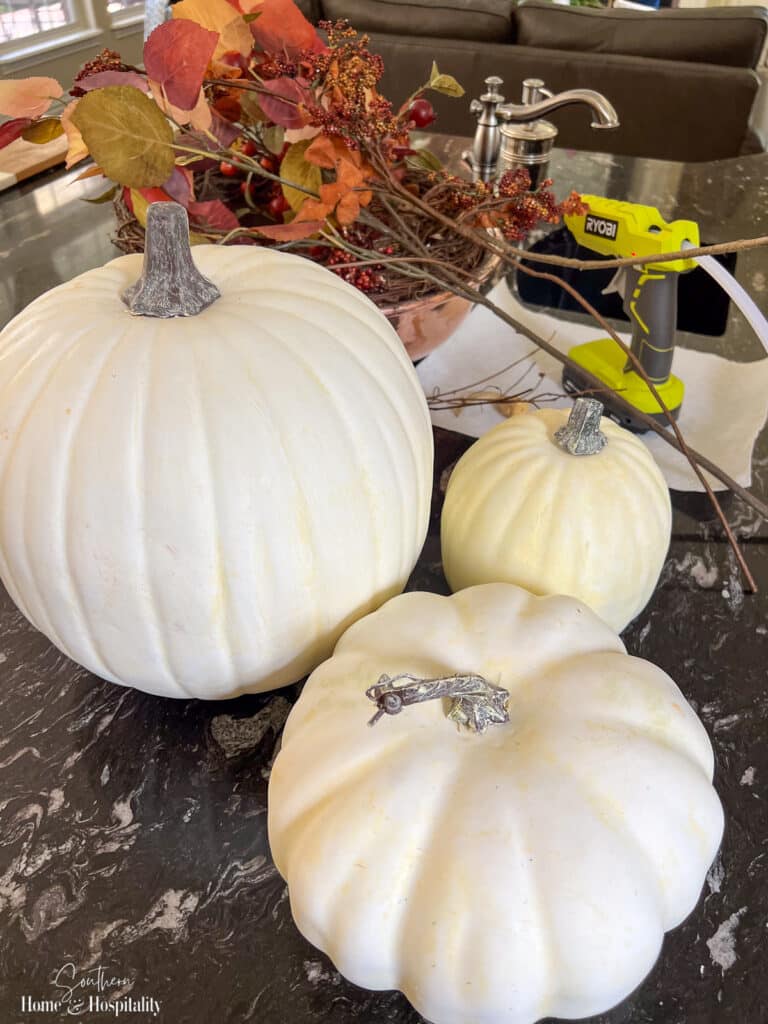
To make my faux pumpkins look a little less fake, the first thing I did was add some pale yellow wax. You can see my tips for this in the post, “How to Make Faux Pumpkins Look Like the Real Deal“.
DIY Pumpkin Topiary Tutorial.
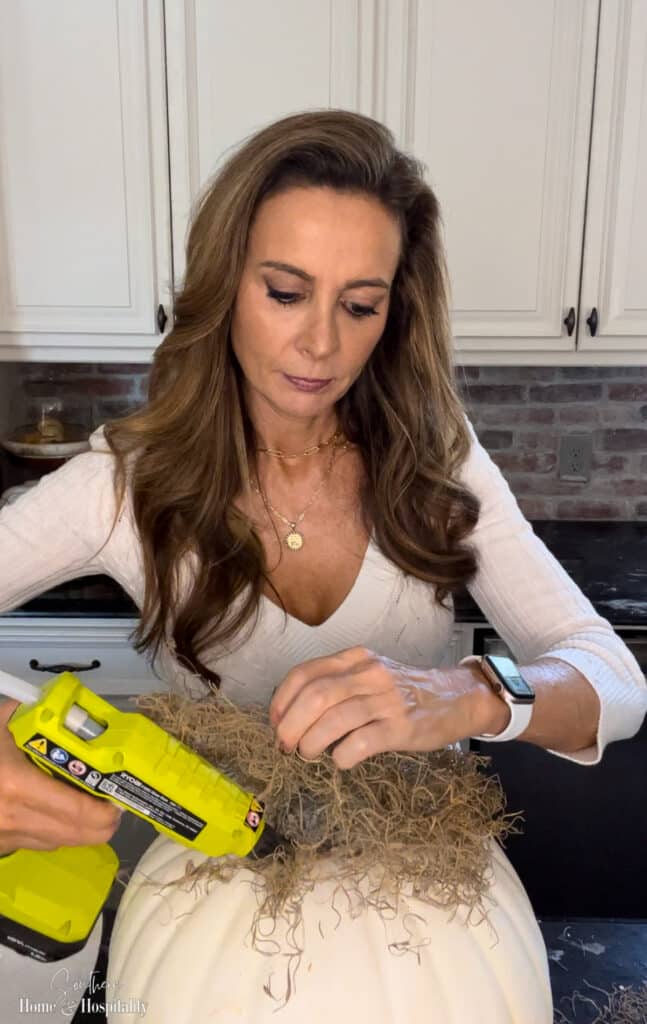
1. First, I applied hot glue to the top of the largest pumpkin and draped some Spanish moss over it.
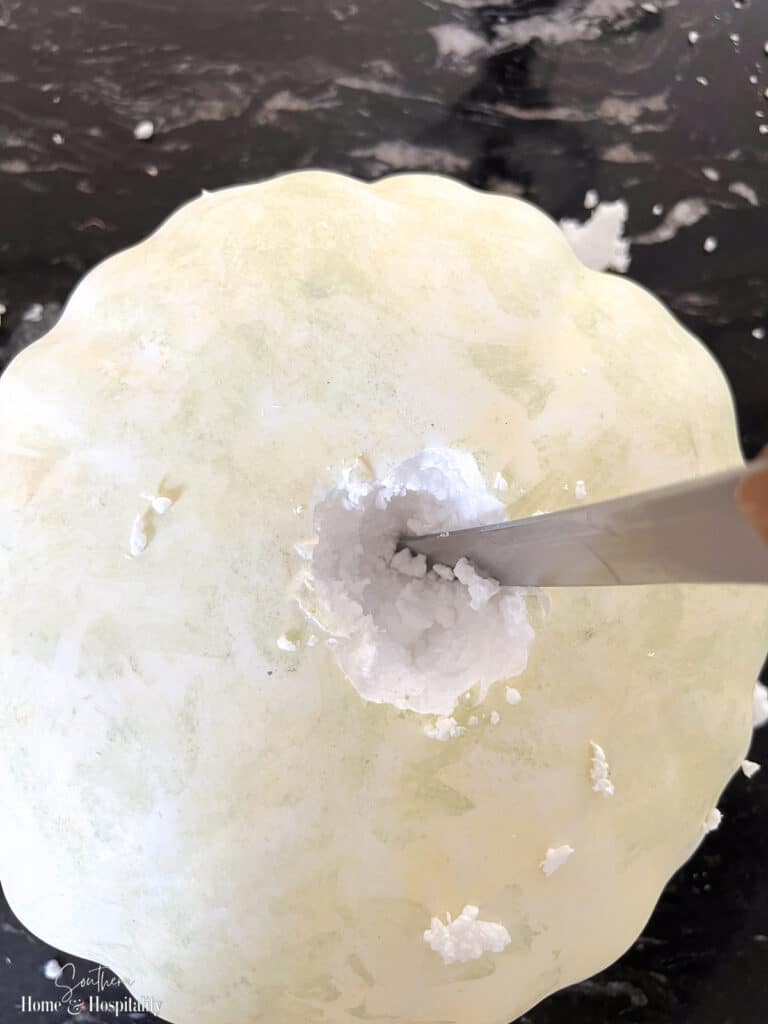
2. This next step will depend on what kind of stem your bottom pumpkin has. My bottom pumpkin had a non-removable stem. (My middle pumpkin has a removable stem, so we’ll cover that too.) So I cut a small hole into the bottom of the middle pumpkin with a sharp knife.

3. Then I set the middle pumpkin on top of the bottom pumpkin, over the stem. I chose a more flat, less round pumpkin for the middle, because it made a nice transition from large to small.
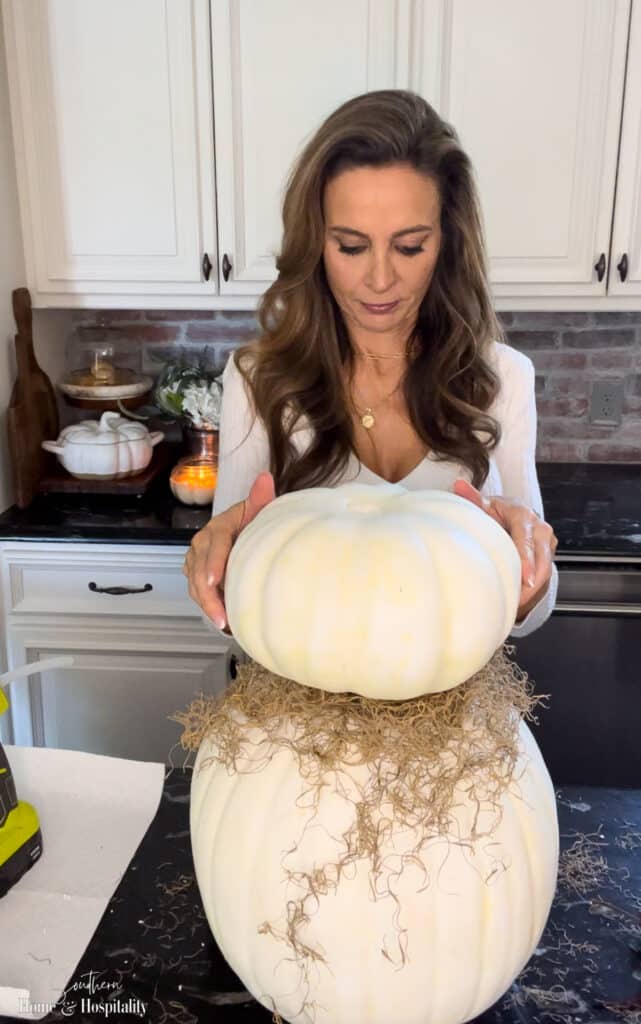
4. Next. I placed pieces of fall leaves and berries between these two layers. (You can do it after all three are stacked if you want—I couldn’t wait.) This craft is a great way to reuse old and partial pieces of faux stems! I believe all of the ones I used are from Hobby Lobby, accrued over several years.
I hot glued most in but some pieces are just tucked in between the pumpkins.
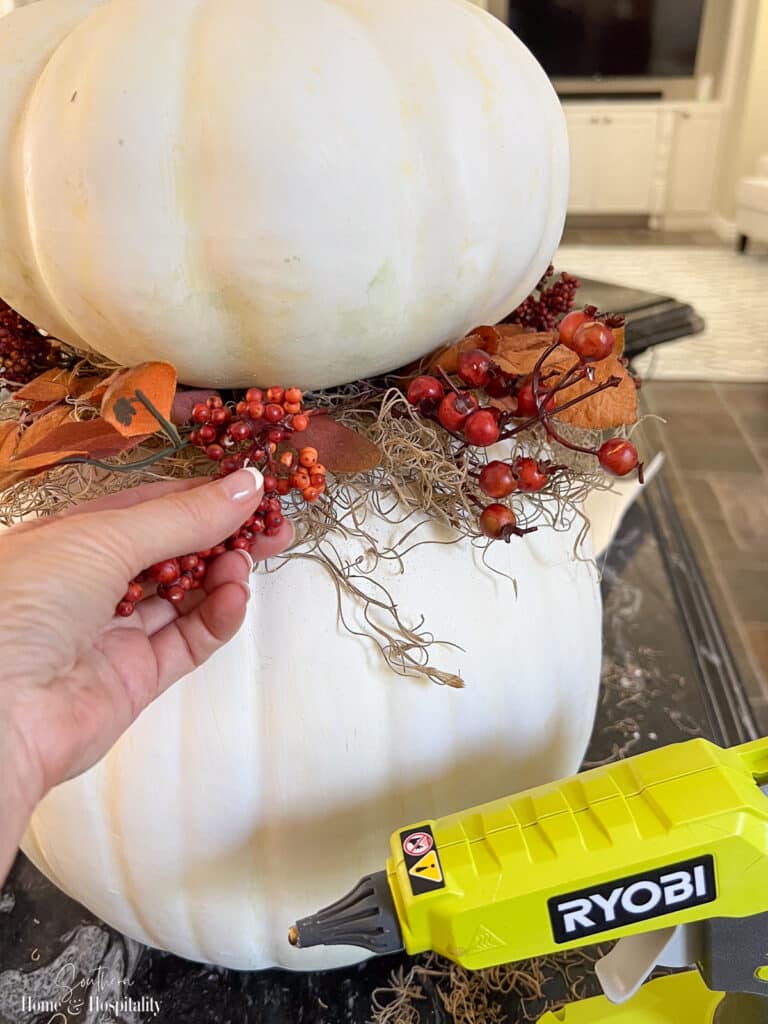
5. This middle pumpkin has a curly stem that I didn’t want to carve a big hole for plus, it was easier to just pull it off. So I removed the stem of the pumpkin to get ready to stack the top one on.
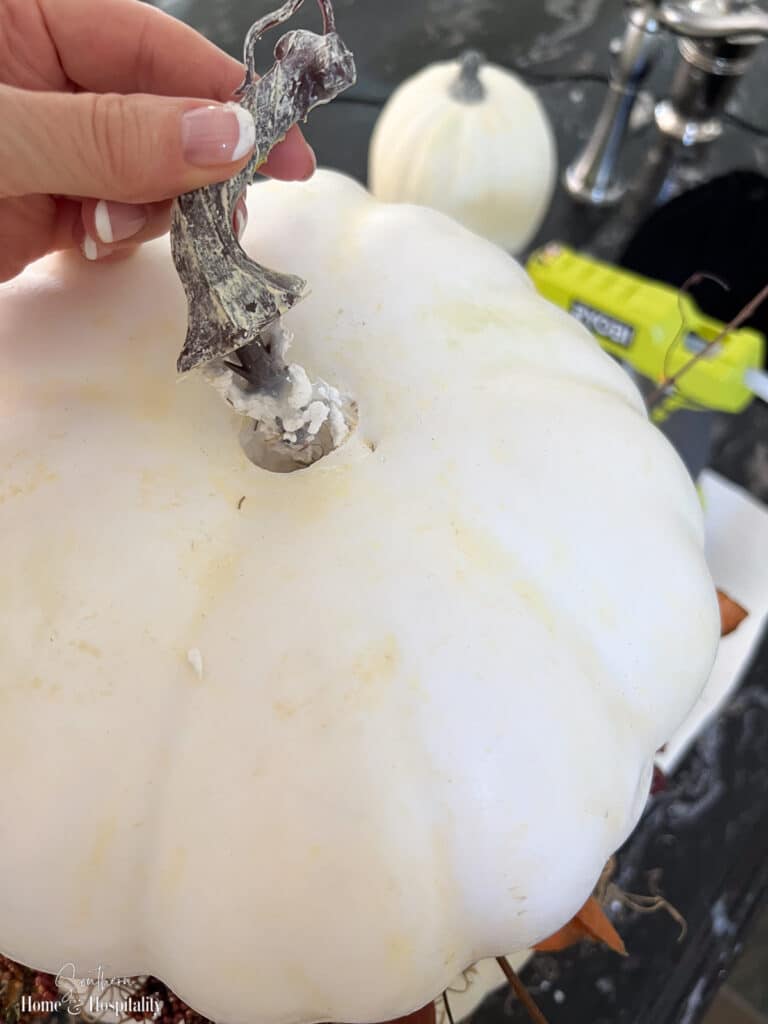
Then I hot glued a bit more moss over the top of the center pumpkin.
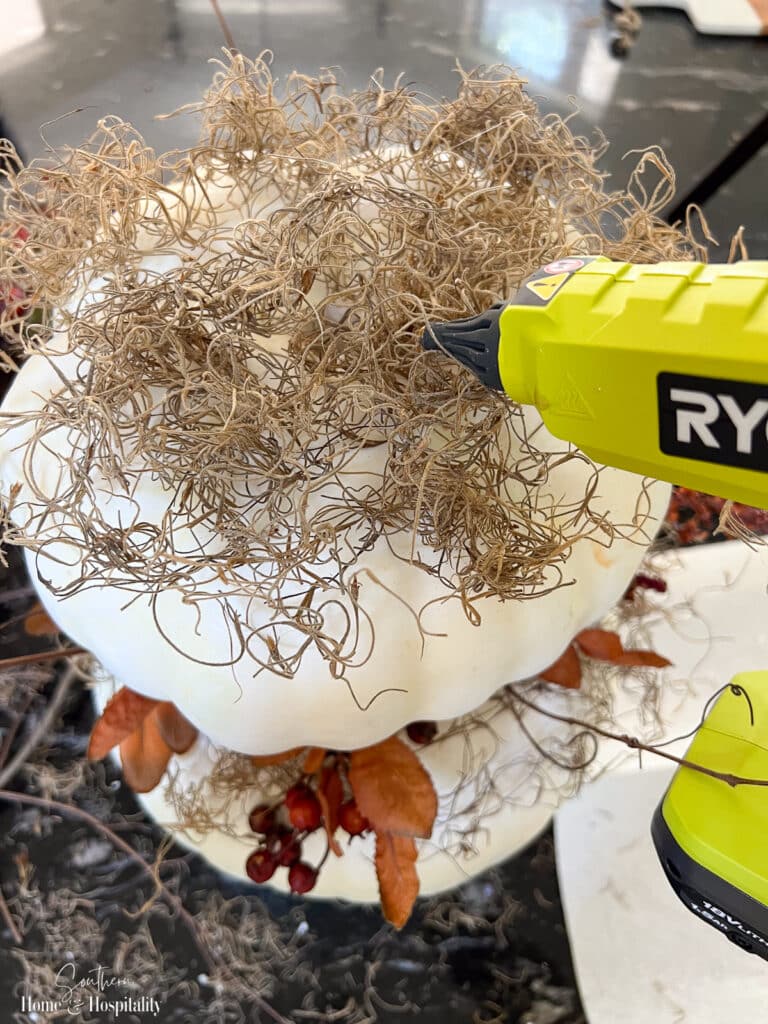
6. One of my favorite touches for faux pumpkins is to replace the fake stem for a real one. So I removed the top pumpkin’s stem, and hot glued on a real one I had saved from a past season.
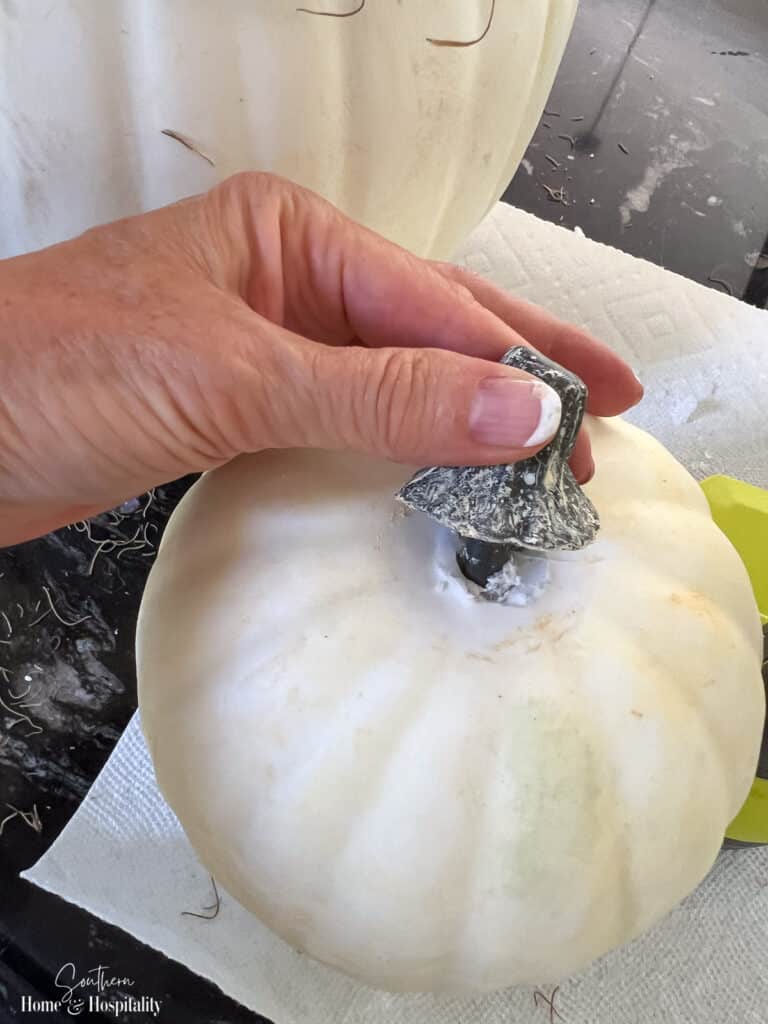
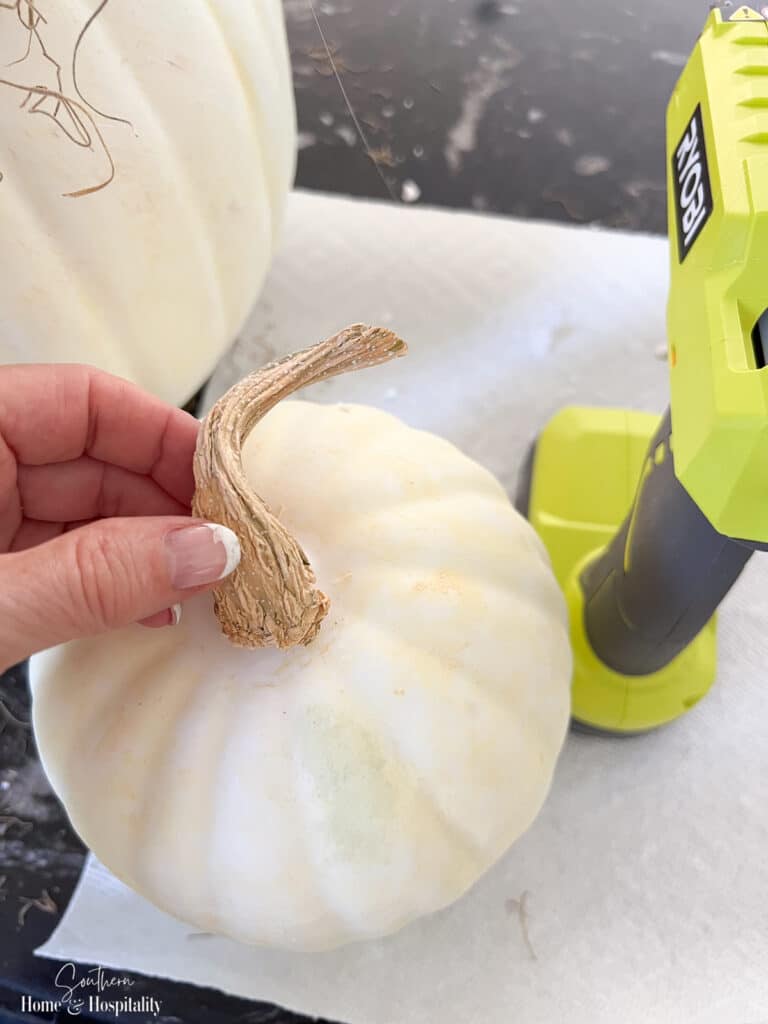
7. I swirled a stream of hot glue over the moss on the middle pumpkin, then pressed the top pumpkin over it.
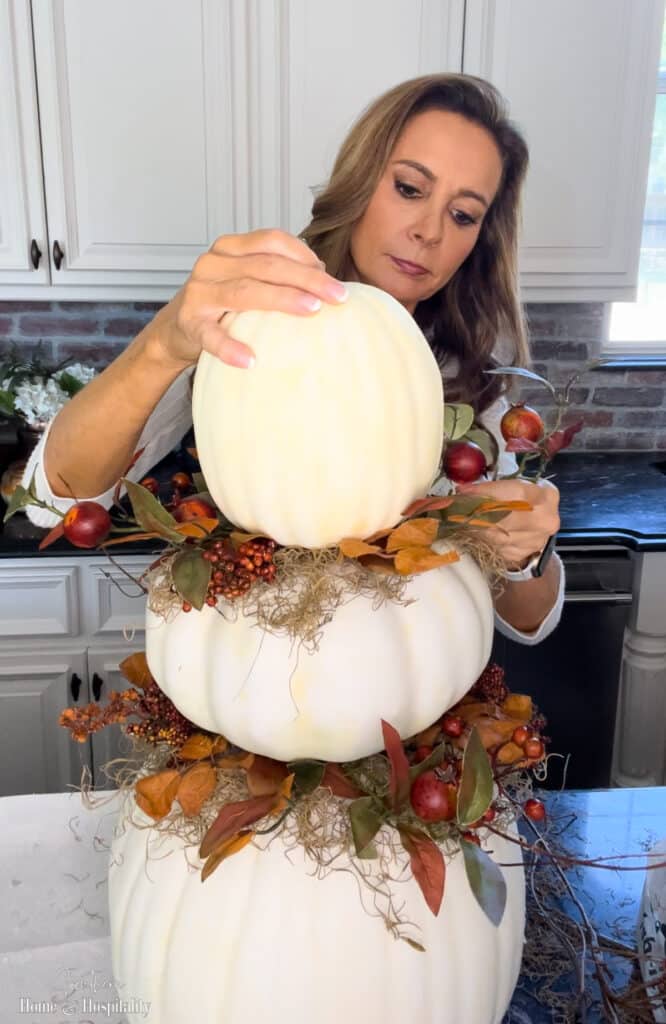
8. Then I added more leaves and berries between these two layers.
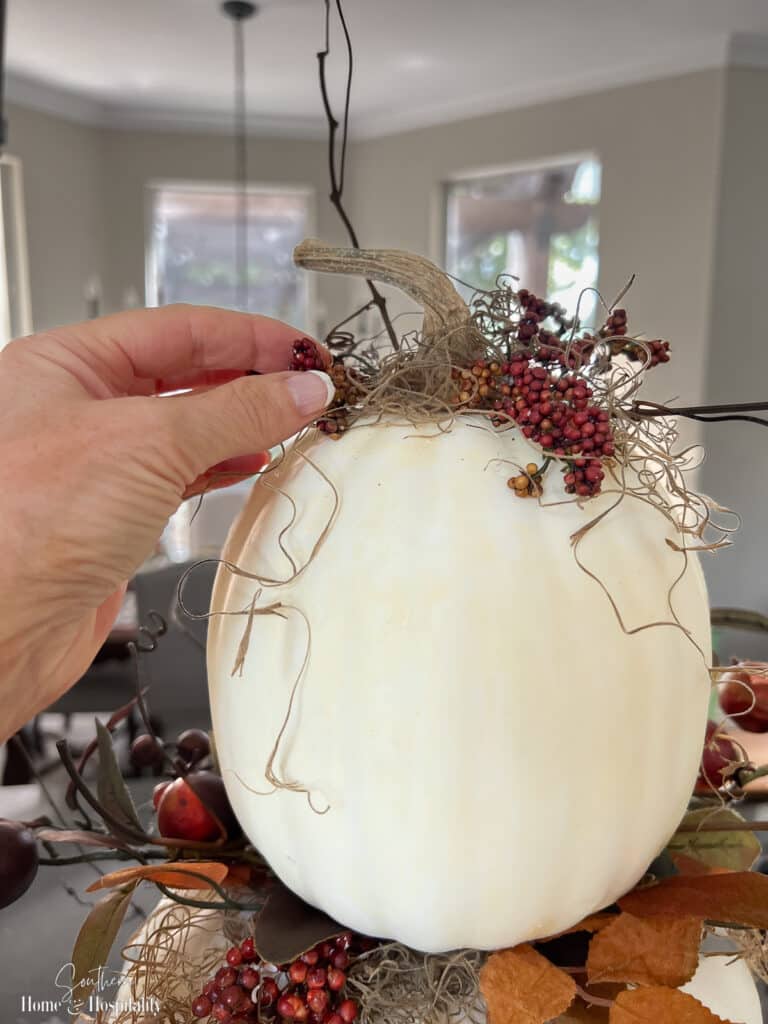
9. On top of the pumpkin, I hot glued a few more leaves and berries and a little more moss.
10. I wound bits of grapevine down and around the stack. And added a little on the top. You can probably cut enough out of grapevine wreaths or a grapevine garland you already have for the small amount this takes.
Now that the topiary itself was finished, it was time to “pot” it.
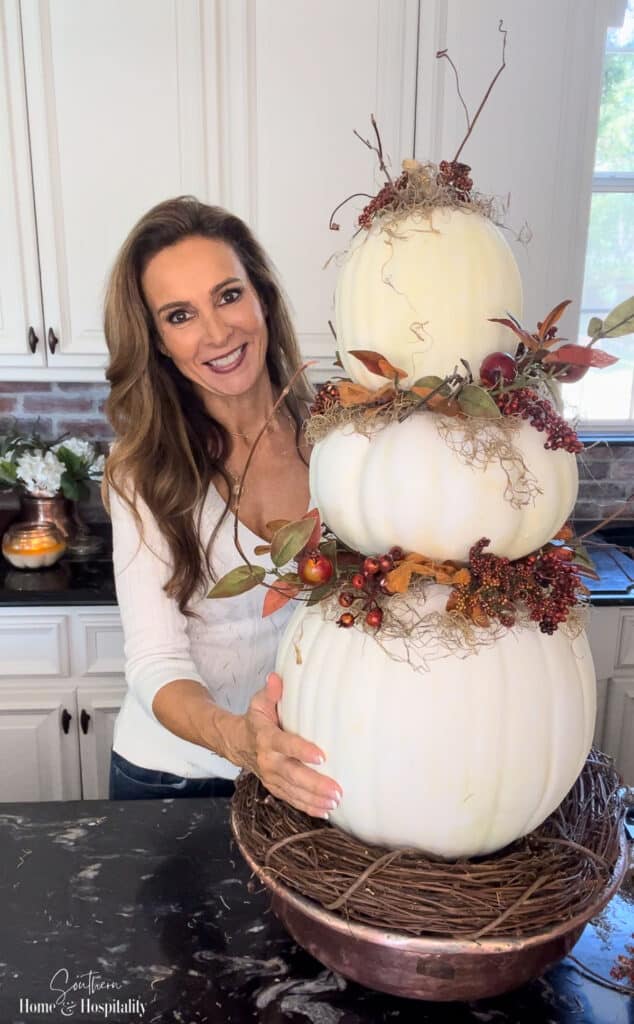
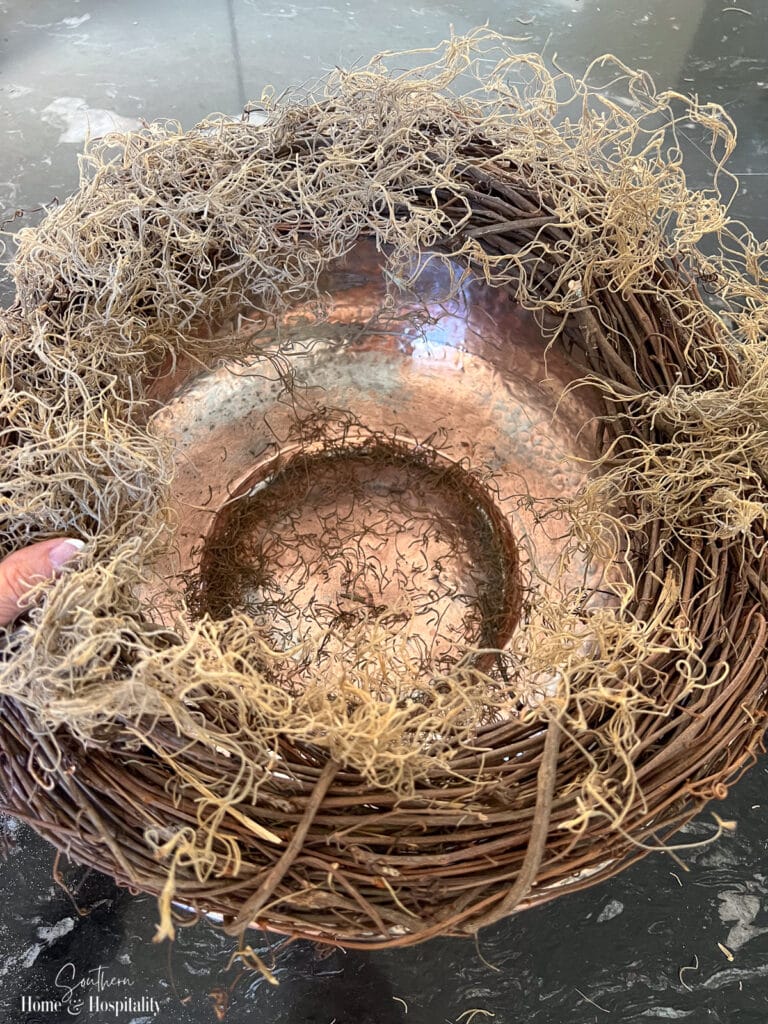
11. I placed a grapevine wreath onto a copper bowl to rest the stacked pumpkins on and added a little bit of Spanish moss.
12. I placed the pumpkin stack onto the grapevine wreath and added a few final touches with some extra fall leaves around the bottom to finish it off.
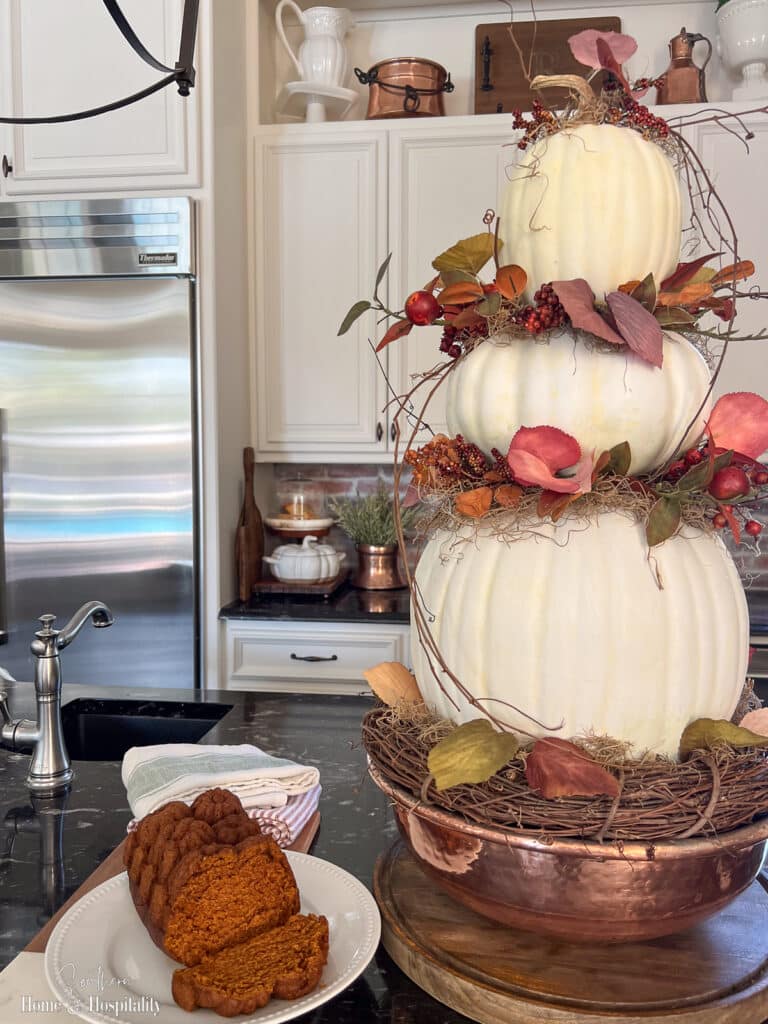
If you’d like to see the topiary as the star of this fall’s kitchen decor, check out my tour of the kitchen and family room in the post, “Cozy Fall Kitchen + Family Room Tour“.
More ideas for a Pumpkin Stack Topiary.
Just check Pinterest—there are so many creative ideas for this pumpkin stack!
- Pile up small pumpkins, gourds, and other fall items around the base
- Place it by the front door for a front porch decoration and paint your house number on as a fun way to display your address
- Use it as Halloween decor by painting the pumpkins with black chalk paint and have them spell out “BOO”
SH&H TIP
If you do use your pumpkin stack outside where it’s subject to wind, you might want to drive a wood dowel down the middle to secure it.
If you’d also like to check out my fall decor in the kitchen from last year, see the post, “24 Budget Friendly Ways to Cozy Up Your Home This Fall“.
If you use this easy craft or any of my fall posts to help you decorate your home, please share a photo and tag @southernhomeandhospitalityblog on Instagram so that we can all enjoy, and I can share your inspiration in my stories!
Happy Fall Crafting,

Before you go:
As always, I appreciate your visit, comments, and shares here on the blog! I’d love it if you also follow along with me on Pinterest, Instagram, and Facebook so you won’t miss any of my inspiration and ideas.
Don’t forget to sign up for updates to keep in touch.
If you’re not already a member of the SH&H family, I’d love to have you join me! You’ll not only get email updates, but you’ll have exclusive access to all the bonus materials in my free subscriber-only library, like this:
Pin it to remember it!
If you’ve enjoyed this post, please pin and share this on Pinterest:


Turned out great! You are one of the few bloggers I’ve seen do what I’ve done for several years…substitute a real pumpkin stem for the odd looking types that come on even some of the more expensive faux pumpkins. An outing to the closest pumpkin farm at the end of the season can bring in a free harvest of stems. I may make a small version of this for the shelf outside the door of my apartment. Thanks for the inspiration.
Thanks Teddee! I need to remember to get more real stems this season—that was my last one!!
Super cute!