DIY Ten Minute Summer Fern and Hydrangea Wreath
Inside: Welcome the summer season and guests with this DIY hydrangea wreath that just takes minutes to make and works on any style and color front door! ➡
I adore summer’s easy, relaxed mood.
I don’t want to spend a lot of time decorating this time of year, but I do want to bring a summer state of mind to my home. The front door sets the tone. So it needs a look befitting all that summer entails – the mood is light and loose, and lush gardens are at their peak.
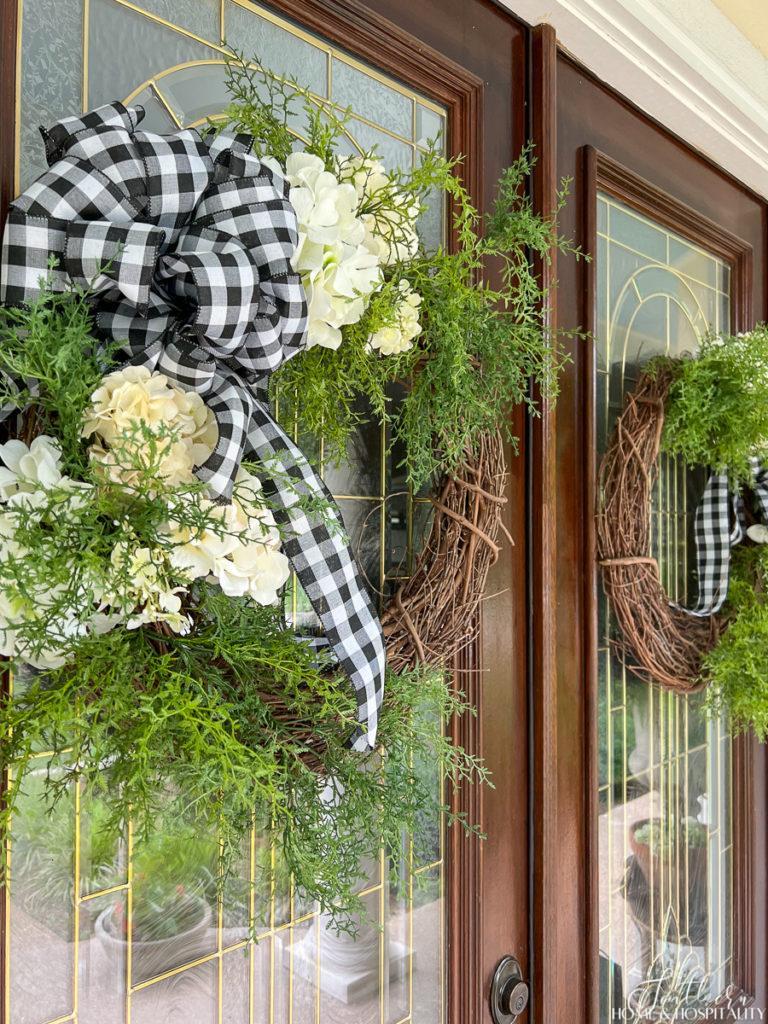
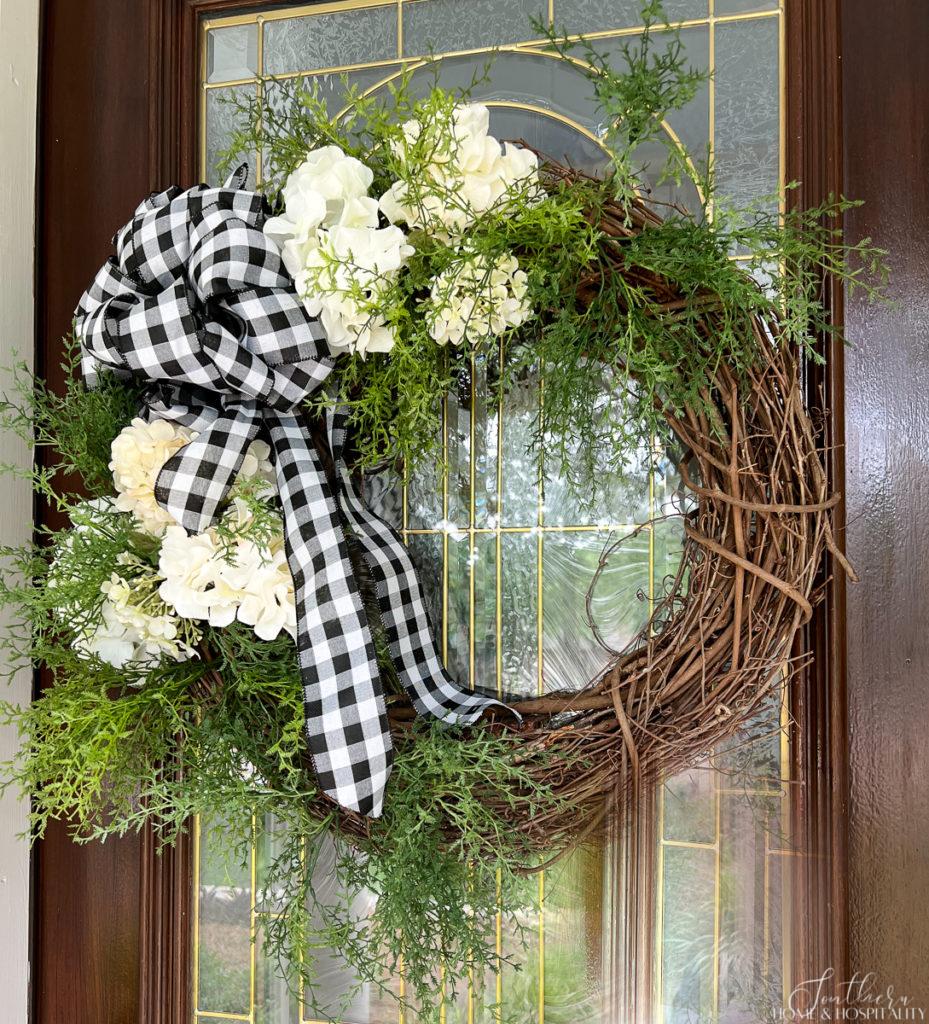
And this wreath of creamy white hydrangea blossoms and airy asparagus fern is a perfect way to bring summer to the front porch!
And even better? The method for making this DIY summer wreath was ridiculously easy and fast.
This post contains Amazon and other affiliate links for your convenience. As an Amazon Associate I earn from qualifying purchases. If you purchase something through any link, I may receive a small commission, at no extra charge to you. I only recommend products that I love or would purchase for myself. See my full disclosure here.
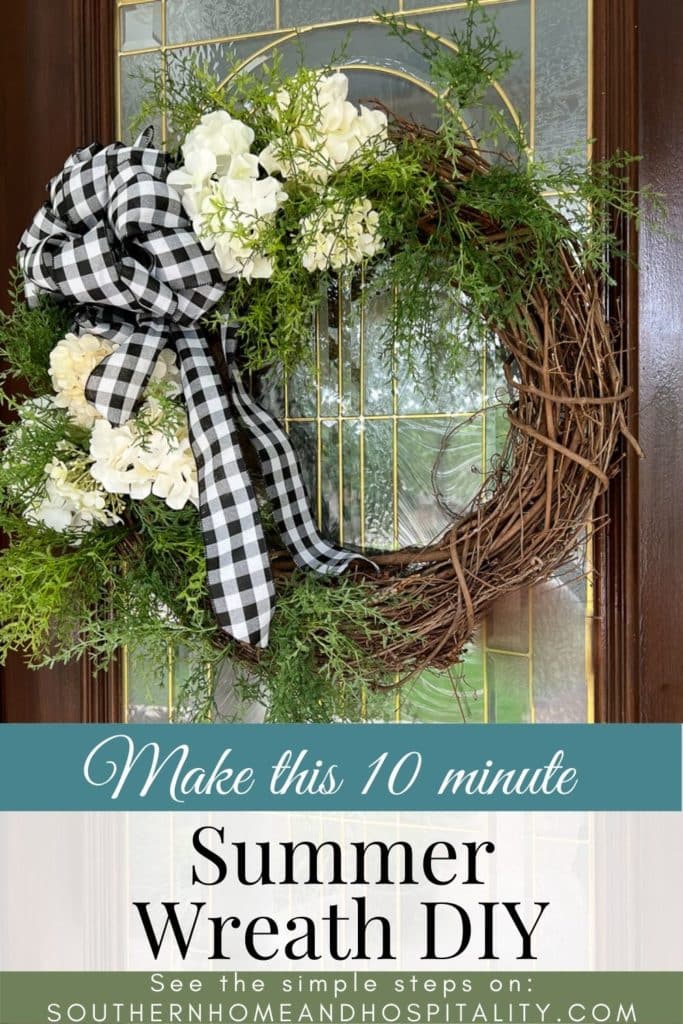
Summer hydrangea and fern wreath supplies.
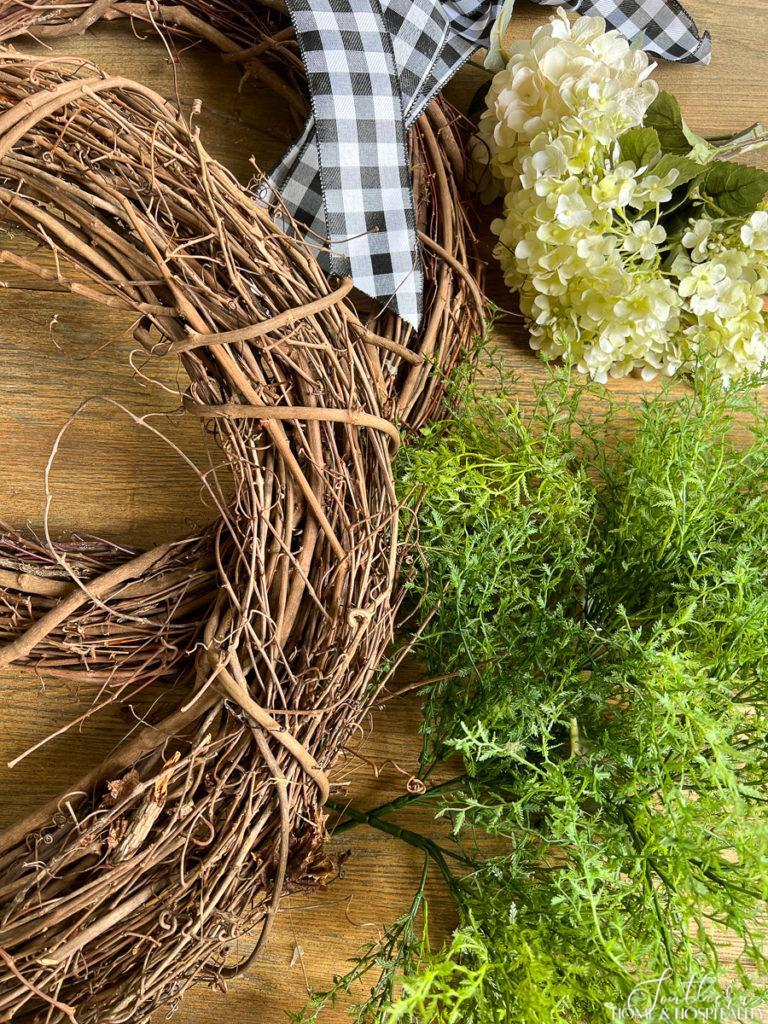
- A grapevine wreath. Choose a size that works best for your door (mine are 24 inches)
- Airy fern or asparagus fern-like greenery. I used the dill bush in the link from Hobby Lobby for this airy fern look. Other good options for wispy, small fern fronds are these and these.
- Large white/cream artificial hydrangea flowers. I used six blooms from what I already had but these are my favorite real touch faux hydrangea blooms.
- Smaller white bloom stems. I used four from my stash had but here is a similar option.
- Ribbon for bow. I chose this black and white wired gingham ribbon.
- Floral wire or zip ties to attach the bow.
How to assemble this DIY hydrangea wreath.
1. Cut the faux flowers. First, I cut the number of blossoms I thought I would use from the floral bushes with wire cutters. I left enough of the hydrangea stems to securely stick into the grapevine without having to use glue.

2. Make the bow. Next, I made a bow by wrapping the ribbon around making a loop and tying it off with another streamer of ribbon.
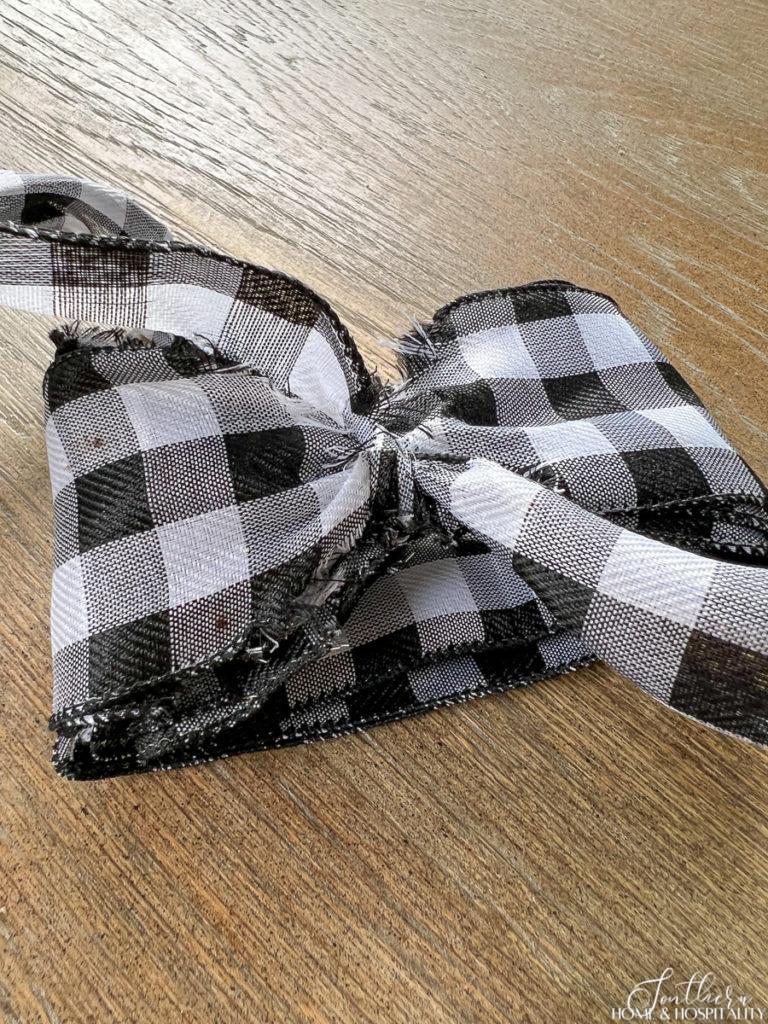

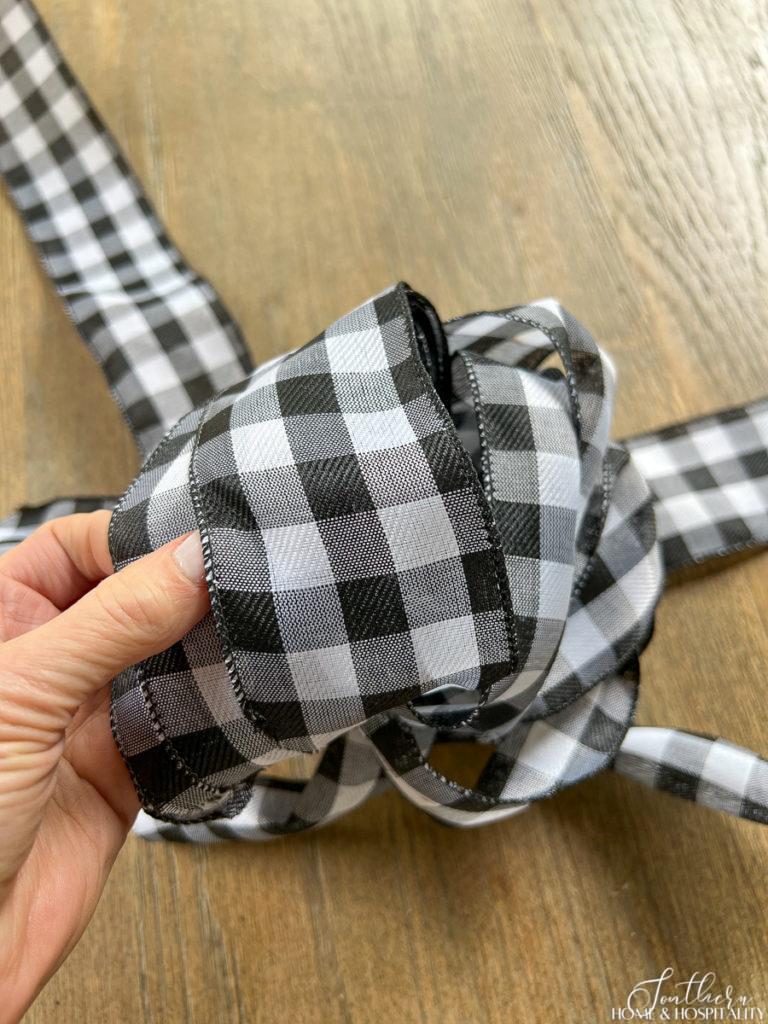
I wanted a full bow, so I looped the ribbon a few times. Then I made a notch on each side of the middle by cutting a small “v” so I would be able to spread out and fluff all of the loops. I also tied on a long streamer with the same tying ribbon. Then I pulled apart and spread the loops.
If you want a simpler bow with five or less loops on each side, use this bow method: Loop two-sided ribbon back and forth in a stack, then pinch and tie it in the middle with no notching.
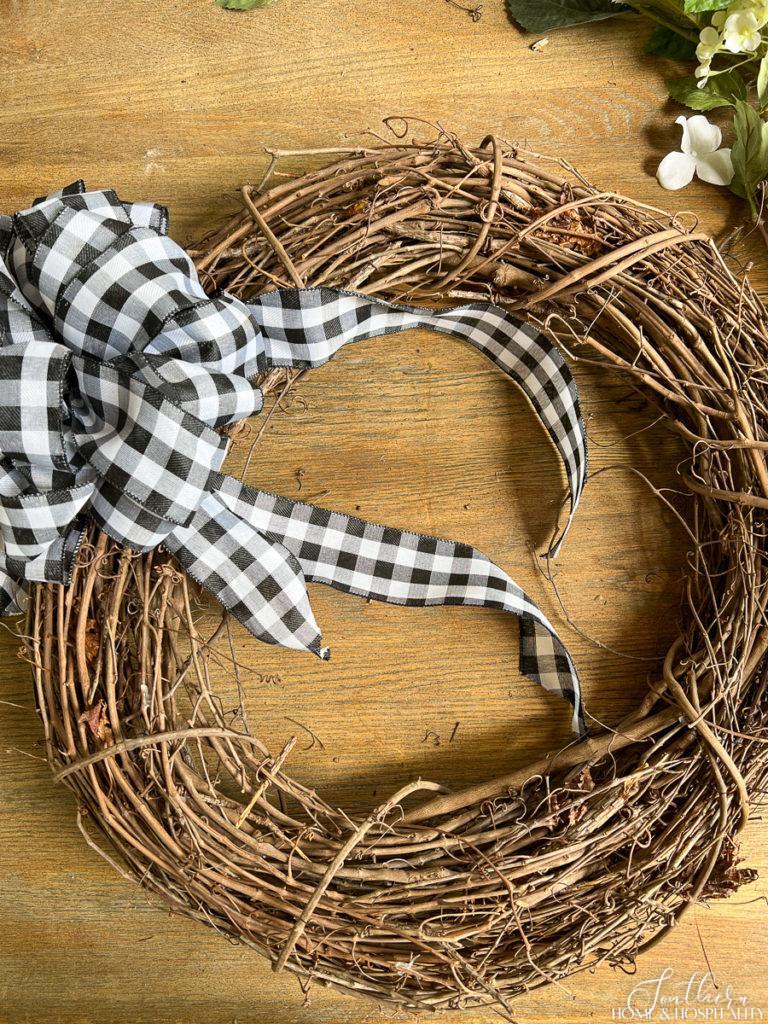
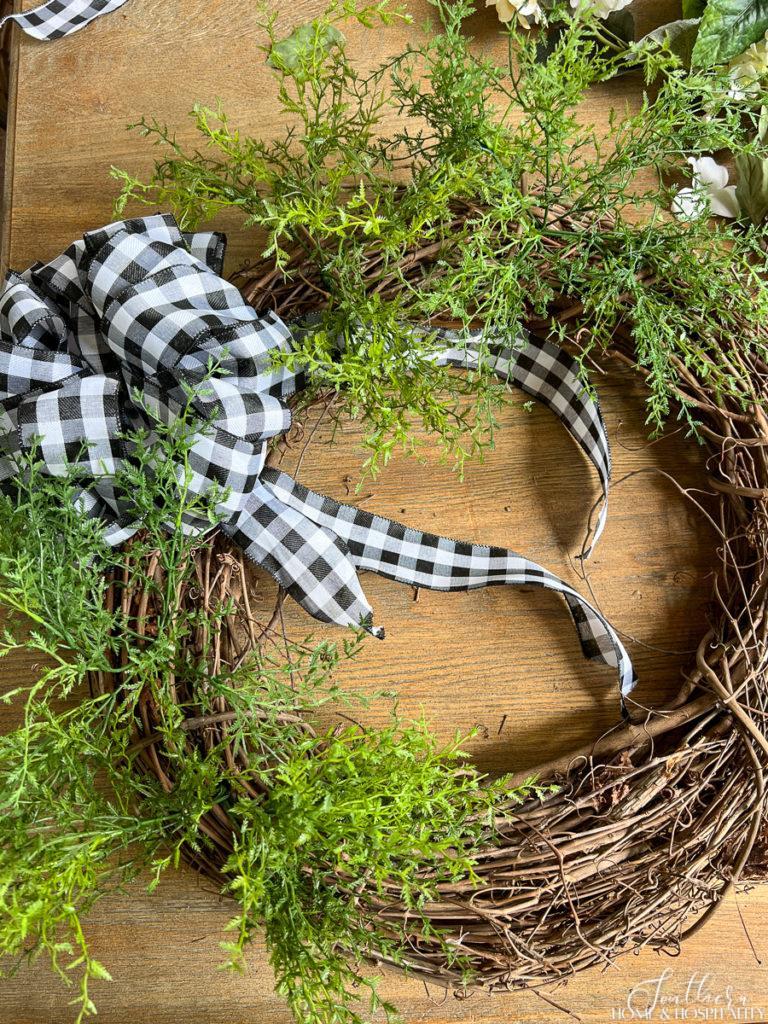
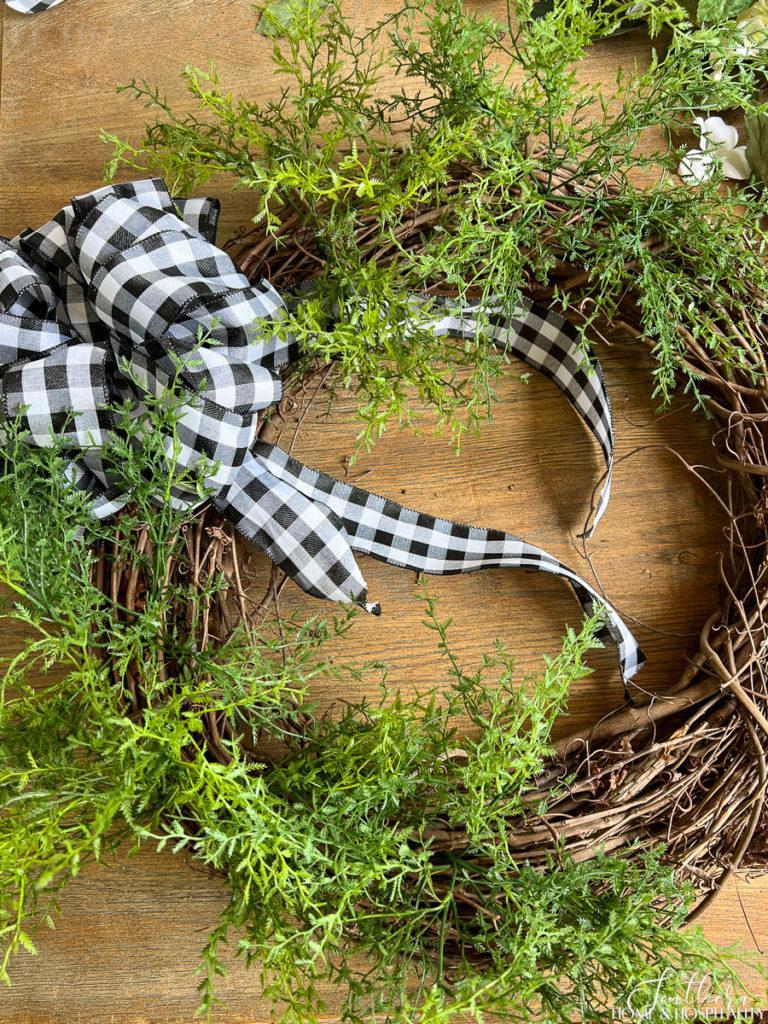
3. Attach the bow. I started on the wreath by placing the bow first as my anchor point and then filled in around it. Since I planned to cover about 2/3 of the wreath and leave 1/3 of the grapevine showing, I attached the bow with a piece of wire at about 10 o’clock on the wreath.
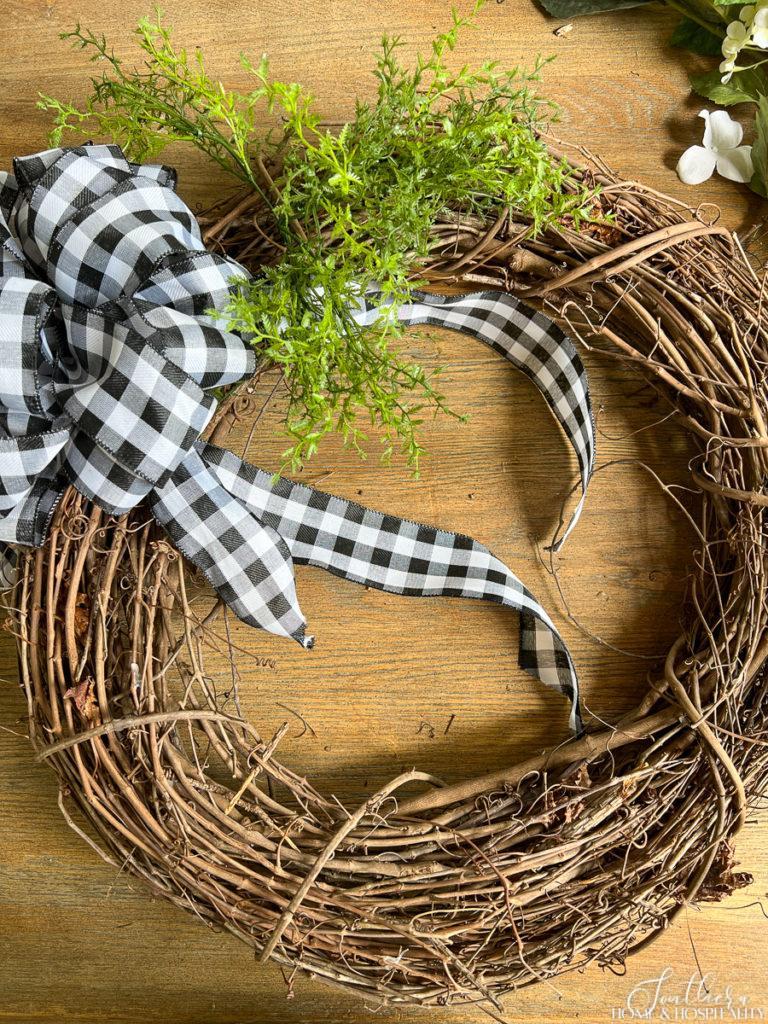
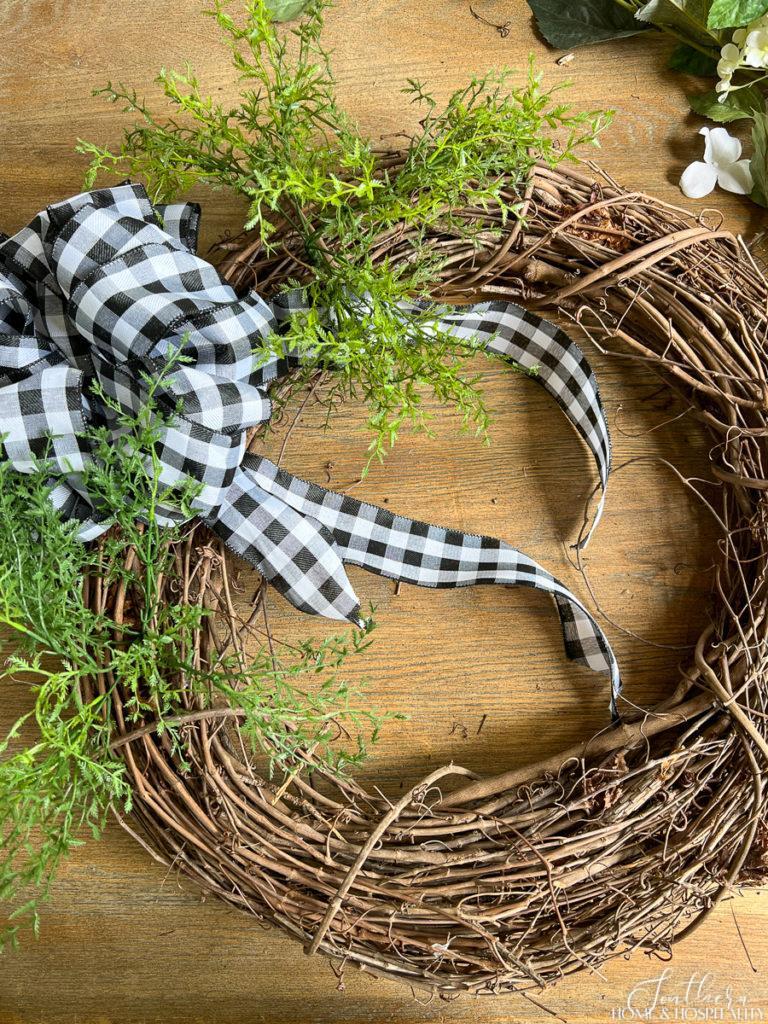
4. Add the fern greenery. I added the first greenery pick next to the bow. For these particular picks, I inserted them almost straight in to give the most dimension coming out of the wreath. I followed with the rest of the greenery until I had covered all but about a third of the wreath.
5. Insert the hydrangeas. Next, I placed a few of the larger faux hydrangeas around the bow:
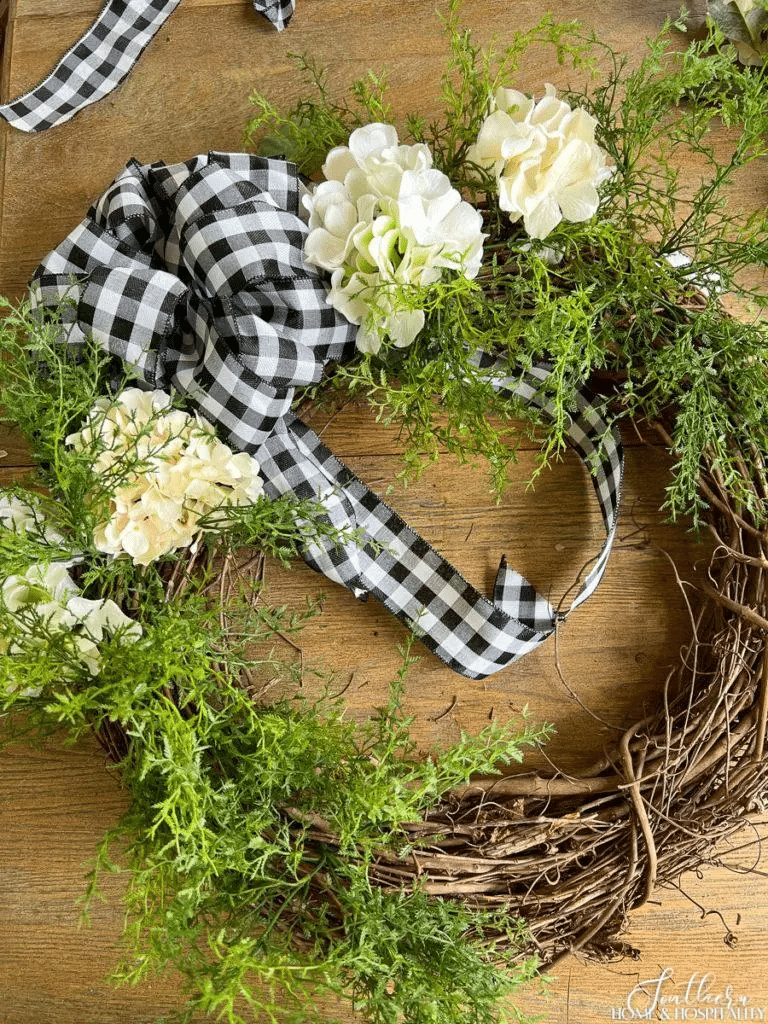
And I filled in with a few smaller blooms:
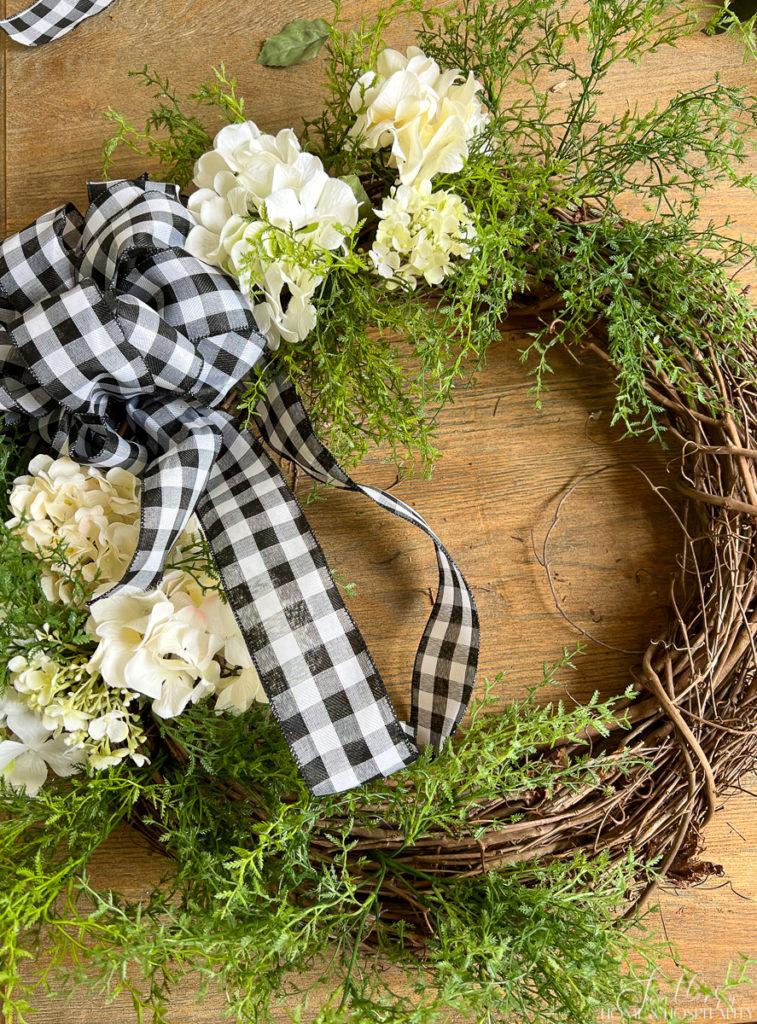
6. Final fluffing. I finished fluffing and arranging after I hung it on the door, when I was able to see how everything would fall into place.
This easy summer wreath is the perfect way to welcome summer! Here it is in all its summer freshness:

Other ideas for making a simple hydrangea wreath.
- Part of the beauty of using a grapevine wreath base is being able to remove everything. It’s an easy way to make a whole new look each season, using the same wreaths! But for a more permanent design that will last a long time, secure everything in place with a hot glue gun.
- For a pop of color with these same white and green florals and black and white ribbon, I can add a few faux lemons.
See how I decorated with lemons for summer in the post, “10 Simple Decorating Ideas for Summer with Blue and Yellow“.
- Hydrangeas may be my favorite flower, but you can make a beautiful wreath with any summer flowers. Keep an eye out for bargains at your local craft store or dollar store on faux flowers in different colors to experiment with your own wreath design.
- I chose to not cover the whole wreath, but go for it and make your entire wreath burst with summer florals and greenery!
For more summer wreath ideas, see the post, “Easy DIY Floral Monogram Wreath“.
I have double front doors so it’s always double the time and money to decorate them. That’s why you’ll only see me create wreaths that are quick, easy, and inexpensive to make.
I’m not sure if the best part of this easy DIY summer wreath is that it’s reusable, or that it only takes minutes to put a pretty wreath together!

Before you go:
As always, I appreciate your visit, comments, and shares here on the blog! I’d love it if you also follow along with me on Pinterest, Instagram, and Facebook so you won’t miss any of my inspiration and ideas.
Don’t forget to sign up for updates to keep in touch.
If you’re not already a member of the SH&H family, I’d love to have you join me! You’ll not only get email updates, but you’ll have exclusive access to all the bonus materials in my free subscriber-only library, like this:
Pin it to remember it!
If you’ve enjoyed this post, please pin and share this on Pinterest:
Ooh, this is lovely and so easy, too.
I just found tour blog and want to make this lovely wreath. When I clicked on the black and white ribbon link, a different source came upfor asparagus fern. Can you tell me where you found the ribbon? Thank you. I am enjoying your blog as I am from MS.
Thank you!
Whoops! I didn’t realize the wrong link was there so thank you for pointing it out!! It’s fixed now. I’ve put an Amazon option there but I bought my ribbon a few years ago at either Hobby Lobby or Michaels. I’m so glad you are enjoying the blog and I hope you continue to come back. Let me know how the wreath comes out!