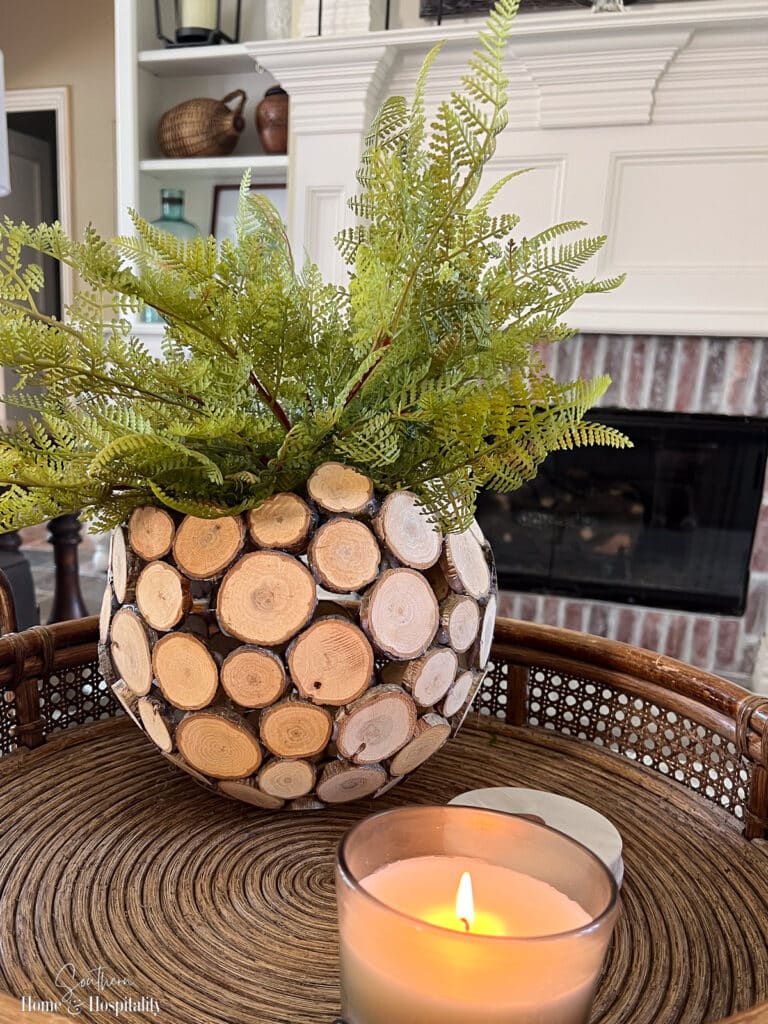
How to Make a Rustic Wood Slice Vase with a Balloon
Inside: Looking for a creative way to use craft wood slices? Try this cute DIY vase idea with step by step instructions for the perfect organic home decor accessory!
Ever get caught up in watching cool DIY projects done in a flash on TikTok?
Well just in case you missed this one, or you don’t do TikTok, I just had to try out this wood slice vase for both of us.
It’s so rustic. So unique. And so cute.
And the TikTok grabby hook? You make it around a balloon.🎈
I was a little skeptical about how easy it looked. About if it would actually collapse into a pile of pieces when the balloon was popped. And if the balloon would even survive with all the hot glue going on.
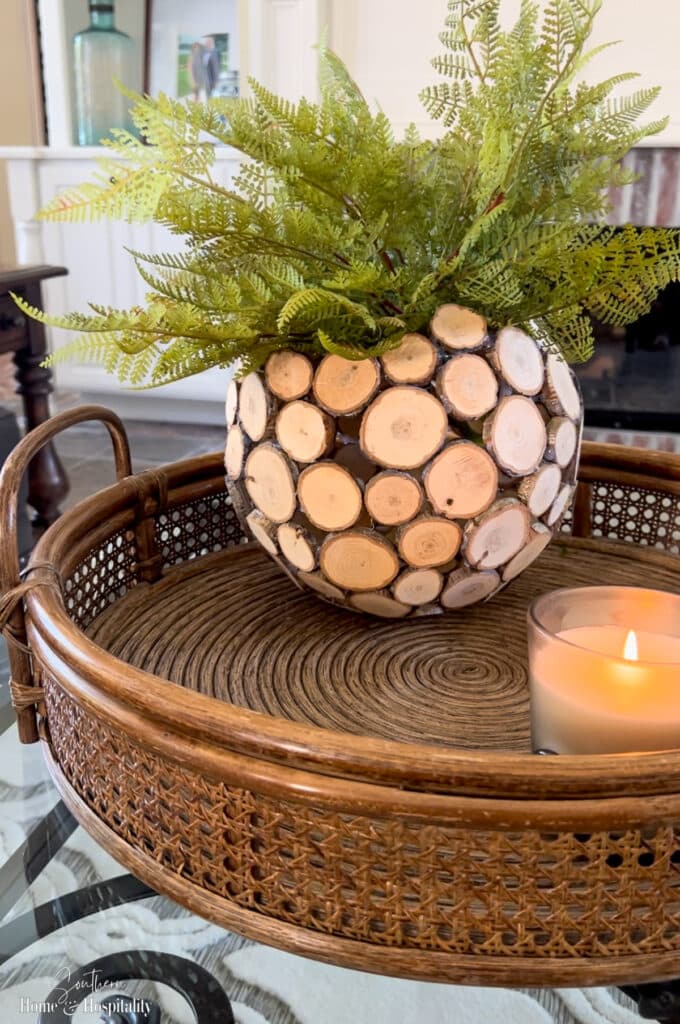
But this could be the perfect vase for any style, or time of year to add an organic touch. And I could just picture these wooden vases as a pretty centerpiece with seasonal blooms, especially for fall and winter.
Was it a success, or a Pinterest fail? I’ll give you to real low down on this cute craft.
This post contains Amazon and other affiliate links for your convenience. As an Amazon Associate I earn from qualifying purchases. If you purchase something through any link, I may receive a small commission, at no extra charge to you. I only recommend products that I love or would purchase for myself. See my full disclosure here.
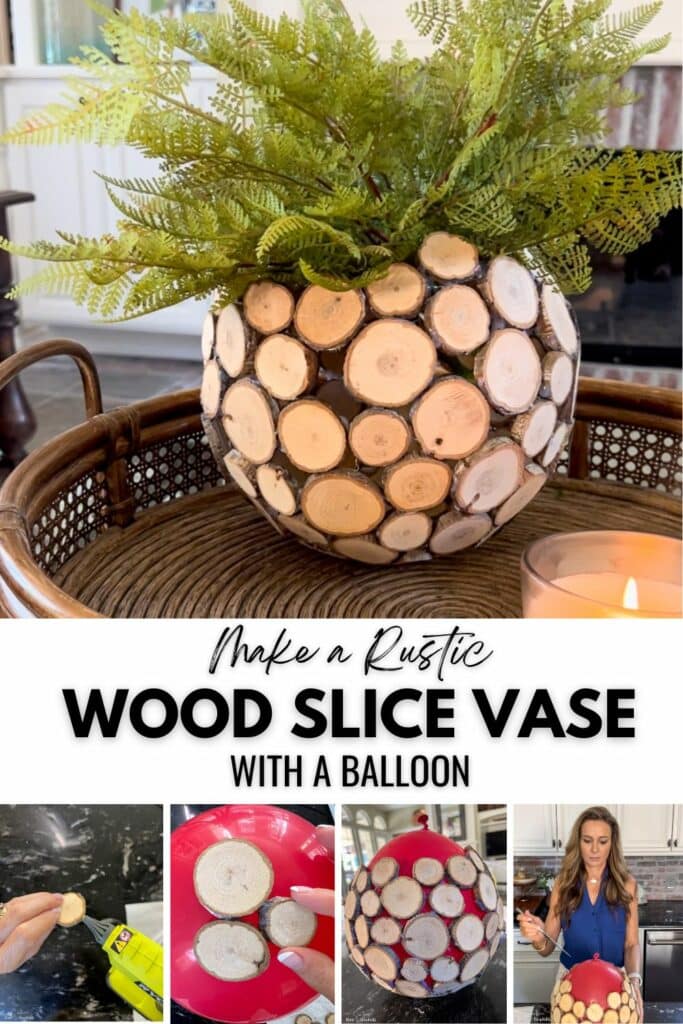
What you need to make a wood slice vase.
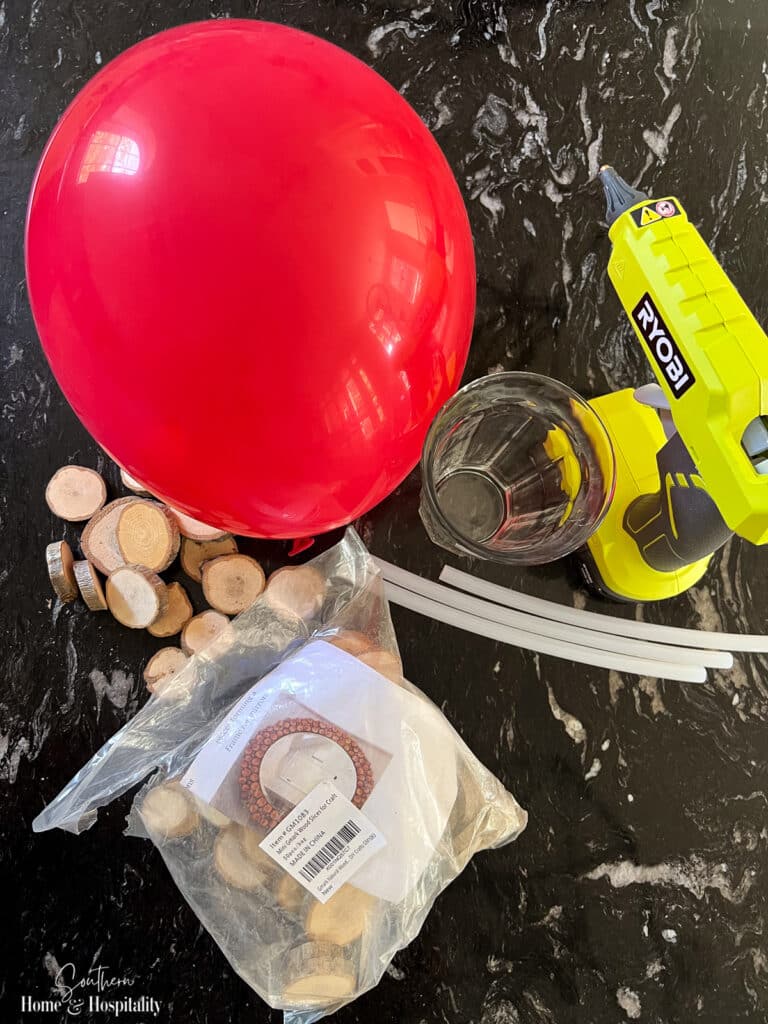
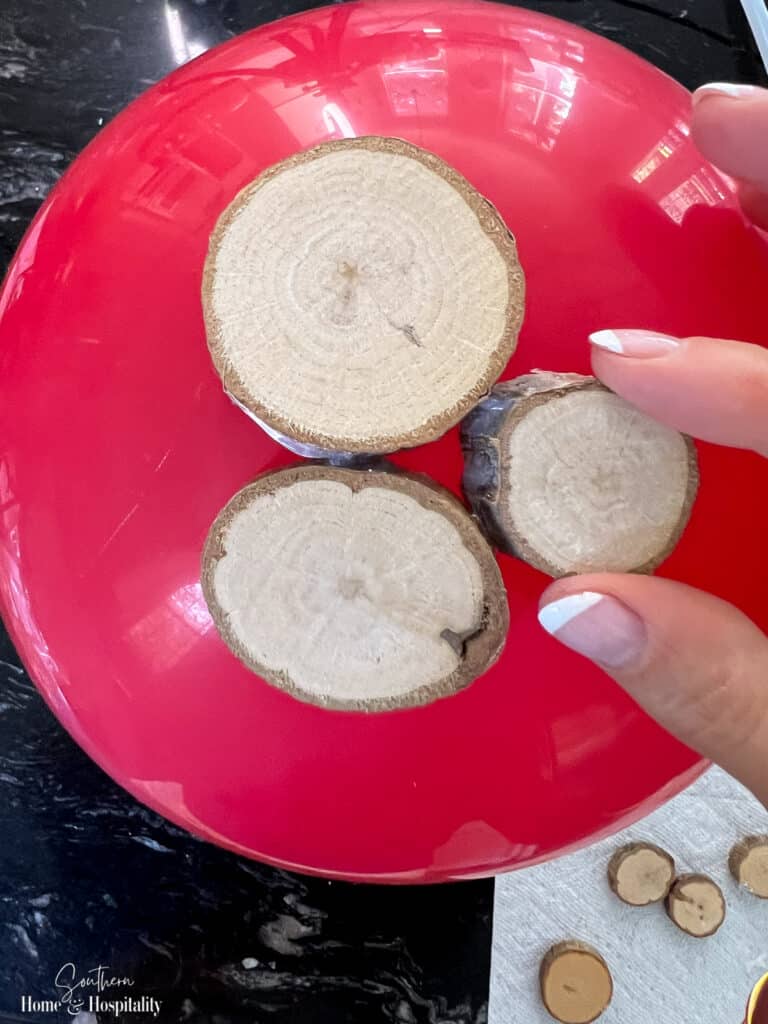
- Small wood slice rounds (I used two bags)
- Hot glue gun (I love my Ryobi cordless glue gun)
- Balloon
- Glass or bowl to make a sturdy base for the balloon
How to make a wood slice vase with a balloon.
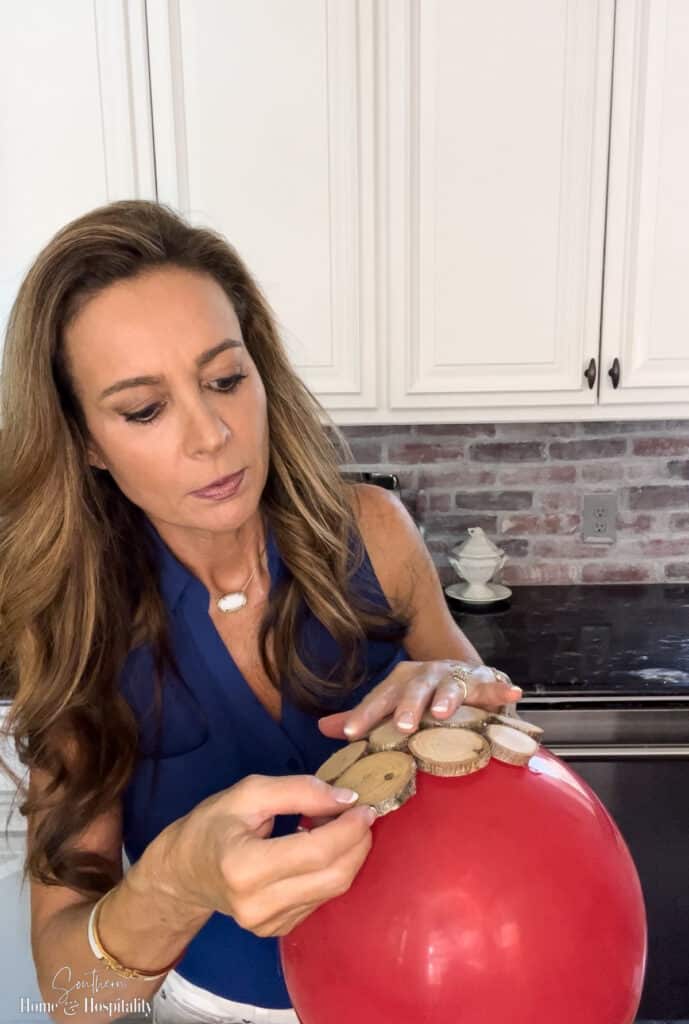
1. Blow up the balloon and set it on a glass or bowl, tied side down. Hold it in place with some glue dots or scotch tape or masking tape loop if desired.
SH&H Tip: Keep the balloon size small for a more stable finished product. In hindsight, I wish I had gone smaller.
2. Lay the first wood piece on the balloon.
3. Next apply hot glue to a section of the side of the next piece you’ll be attaching.

My main concern was getting hot glue on the balloon, which would pop it. So to help avoid this, I let the glue cool for a couple of seconds before attaching the wood slice just in case it wanted to drip.
4. Hold the piece with the glue against the first piece until it’s secure. I estimate it took 15-20 seconds for most of my slices of wood. I held it up away from the balloon while the glue cooled, and then gently pushed the piece down around the curve of the balloon while it was still malleable, but set.
5. Repeat over and over again with wood slices until they start to curve around the bottom of the balloon.
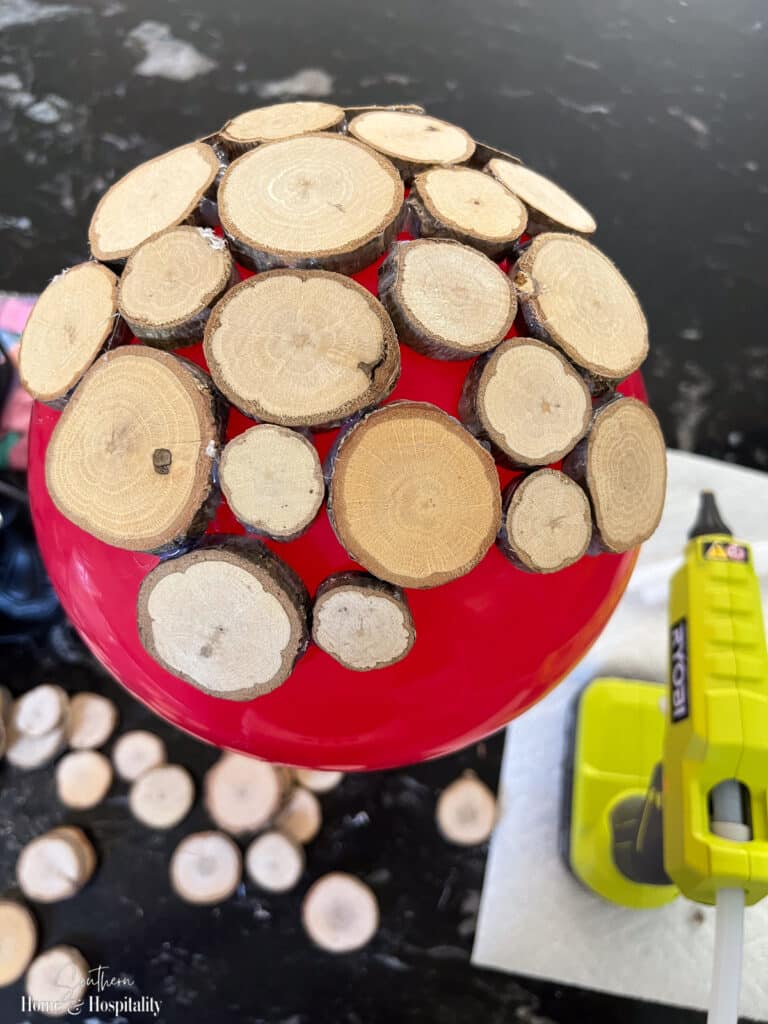
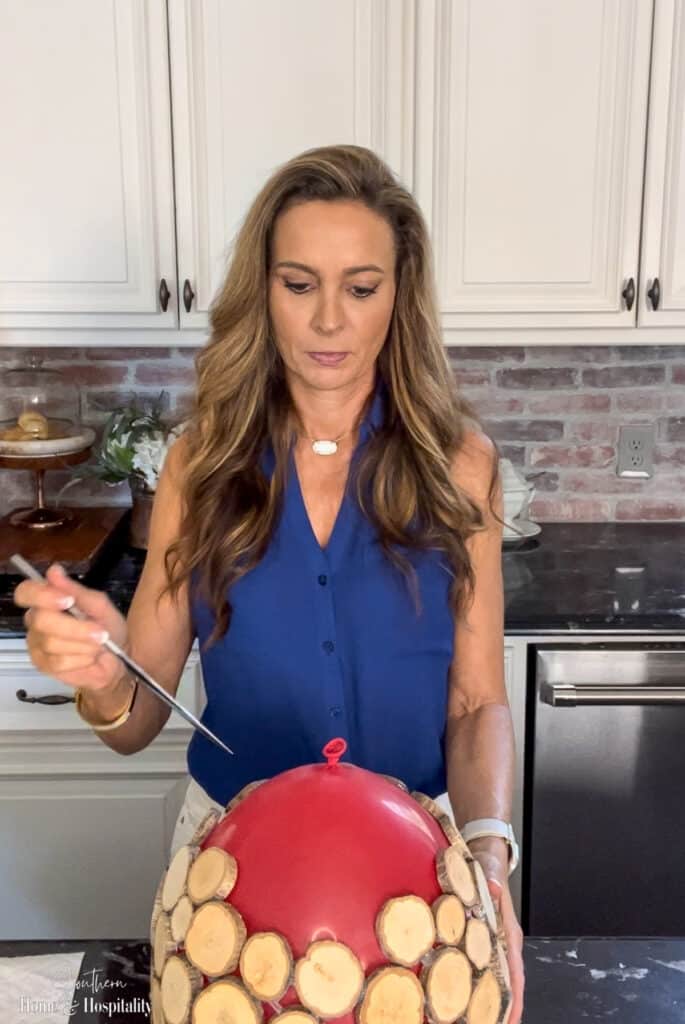
6. Then remove the balloon from the cup or bowl, flip it over, and set it on its bottom. Add pieces around the top edge of the wood slices until you’ve reached the desired height, and things are pretty even.
I didn’t make the top perfect and I could have used a few more small rounds to fill in. But I think it’s okay because the look is organic!
7. Next, pop the balloon and remove the pieces.
If there are any balloon fragments in the glue, carefully peel them away (I had a couple).
8. Repair sections as needed.
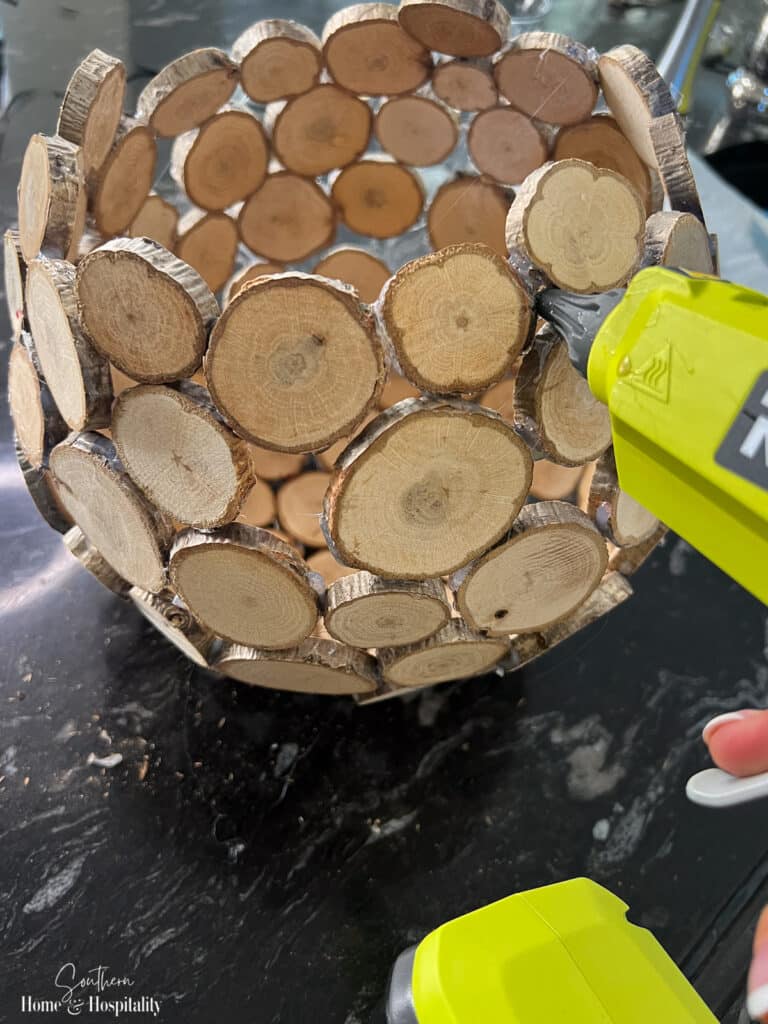
The balloon pop was the telling moment of success or failure.
This is where reality in crafting comes in.😂 I had a section of the top cave in after I removed the support of the balloon. I could also see at this point that some pieces didn’t hold together. So I went back and added glue as best I could.
You can see my own wood slice vase video on TikTok, Instagram. and YouTube. (And you can do me a big favor and follow me while you’re there.)
The result of this “tried it from TikTok?
My experience with this craft?
- You can see a lot of the hot glue. But I only notice it if I study the vase close up.
- You have to be careful with the finished vase. Because of the size I did, mine is quite delicate. After a few days, I had even more pieces come apart and had to add even more hot glue.
- While it doesn’t require any expert level crafting skills, it takes a bit of time and patience (I think this took a couple of hours). And it’s a little maddening when the slices keep coming apart.
- I later sadly learned this vase needs to stay in a cool location. I made the mistake of moving it in front of a warm window on a 100+ degree day, which made the glue soften.
- Hot glue is hot. Because I’m not careful enough, I got a couple of hot glue burns on my fingers.
Even with all the cons, I still think this craft is still really cute. So do I still recommend trying it? Yes. But—learn from my experience. Go with a smaller balloon. Or maybe make it easier on yourself, and glue the wood slices to a clear glass vase instead.
And maybe wear some gloves. You’re welcome. 😘
For another cute rustic vase DIY, see the post, “How to Make a Rustic Twig Vase: Boutique Style for Under $10“.

Before you go:
As always, I appreciate your visit, comments, and shares here on the blog! I’d love it if you also follow along with me on Pinterest, Instagram, and Facebook so you won’t miss any of my inspiration and ideas.
Don’t forget to sign up for updates to keep in touch.
If you’re not already a member of the SH&H family, I’d love to have you join me! You’ll not only get email updates, but you’ll have exclusive access to all the bonus materials in my free subscriber-only library, like this:
Pin it to remember it!
If you’ve enjoyed this post, please pin and share this on Pinterest:
This is such a great idea. I love it.