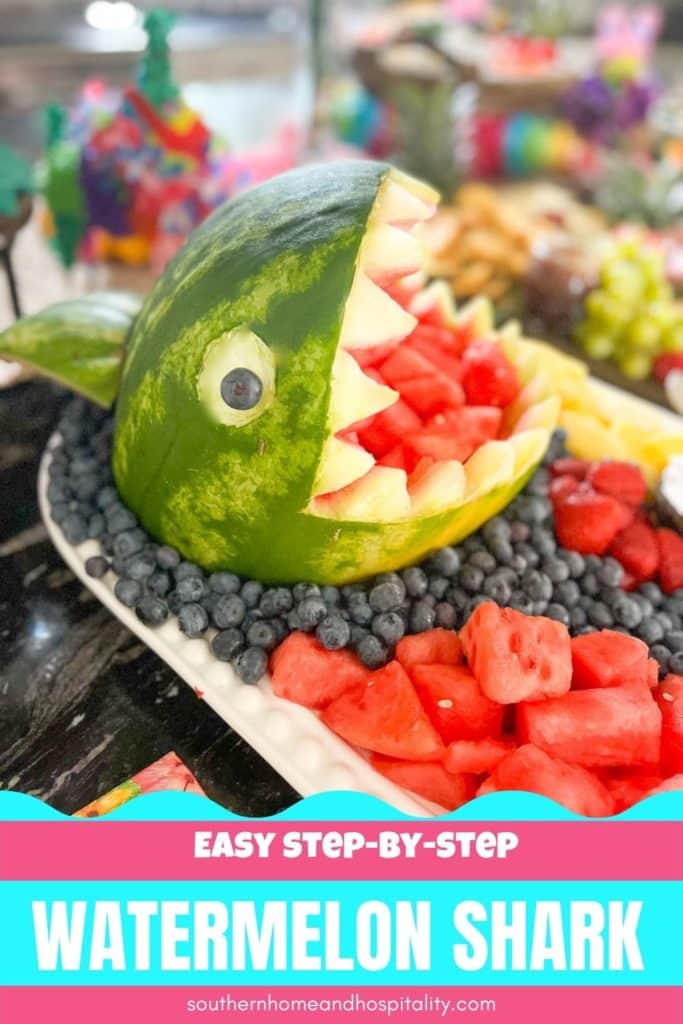
How to Make a Watermelon Shark (Easy Step-by-Step Instructions)
Inside: Easy tutorial for how to carve a fun watermelon shark for a killer fruit platter at your next party, plus creative ideas for using it! ➡
What delights guests more than a sticky, sweet, juicy slice of watermelon in the summertime?
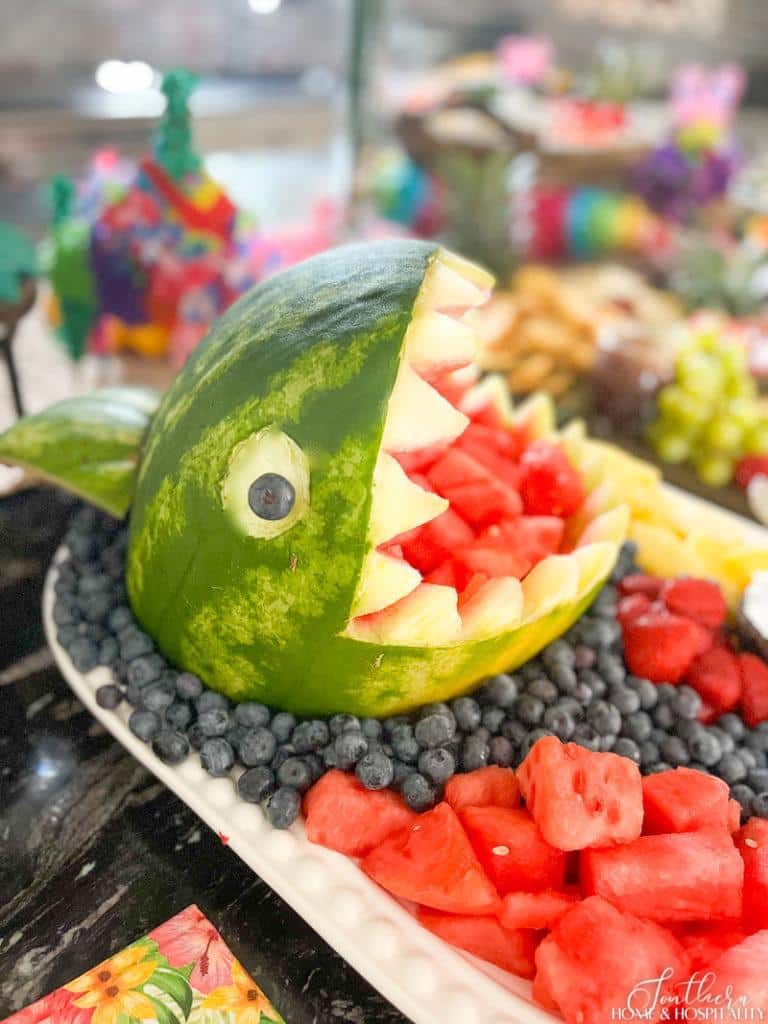
Serving it in the mouth of a shark of course!
But this fun DIY needn’t be scary to make (cue the music from “Jaws”…)
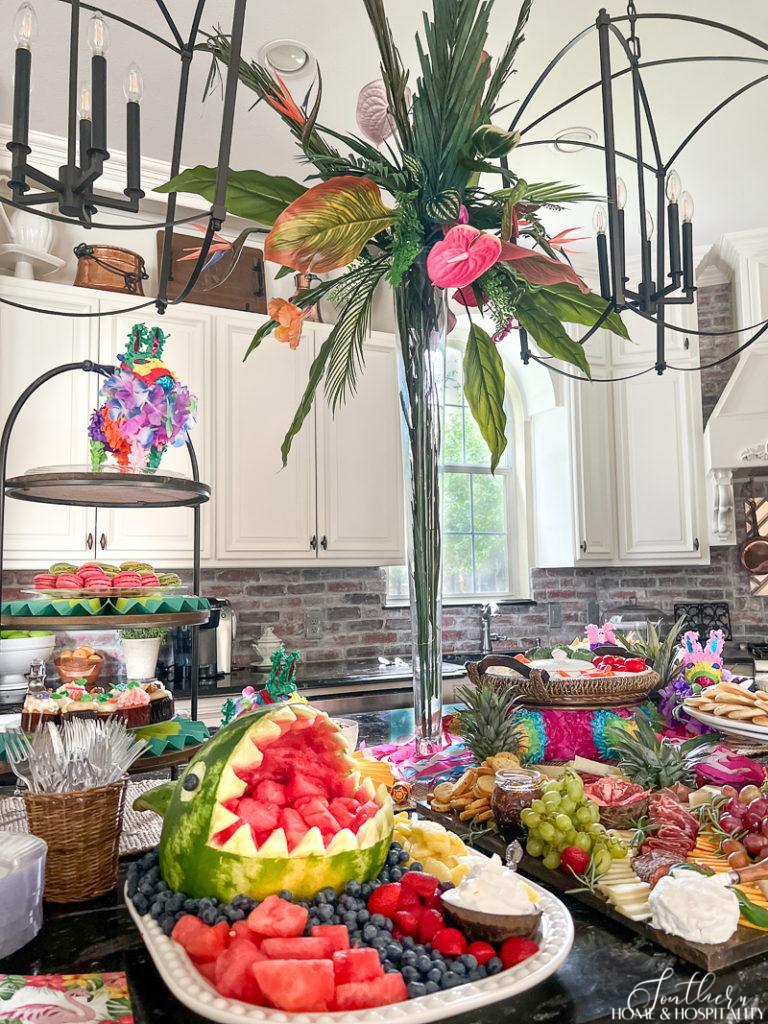
It’s really quite simple and turns that boring fruit platter into a “FIN-tastic” display!🦈
This post contains Amazon and other affiliate links for your convenience. As an Amazon Associate I earn from qualifying purchases. If you purchase something through any link, I may receive a small commission, at no extra charge to you. I only recommend products that I love or would purchase for myself. See my full disclosure here.
Materials to carve a watermelon shark.
- A seedless watermelon
- 2 blueberries, black olives, or black grapes for eyes
- 3 toothpicks
- Large knife
- Small paring knife
- Dry erase marker
Optional:
How to cut a watermelon shark step by step.
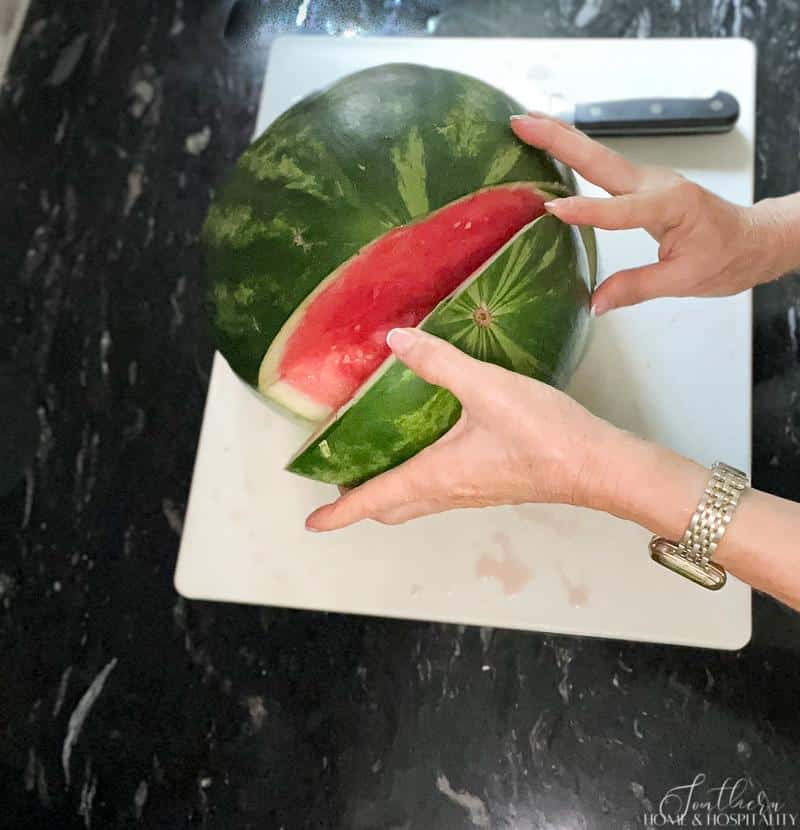
Step 1: Prepare the watermelon.
Wash and examine the watermelon to choose which end will be the best looking for the top of the shark. You’ll want the larger side with the most even shape and as few blemishes as possible.
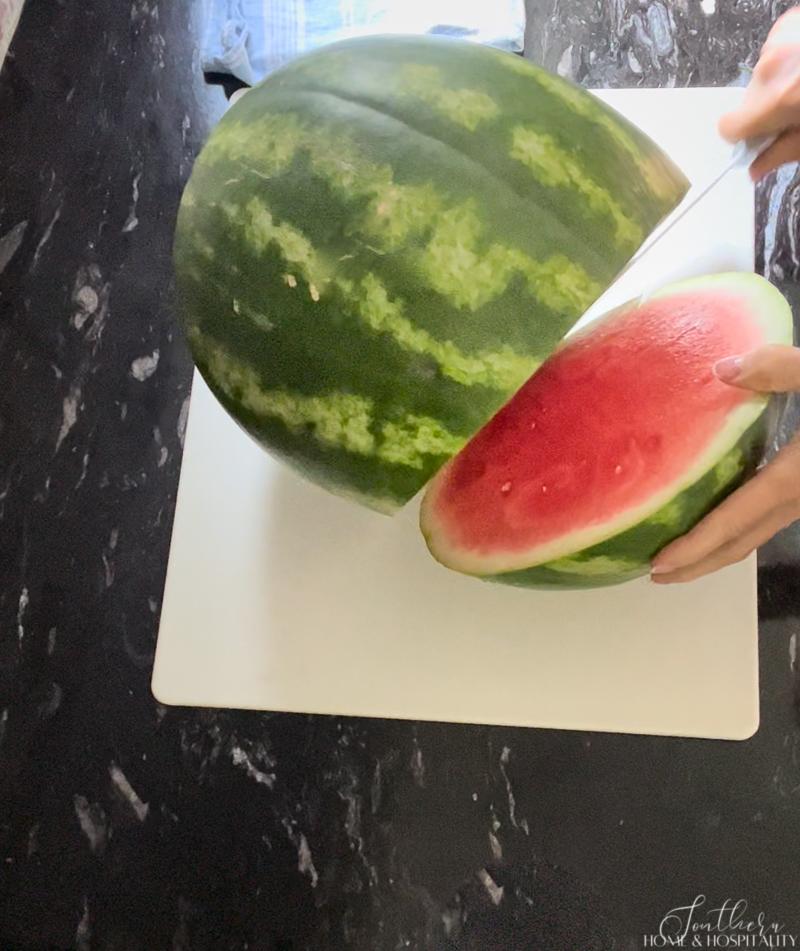
Place the watermelon on a cutting board and cut approximately one third of the end of the watermelon off at an angle slightly less than 45 degrees, and exactly opposite of the side you want to show. Take care that you end up with his best face forward.
Set aside the cut piece to use for the dorsal fin.
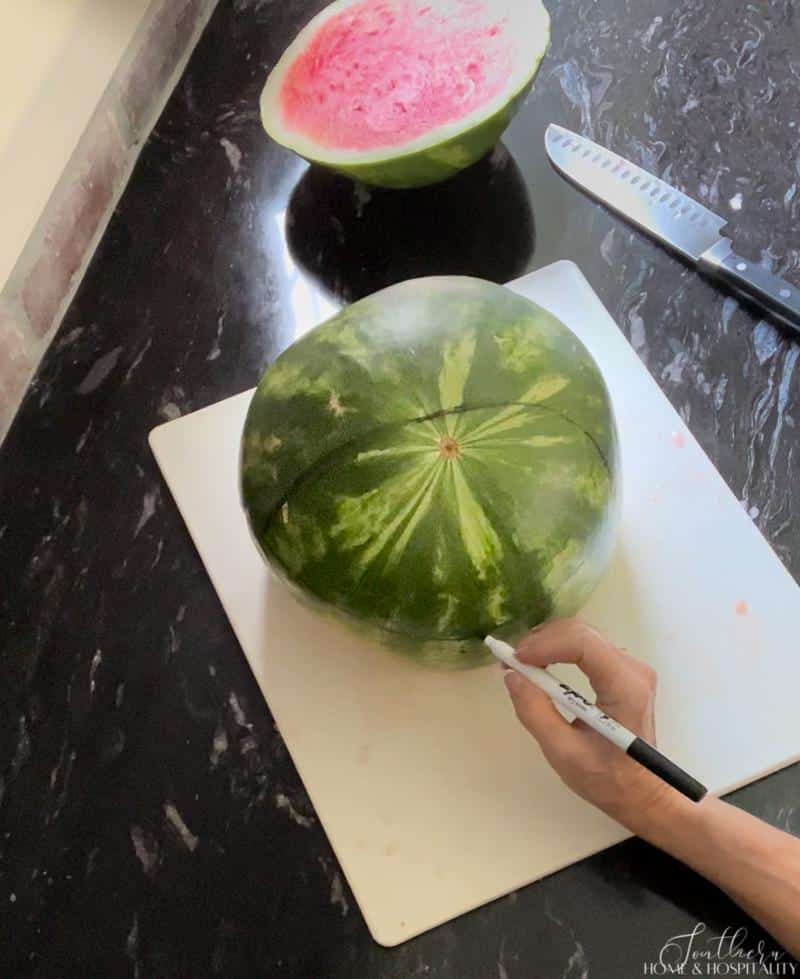
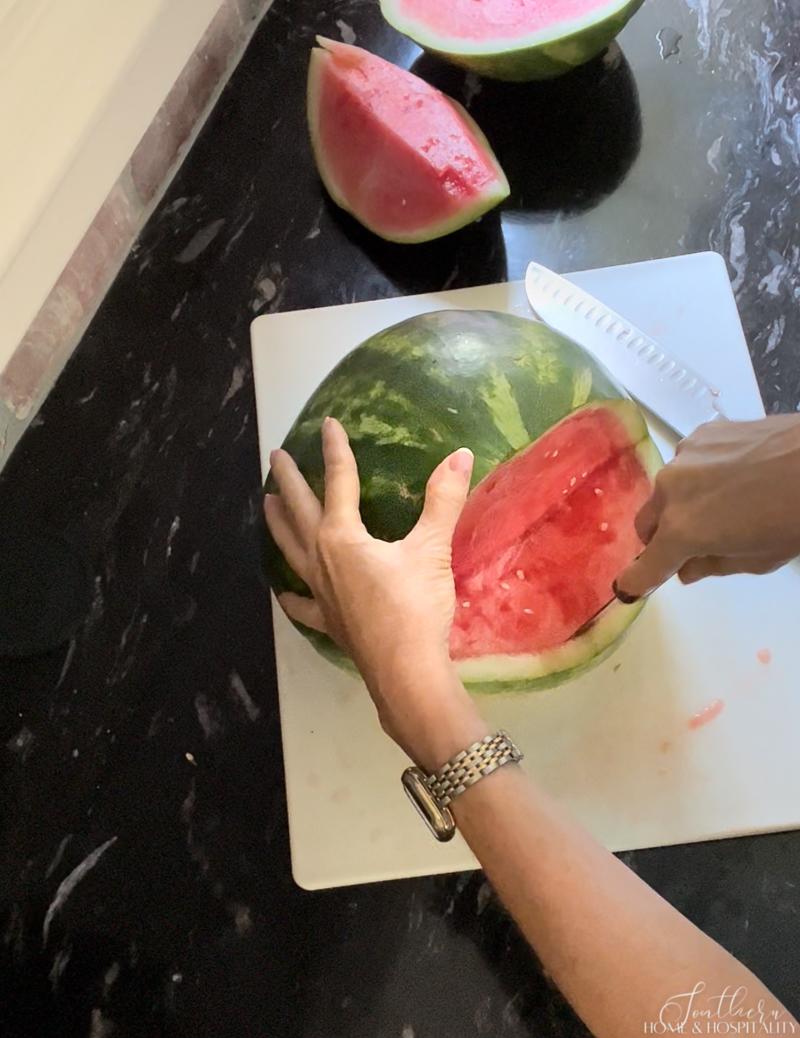
Step 2: Make the mouth.
Stand the watermelon up on the angled cut, which tilts the shark, like the head is popping out of the water.
Sketch the mouth shape with a dry erase marker, starting right above the stem mark. (Make sure the mouth outline is large enough to easily reach in for the fruit.)
Insert the end of a sharp knife and cut along the mouth line, removing a wedge-shaped piece of the watermelon.
Then wipe off any dry erase marker with a damp paper towel.
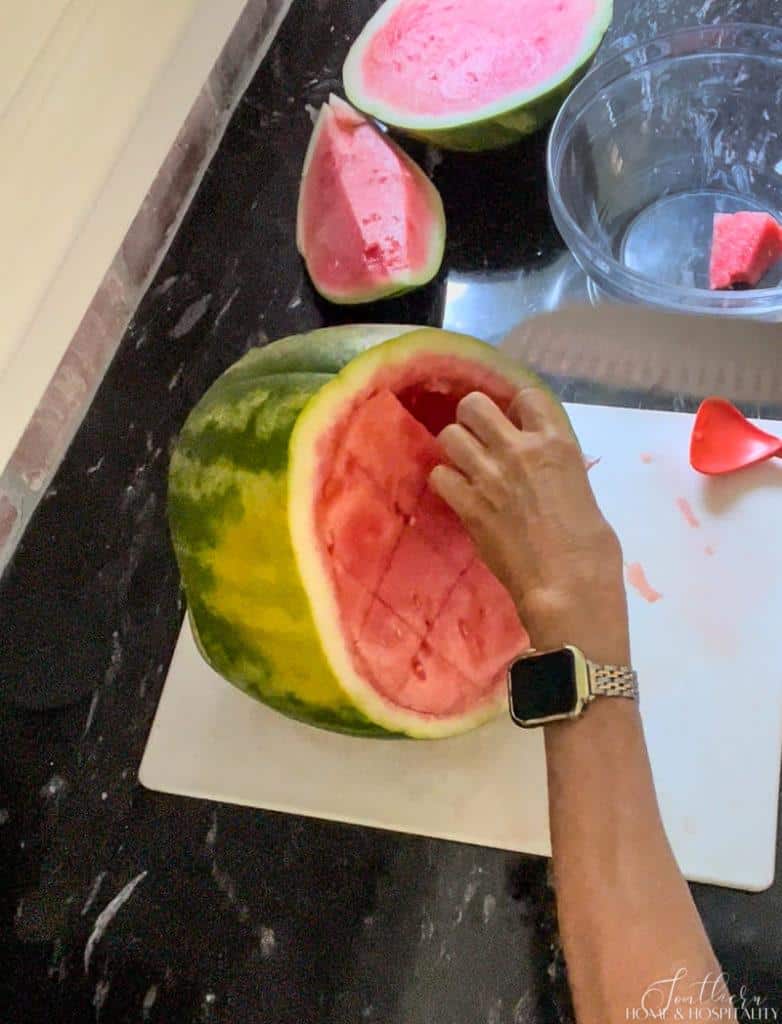
Step 3: Remove the flesh.
Cut down into the watermelon flesh around the mouth opening. Next, cut lines into the watermelon meat from the front and the back and pull out large sections with your hands or a large spoon and set aside in a large bowl.
Scoop until the cavity is empty, leaving enough of a layer of pink flesh to look like the inside of a mouth.
Tips
Watermelon flesh removal tips:
- Some people prefer to leave an inch or two of watermelon meat at the bottom to serve as a natural bowl for any juice that will collect from the watermelon or fruit you serve inside. I figure that a layer of watermelon at the bottom is still going to leak some juice, so I find it easier just to clean it all the way through. (If you’re leaving the bottom don’t cut slices into that side)
- If you’d like neat little balls of watermelon instead of large hunks, remove the flesh with a melon baller.
- Tidy up the cavity with the scoop from a pumpkin carving kit. Just don’t scrape off all the way down to the white layer.
Step 4: Make the teeth.
Using the smaller utility knife, cut a shallow outline 1 inch outside around the mouth outline opening. Pierce the green rind all the way through but take care not to cut too far into the white rind so the teeth have some stability.
Remove this one inch strip of the outer green rind by inserting the tip of the sharp utility knife perpendicular to the cut line of the green part of the rind. Slice up under this green layer and pick and peel it away as you go, leaving two bands of the white rind around the mouth hole.
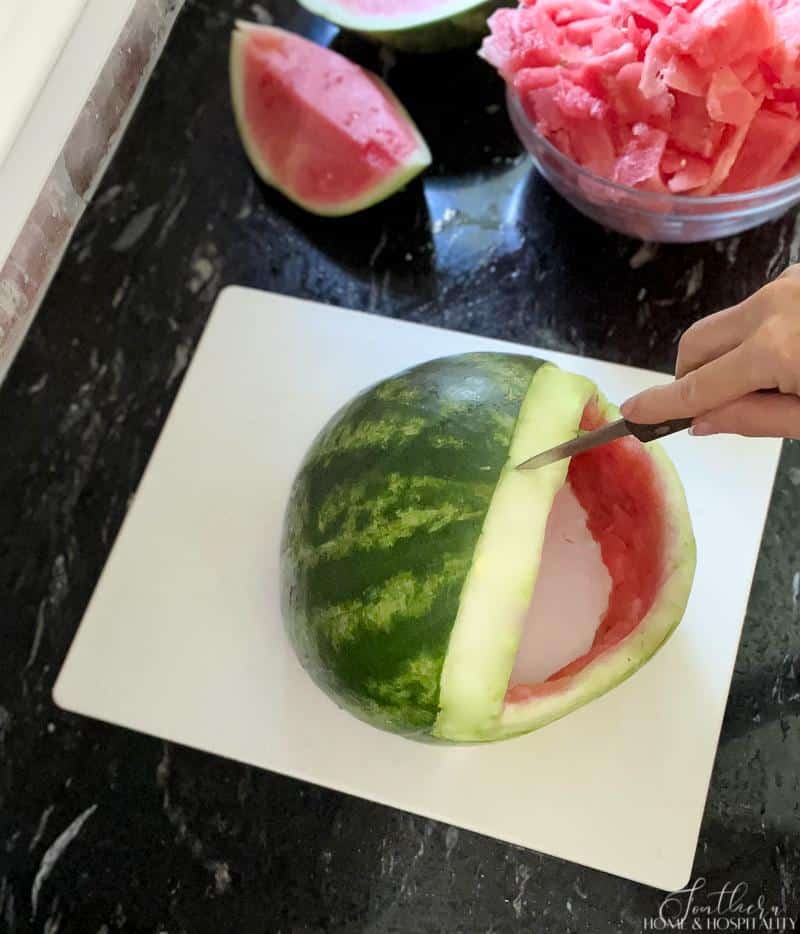
Then with the paring knife, cut triangles out of the white bands to make the teeth. In the corners of the mouth, you can cut some very narrow teeth to handle the angle.
Tip: If your knife is not sharp enough, you won’t be able to cut one easy-to-remove strip of green rind. You can cut up under and peel it away in pieces – it will just take a bit longer.
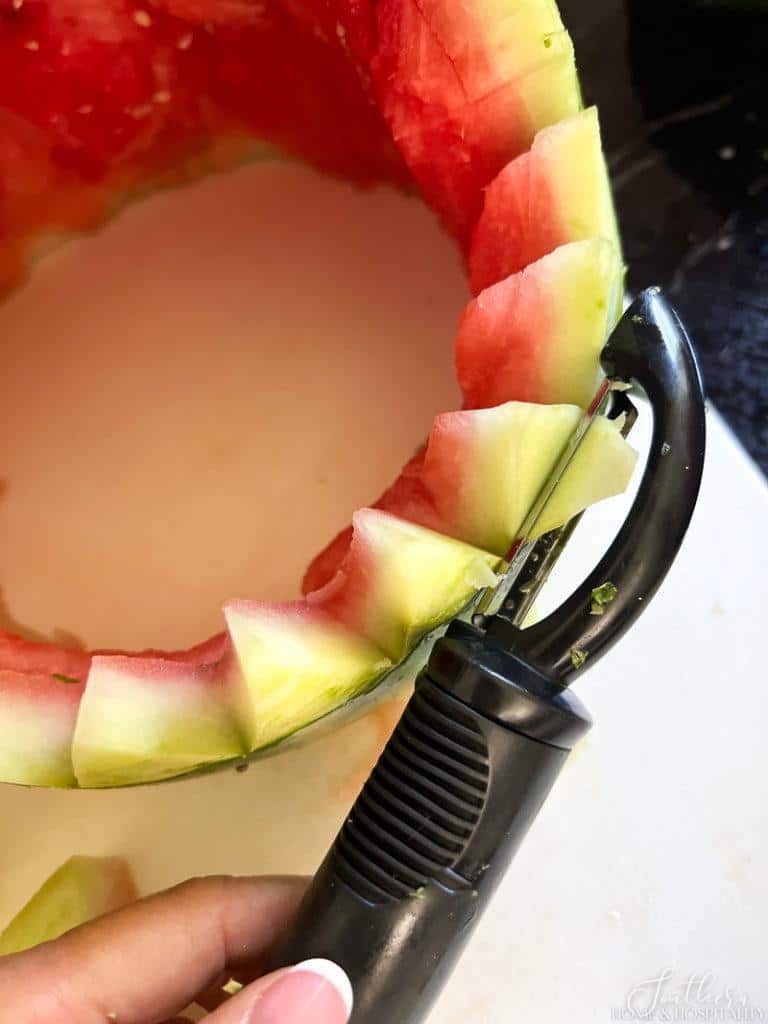
I was left with some green on the bottom teeth (knife NOT being sharp). I simply used a vegetable peeler to take off another layer.
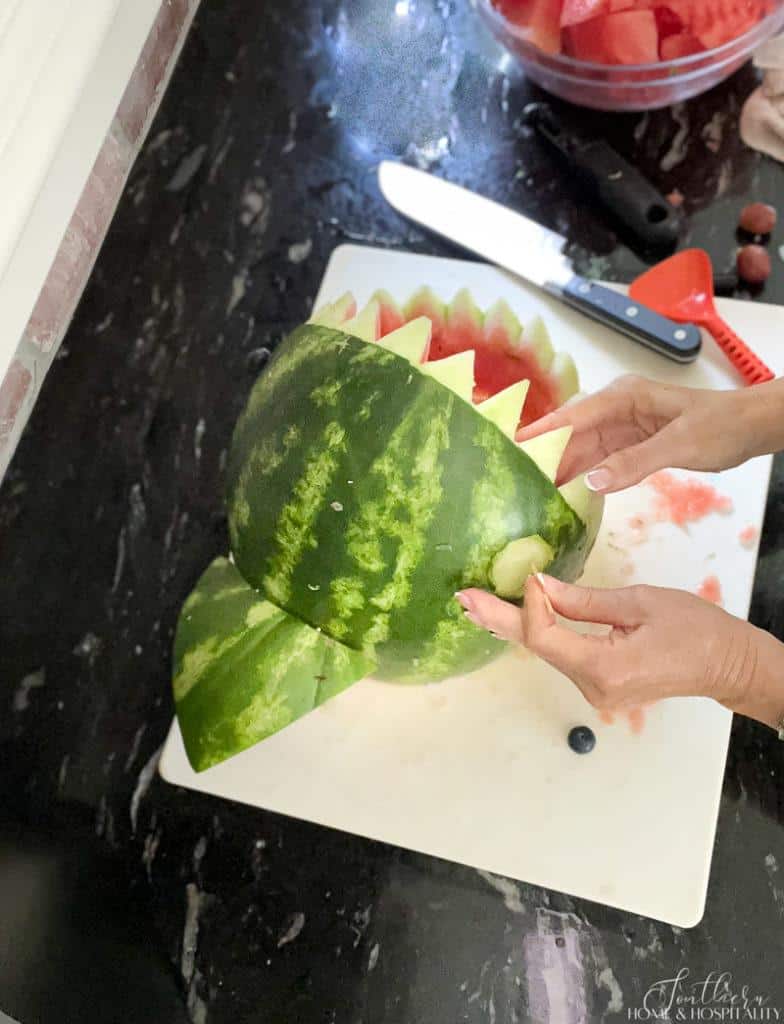
Step 5: Make the fin.
For the fin, cut a triangle out of either of the reserved cut pieces from the bottom of the watermelon or the mouth.
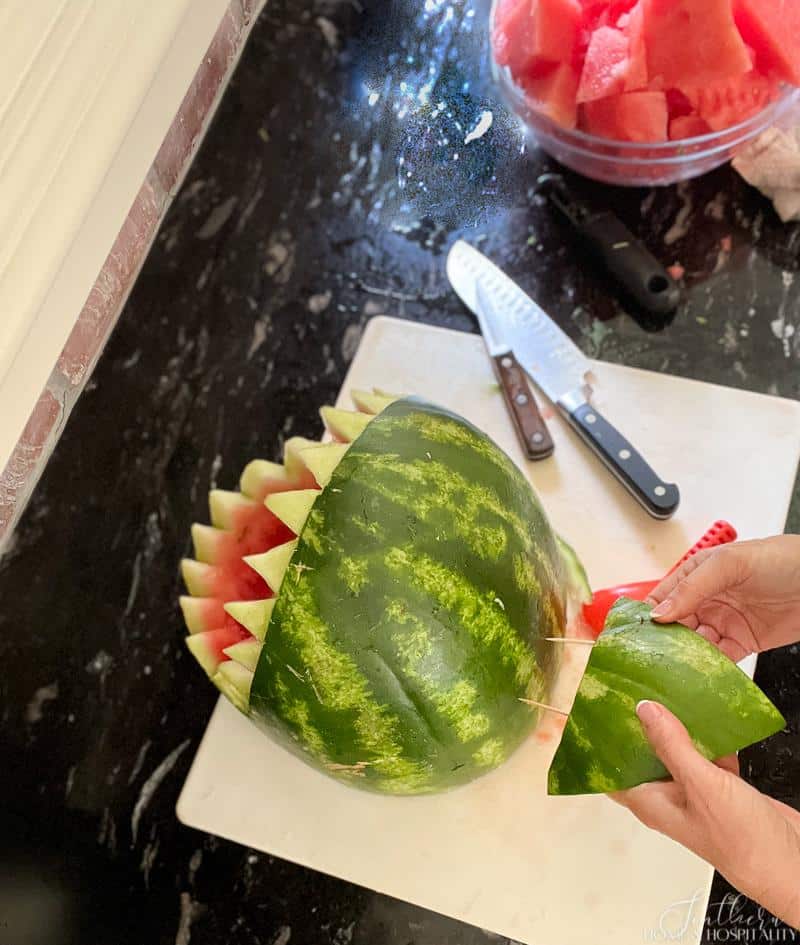
Attach to the back with two toothpicks with either the green rind facing up or sideways. It’s helpful to carve a slight curve into the side that will sit on the watermelon for a better fit.
Step 6: Make the eyes.
Draw a circle on each side with the dry erase marker where you want the eyes. There are three ways to create those beady shark eyes:
- Use a melon baller to cut out the eye sockets. Push in a corner of the melon baller to start the cut, then scoop the ball out in one motion.
- I didn’t have a melon baller (adds to Amazon list) so I cut the rind inside the circle with the paring knife using the same method as removing the band of green for the teeth.
- Skip the eye “socket” altogether.
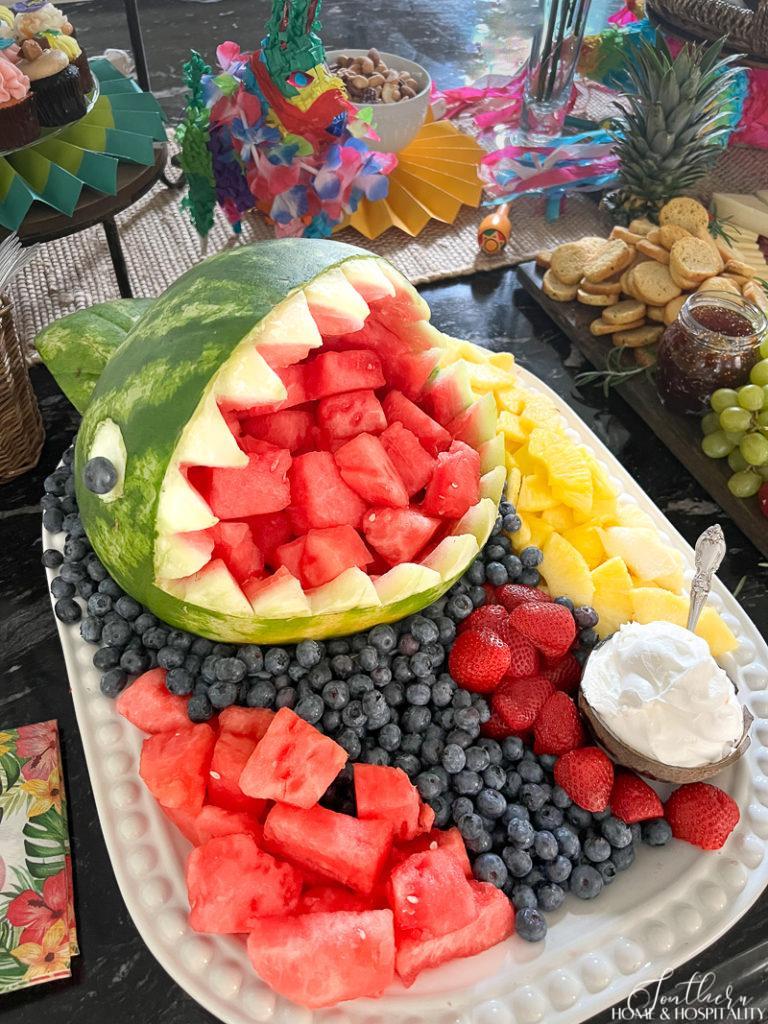
Break a toothpick in half and insert one end into the watermelon eye socket (or just into the watermelon). Then pop a blueberry, black grape, or black olive onto the other end. Repeat on the other side with the other toothpick half.
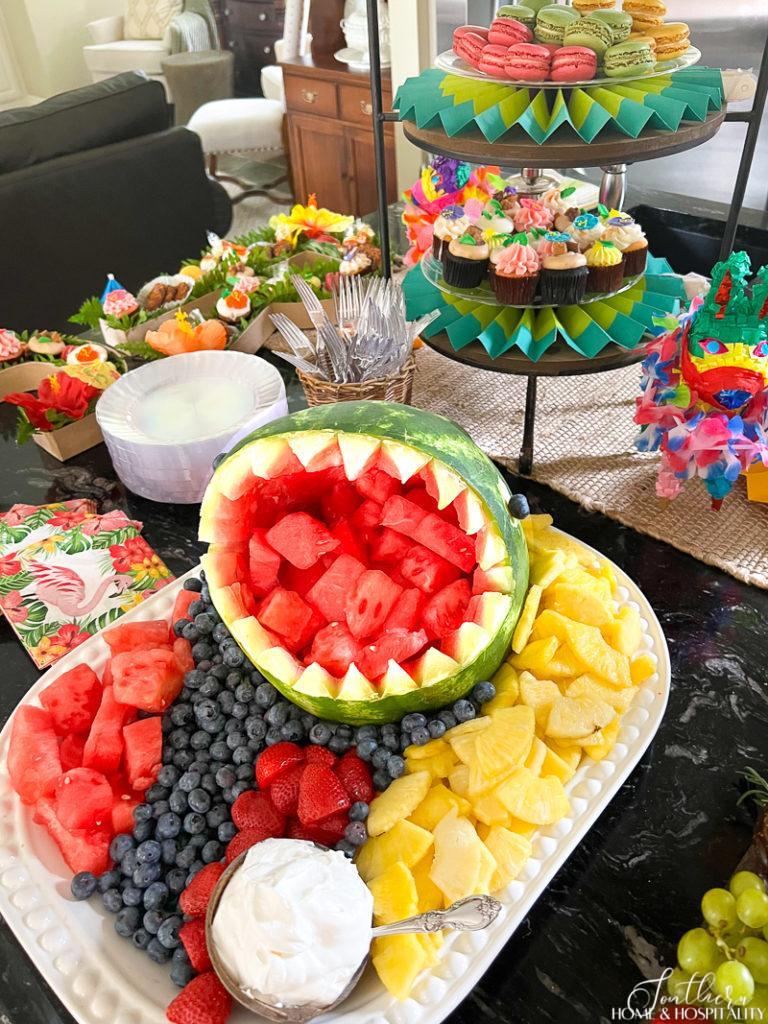
Watermelon shark details that make a splash.
The fun doesn’t stop there! Here are some presentation ideas for you to sink your creative teeth into:
- Pile blue “water” around the shark with blue jello or blueberries.
- Party for kids or candy lovers? Add some Swedish Fish to the mouth.
- This shark is all fruit friendly—use it to serve a complete fruit salad.
- Make a shark family with different sized watermelons for your Baby Shark theme party. (ugh, never can get that song out of my head doo-doo-doo-doo-doo)
- Looking for an excuse to make this DIY? How about a Shark Week party for summer?
Reel in a good one.
How do you pick the best watermelon?
To ensure a ripe watermelon full of sweet flavor, look for these things:
- Dull exterior
- Dark golden spot on the bottom
- Hard when you knock on it
- Heavy for its size
Can I make the watermelon shark the day before?
Yes you can, but you need room to store it in the fridge. It should last this way for 2-3 days but his choppers will look best toward the beginning.
Looking for other easy and unique summer party decorating ideas for the food buffet? Check out “DIY Pineapple Vase for a Crazy Quick Stunning Centerpiece” and “Easy DIY Charcuterie Letter and Number Boxes for Any Occasion“.
Want the look but don’t have the time?
Here’s a cute, less messy alternative shark server.
Have I convinced you to take a bite out of this cute, not scary party project? Your guests are sure to think it’s “jawe-some”!🤣

Before you go:
As always, I appreciate your visit, comments, and shares here on the blog! I’d love it if you also follow along with me on Pinterest, Instagram, and Facebook so you won’t miss any of my inspiration and ideas.
Don’t forget to sign up for updates to keep in touch.
If you’re not already a member of the SH&H family, I’d love to have you join me! You’ll not only get email updates, but you’ll have exclusive access to all the bonus materials in my free subscriber-only library, like this:
Pin it to remember it!
If you’ve enjoyed this post, please pin and share this on Pinterest:
Super cute idea! I love it.