How to Paint an Easy Faux Zinc Finish (In Under 30 Minutes)
Inside: Make over your inexpensive, worn, or faded planters with a budget-friendly faux zinc finish in under an hour. The patinaed zinc look will transform your pots into dupes for aged garden heirlooms or ones from pricey catalogs! ➡
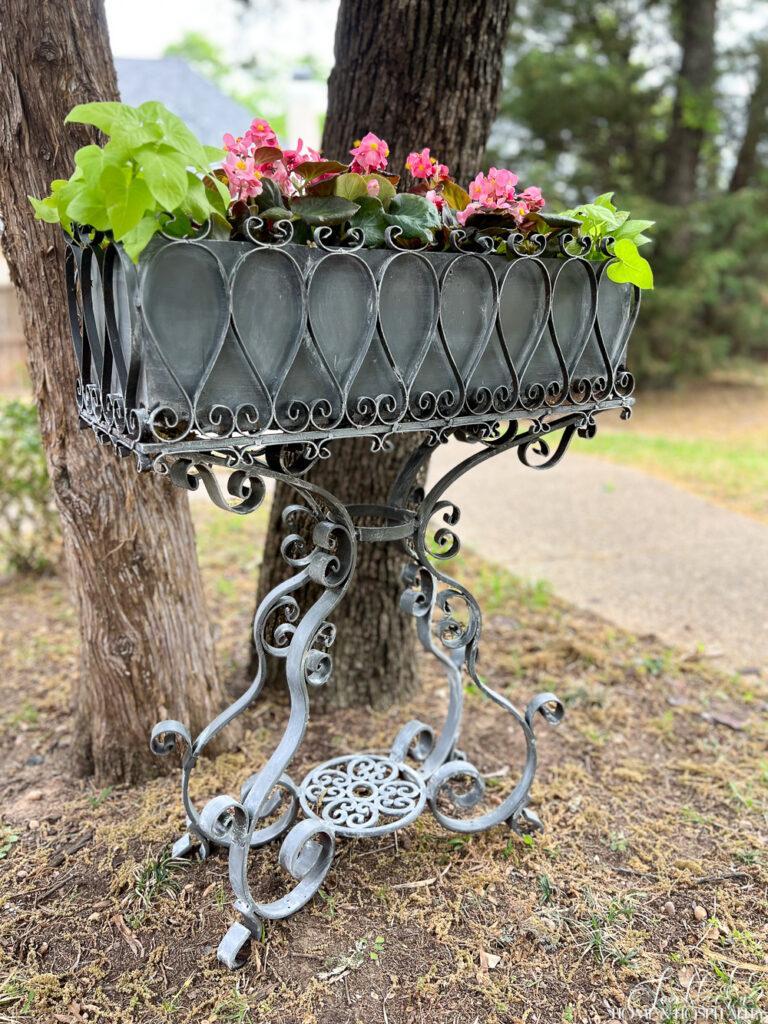
Do you have a collection of cheap or just plain tired-looking garden pots?
Do you want to give your plants a home this summer that says “I’m fancy like Pottery Barn” – instead of “I belong hidden behind the barn”?
Well, with a little paint and less than an hour you can have a zinc-finish catalog look alike!
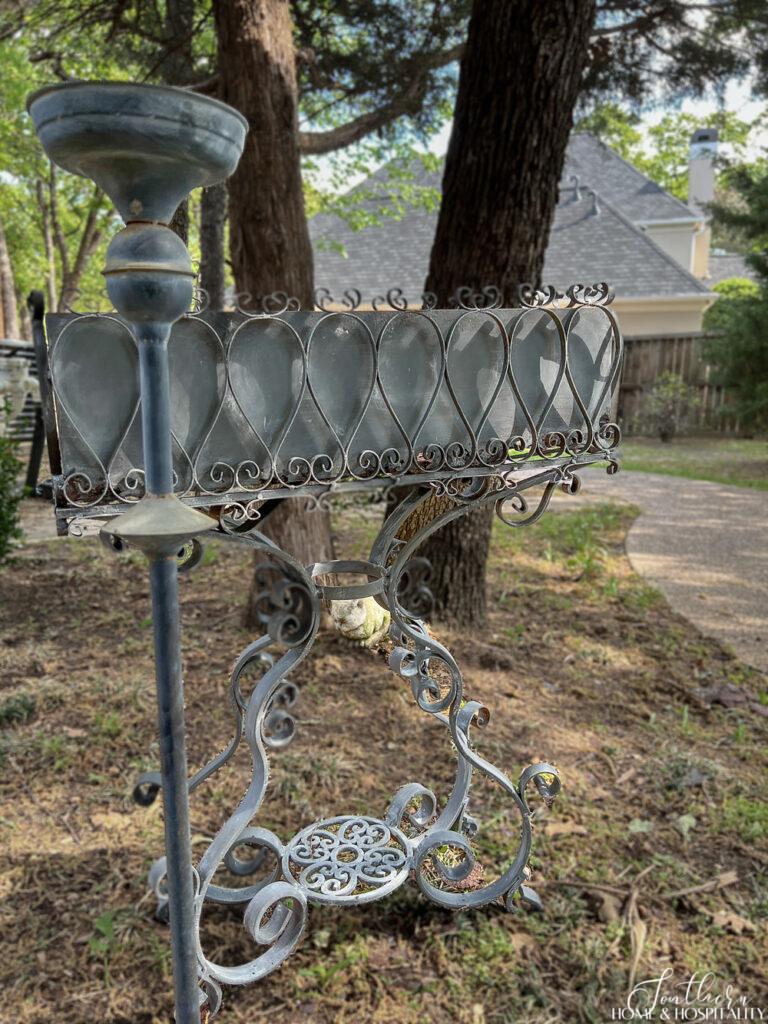
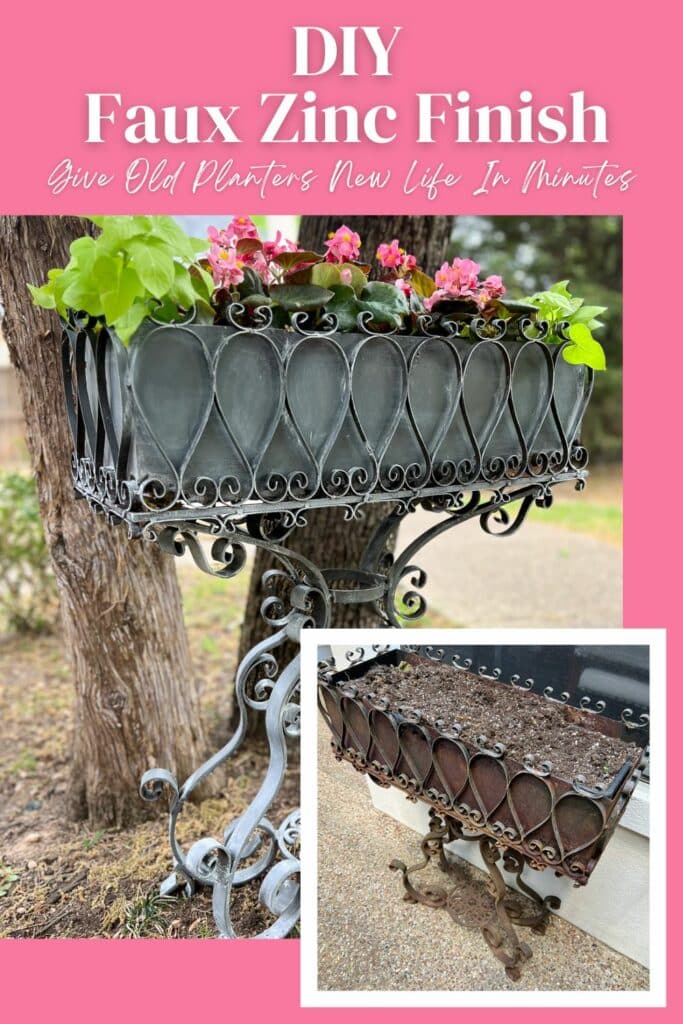
As I was cleaning up the yard and prepping it for another summer season this weekend, I was sad to see this planter was on its last curly leg:
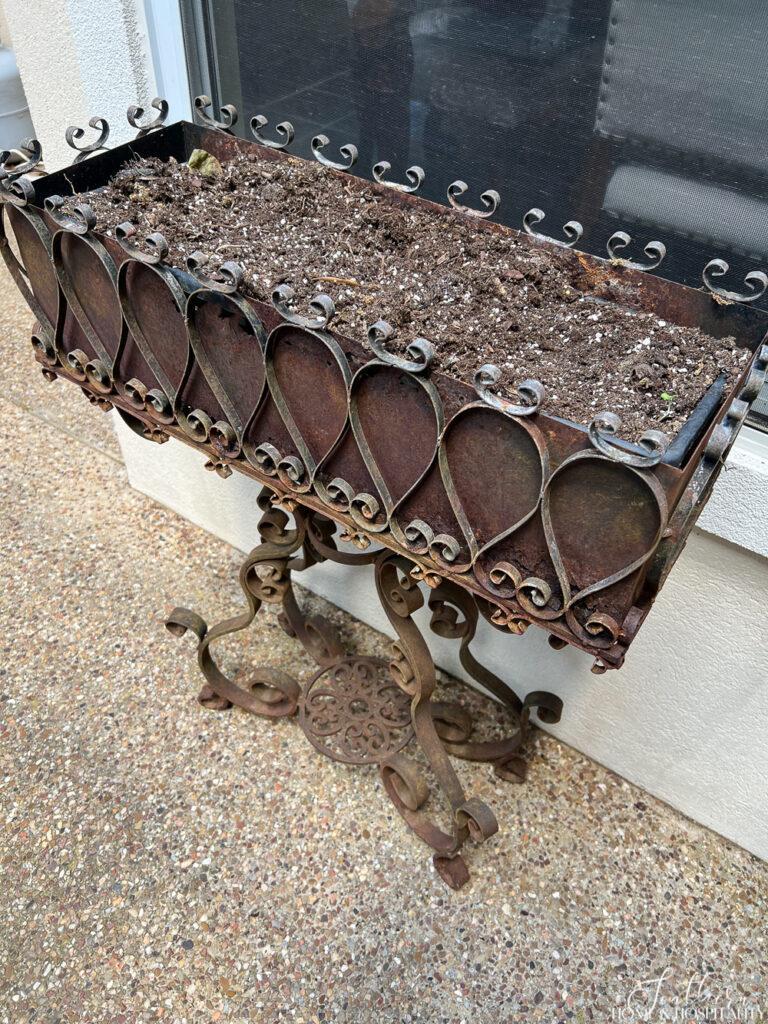
When it was in its planter prime, it was a lovely piece in a bronze finish. Now after sitting outside for such a long time, its color was now officially “rust”.
Not ready to kick it to the curb, it was time for a little painting experiment with some supplies I had in the garage.
My inspiration for its new look were the beautiful zinc finish garden pots in catalogs like Pottery Barn, Restoration Hardware, and Ballard:

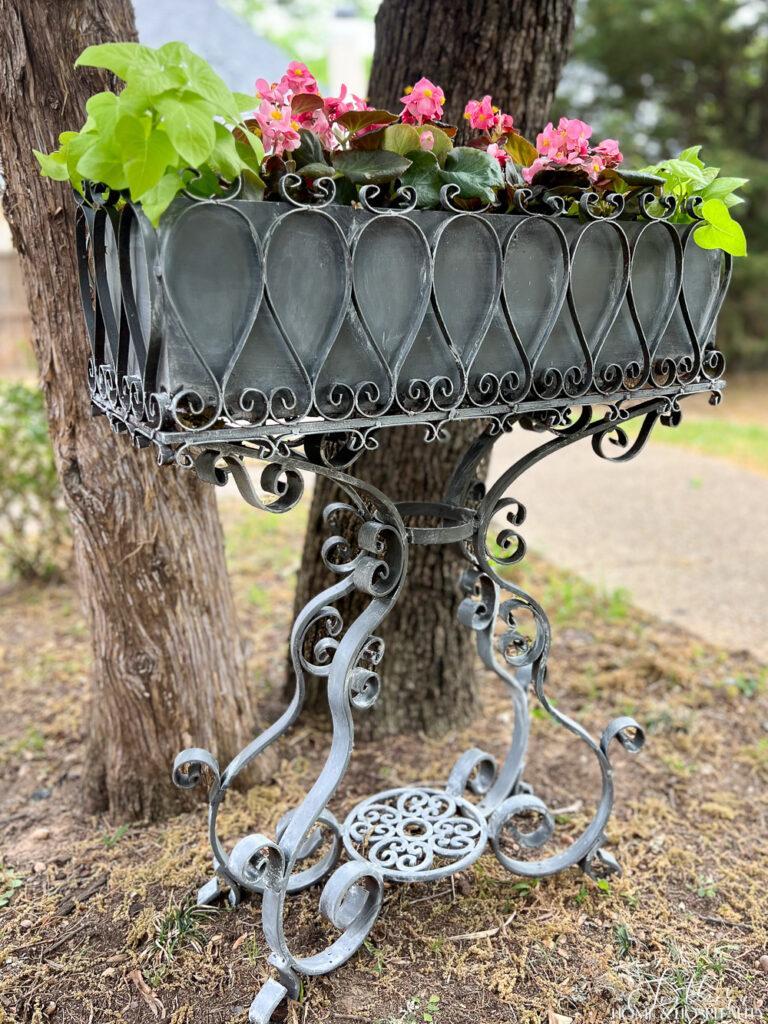
Copying this faux zinc finish turned out to be so simple. And spoiler alert – it saved this planter to see another summer season.
This post contains Amazon and other affiliate links for your convenience. As an Amazon Associate I earn from qualifying purchases. If you purchase something through any link, I may receive a small commission, at no extra charge to you. I only recommend products that I love or would purchase for myself. See my full disclosure here.
Materials for a zinc finish DIY.
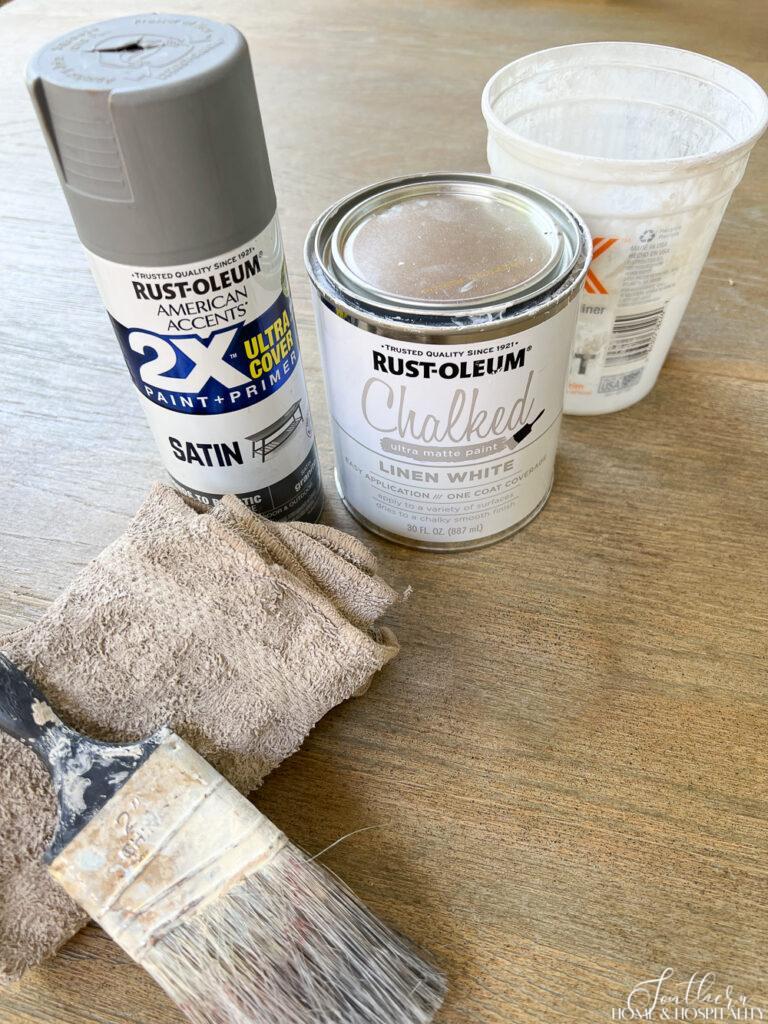
- A planter
- Gray spray paint with primer
- Flat white paint or white chalk paint
- Old rags
- Paint brush or foam brush
- Stiff paint brush or chip brush
- Spray sealant (optional if the planter will get wet)
Step-by-step instructions for painting a faux zinc finish on a planter.
Getting the look of zinc is so easy because it really only requires a base coat of gray paint and a whitewash treatment!
Remember, even though this demonstration is on metal. this faux zinc paint treatment is an inexpensive way to make over any of your planters including plastic pots and clay pots.
1. Clean the planter.
The first step is to make sure the planter is clean and free of dust, dirt, or any other debris. You can use a damp cloth to wipe down the planter and let it dry completely before moving to the next step.
2. Apply the gray base coat.
Choose a gray spray paint that includes a primer. Apply a thin, even layer of the paint over the entire surface of the planter and let it dry completely. On this metal, my paint dried within 10 minutes.
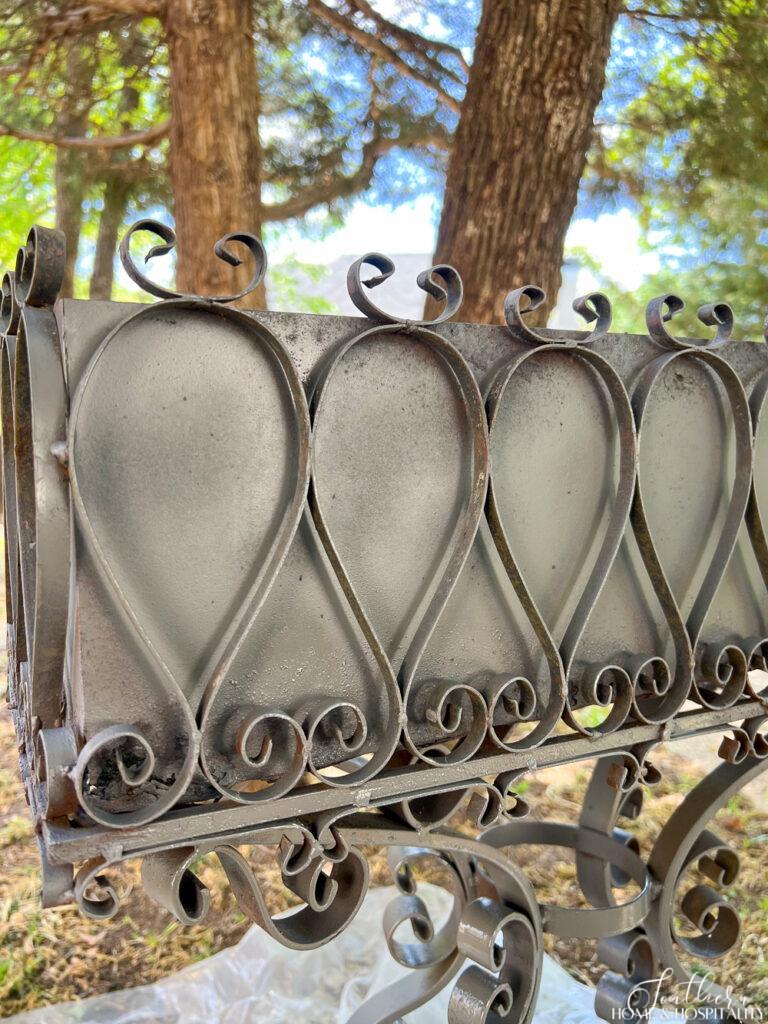
I only sprayed one light coat on this planter and didn’t go for complete, full coverage. In this case, the small patches of rust showing through adds to the time-worn look.
But if you’re covering a plastic or terra cotta garden pot, you may need a second coat to make sure all of the existing color is covered.
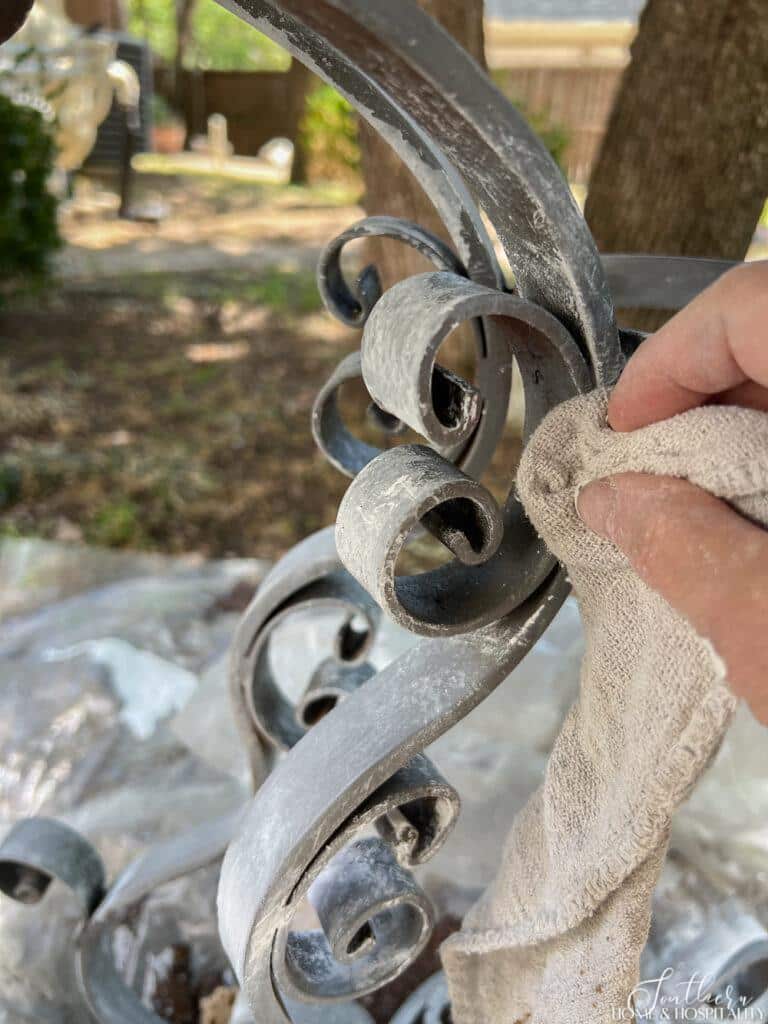
3. Apply the whitewash.
Mix a small amount of paint with an equal amount of water. White craft paint, cheap ceiling paint, or any white paint you have on hand without a gloss will work.
Dip a paintbrush into the mixture, then brush a thin coat onto a section of the planter.
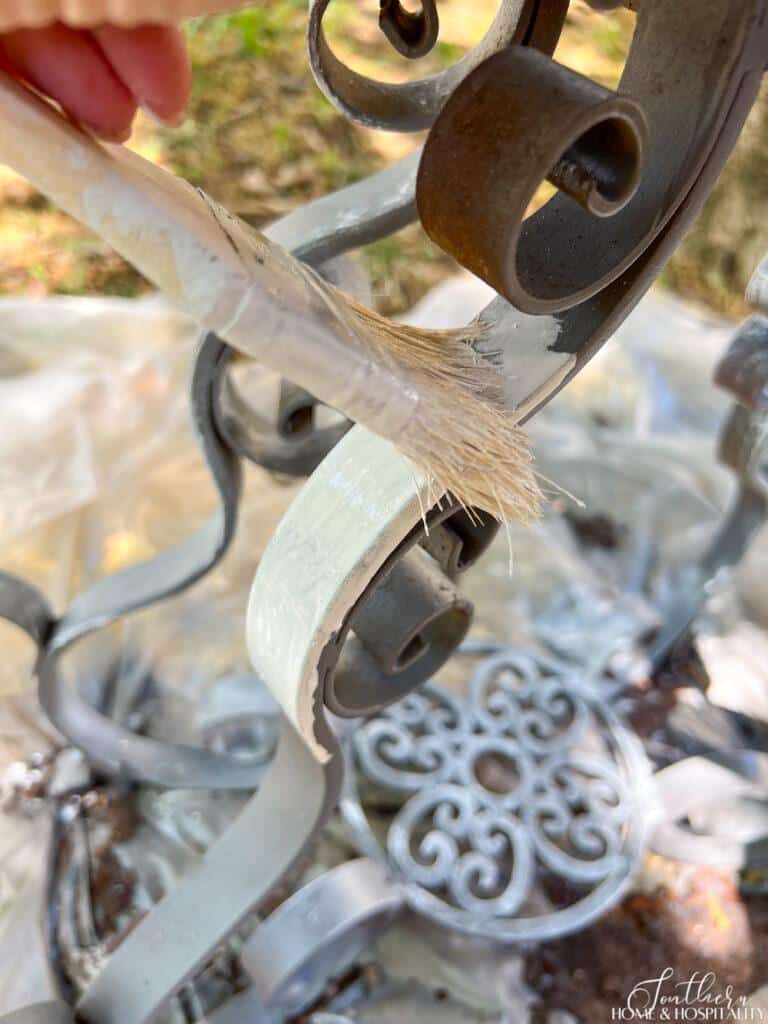
Then after a few seconds, go back and wipe off most of the watered down white paint with a dry rag. Use an old rag or old t-shirt that you don’t mind throwing away.
It’s amazing how the addition of the whitewash gives it instant patina!
I was happy with wiping away with a simple rag on this piece. But if you’d like a more mottled effect, you can dab areas with a damp rag, a piece of cheesecloth, or a natural sponge to avoid having the look be too uniform.
To perfect your techique, you may want to test a small area inside of the planter first.
I used this zinc candleholder I had as a guide to mimic the whitewash finish:
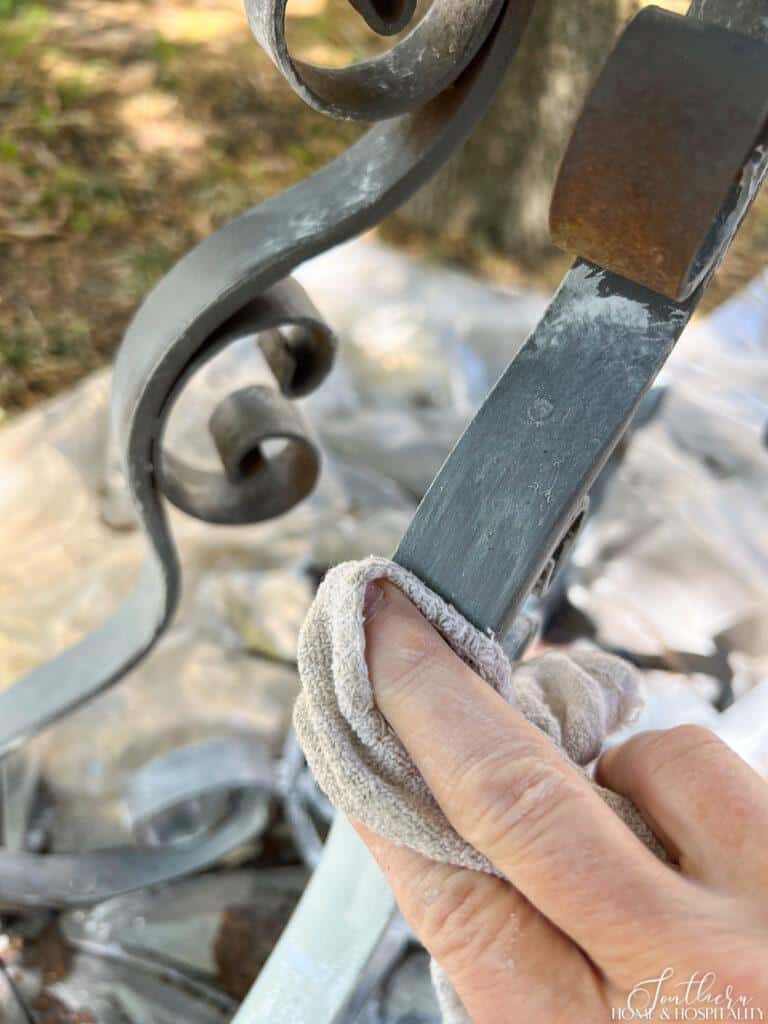
4. Add some highlights with dry brushing.
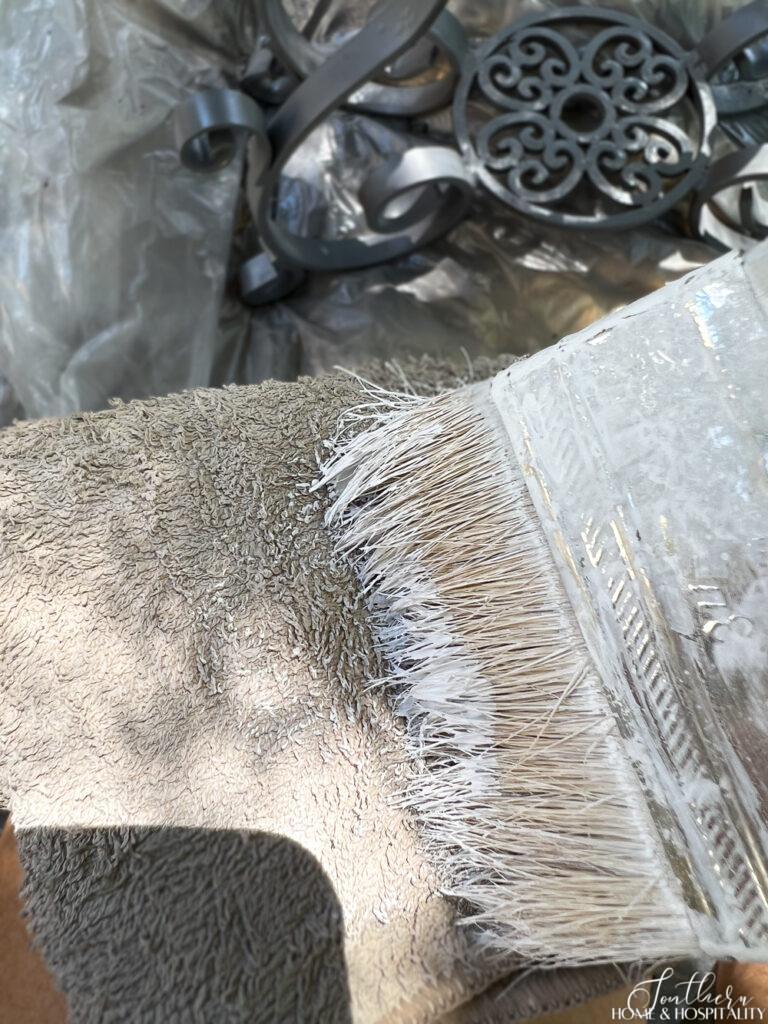
The next step is to add some extra aging to the faux zinc finish with a little dry brushing. A chip brush or an old brush that’s gotten a little stiff works well for this. Dip the tip of the bristles into some of the white paint (not the paint/water mixture) and wipe off most of it on a paper towel or rag to remove most of the paint.
Then lightly drag the end of the bristles over random parts of the pot.
I finished the paint treatment by going over some brush strokes and areas that I thought were too heavy with a wet rag to remove some of the paint and soften them.
5. Seal the finish.
If your planter will be outside, it’s a good idea to use a sealer on it. Once the faux finish paint job has dried completely, apply a matte clear sealer to protect it and make it more durable.
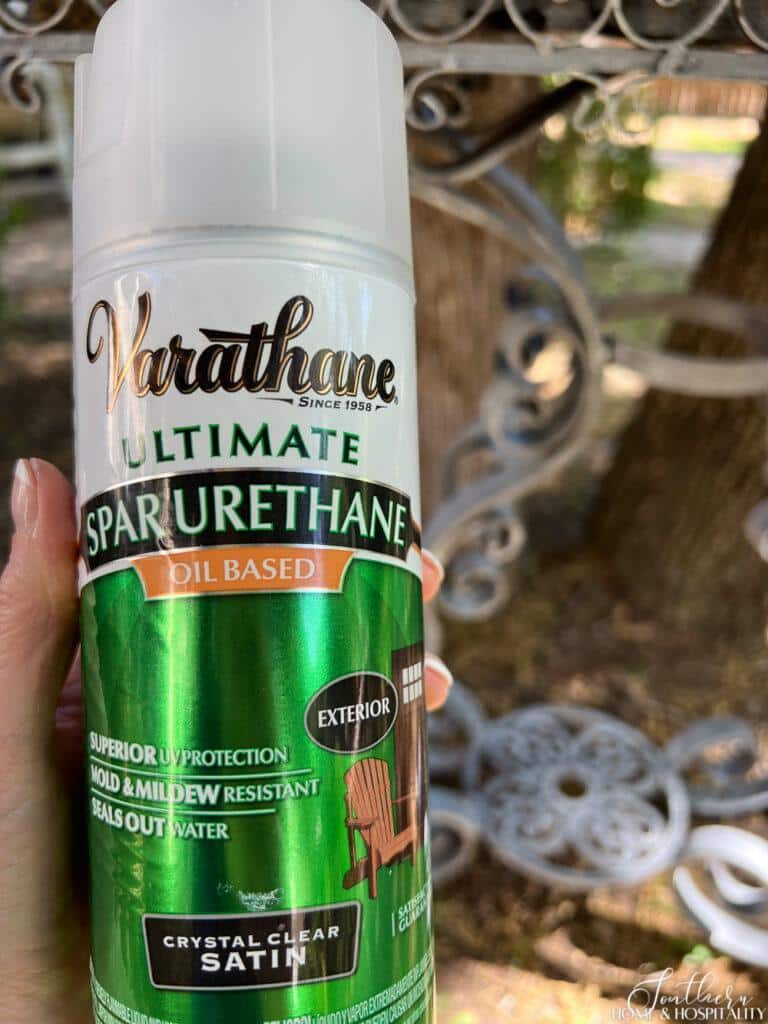
I used this spar urethane sealer I had on hand. It should make the paint job last through the season, but I would guess it will need another coat if the aged zinc finish is still looking good next year.
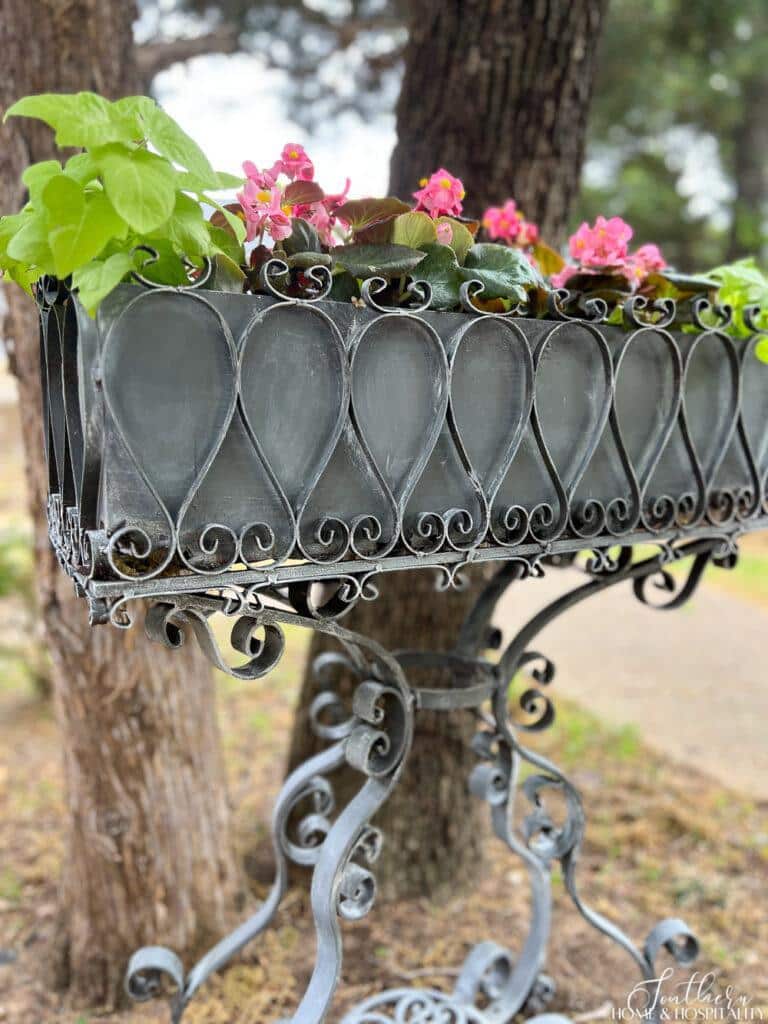
So simple right? It’s one of those small projects that requires no crafting skills. And the best part? Treating this entire piece only took about half an hour, including dry time.
It’s cheap too. It didn’t cost me anything since I used the paint supplies in my garage. But even if you don’t have them, it’s one or two cans of spray paint, a small amount of cheap white paint, and maybe a can of sealer.

For other easy faux painting techniques check out the posts, “How to Make Decorative Accessories Look Like Beautiful Aged Metal” and “Make Any Material Look Like Glazed Ceramic With This Easy Hack“.
As you’re prepping the yard to make it pretty for the summer, make your plants feel all fancy-like by giving your tired planters this ridiculously easy DIY faux zinc finish!

Before you go:
As always, I appreciate your visit, comments, and shares here on the blog! I’d love it if you also follow along with me on Pinterest, Instagram, and Facebook so you won’t miss any of my inspiration and ideas.
Don’t forget to sign up for updates to keep in touch.
If you’re not already a member of the SH&H family, I’d love to have you join me! You’ll not only get email updates, but you’ll have exclusive access to all the bonus materials in my free subscriber-only library, like this:
Pin it to remember it!
If you’ve enjoyed this post, please pin and share this on Pinterest:
This is so beautiful. I love it. Hugs to you.