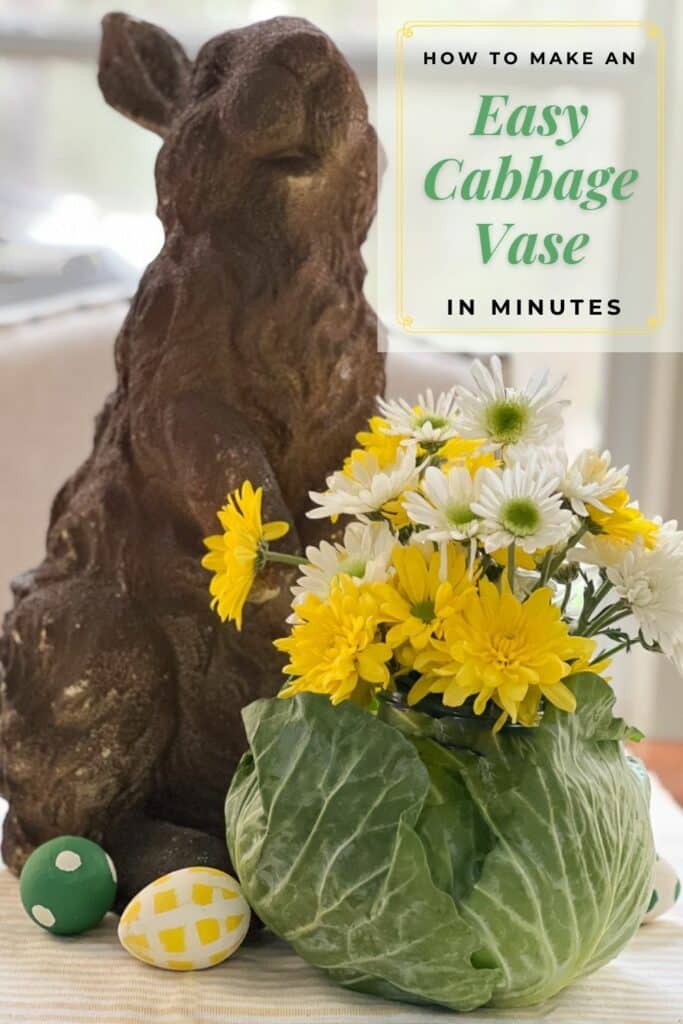
How to Make a Cabbage Vase for a Simple Spring Centerpiece
Inside: Looking for an enchanting spring or Easter centerpiece? Replace the vase with this super easy and unique DIY cabbage vase to make your tablescape more special in less than 10 minutes!
This post contains Amazon and other affiliate links for your convenience. As an Amazon Associate I earn from qualifying purchases. If you purchase something through any link, I may receive a small commission, at no extra charge to you. I only recommend products that I love or would purchase for myself. See my full disclosure here.
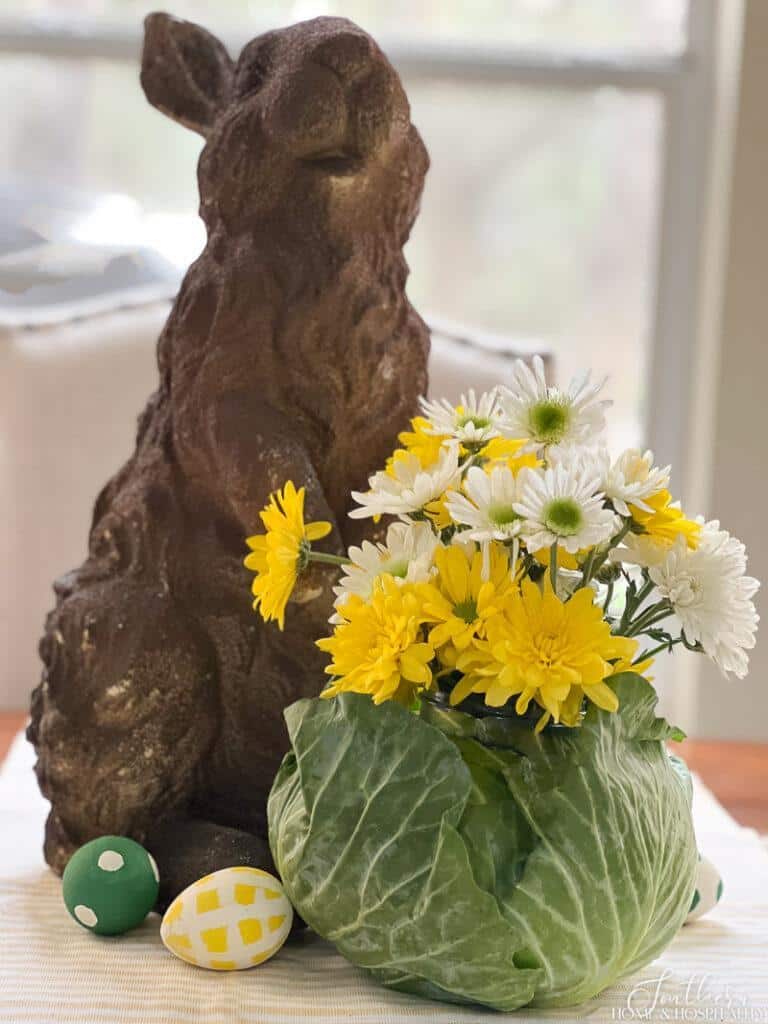
Want to make a quick and cute flower arrangement to elevate your spring table that would even charm the pants off of Peter Rabbit?
A cabbage makes the perfect spring centerpiece vase with its fresh spring green color and a nod to those irresistible bunny veggies in the fairytale garden of Mr. McGregor.
So step away from the regular vase, because for the price of a cabbage and a bouquet of spring flowers from the grocery store, you can whip this up in less than 10 minutes—and it’s so simple!
What You’ll Need to Make a DIY Cabbage Vase.
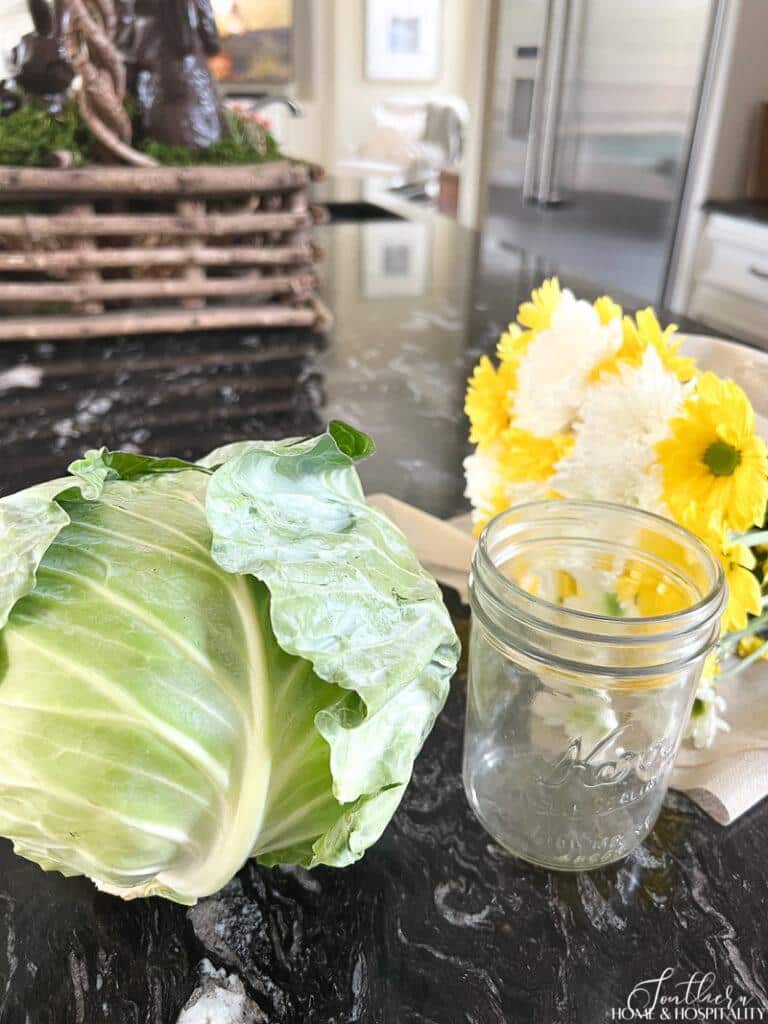
- Large head of cabbage
- Small 8 oz. mason jar or small glass
- Sharp knife
- Sharpie marker
- Floral pins or floral wire
- Fresh flowers
How to Carve a Cabbage Vase Step By Step.
Let’s see how truly easy it is to make this lovely floral cabbage vase:
1. Cut off the bottom of your cabbage (the core end) to make a nice, flat surface for the cabbage vase to sit level.
2. Carefully remove the outer loose leaves and set aside.
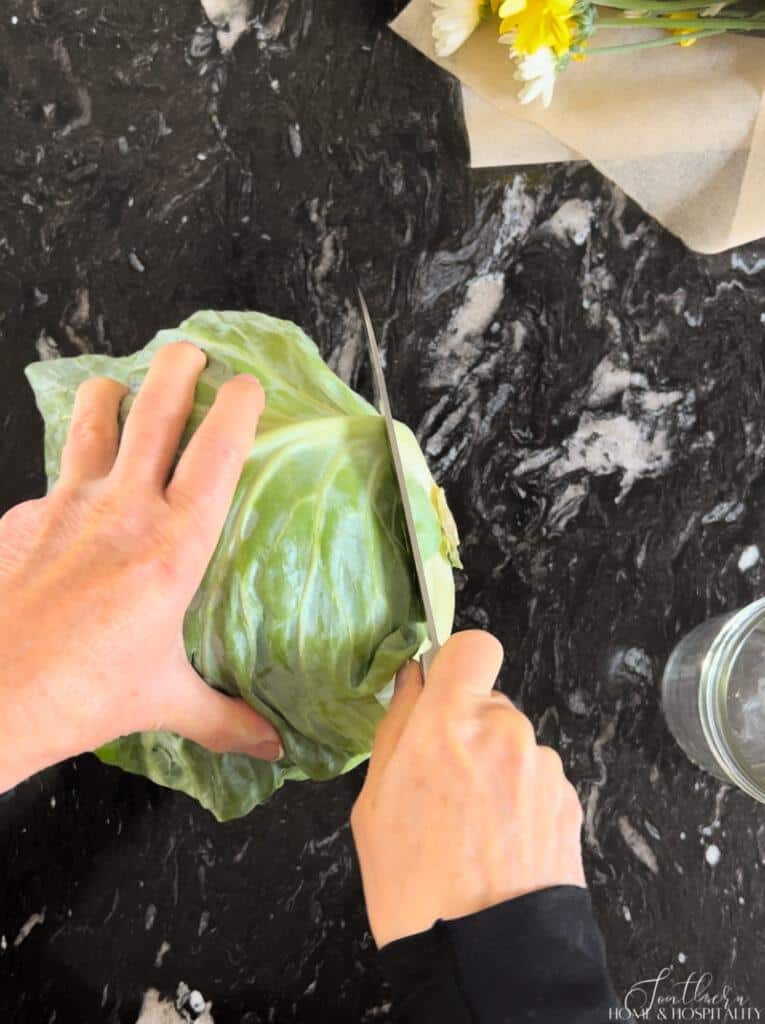
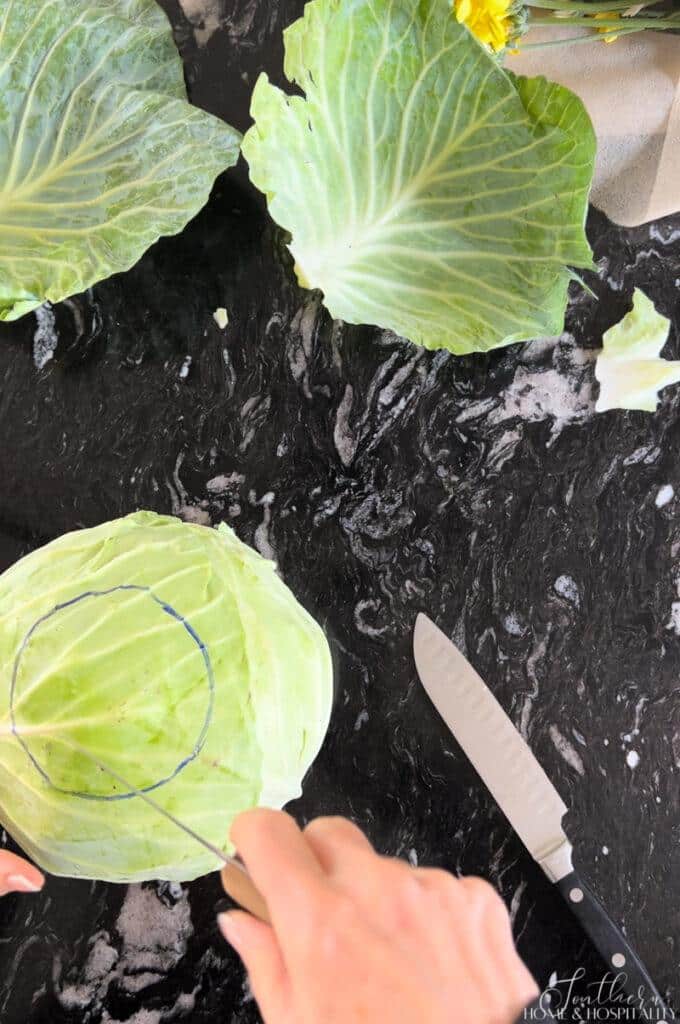
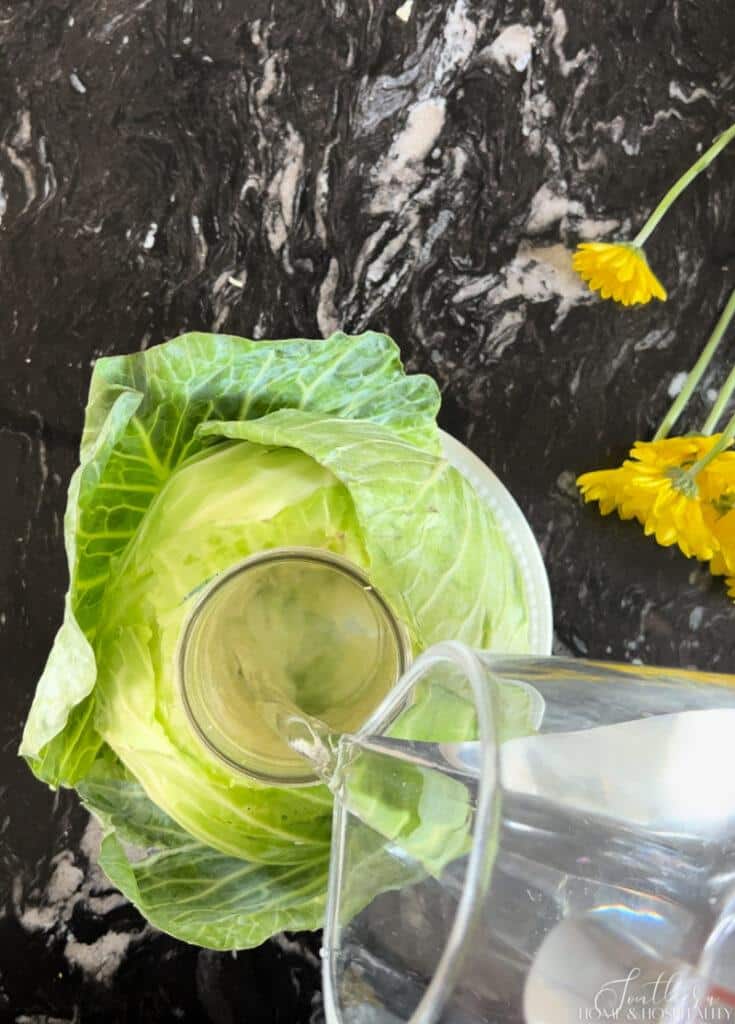
3. Turn the mason jar upside down on top of the cabbage and trace the outline of the jar with a Sharpie.
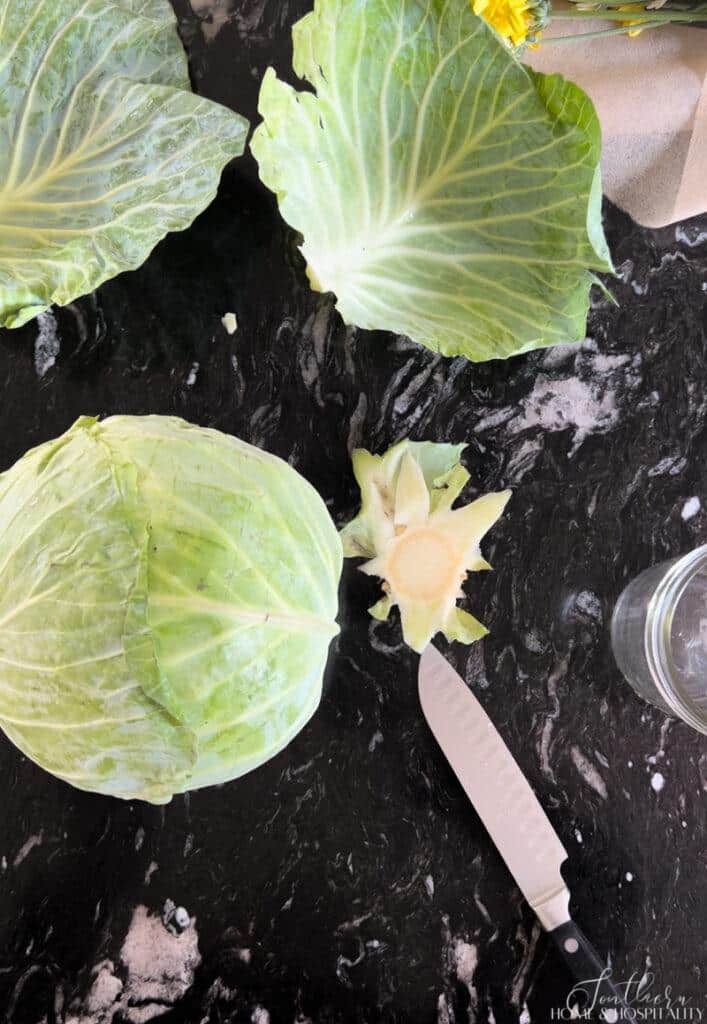
4. With a sharp knife, start cutting straight down around the outline and begin pulling out the pieces of cabbage.
(Don’t let it go to waste—make some yummy coleslaw or Asian chopped salad for dinner!)
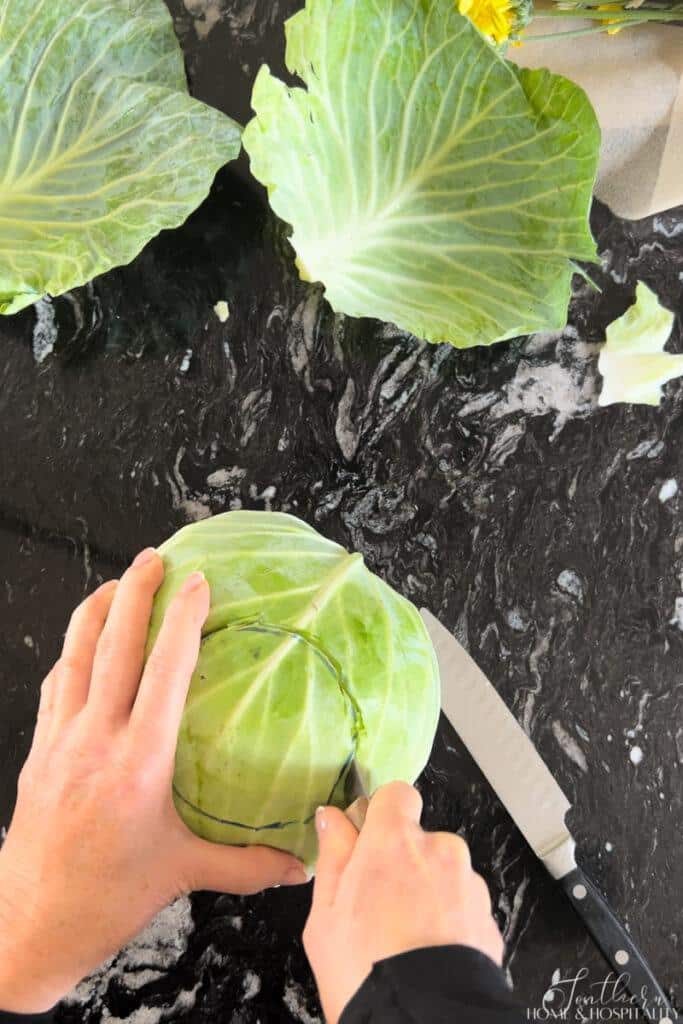
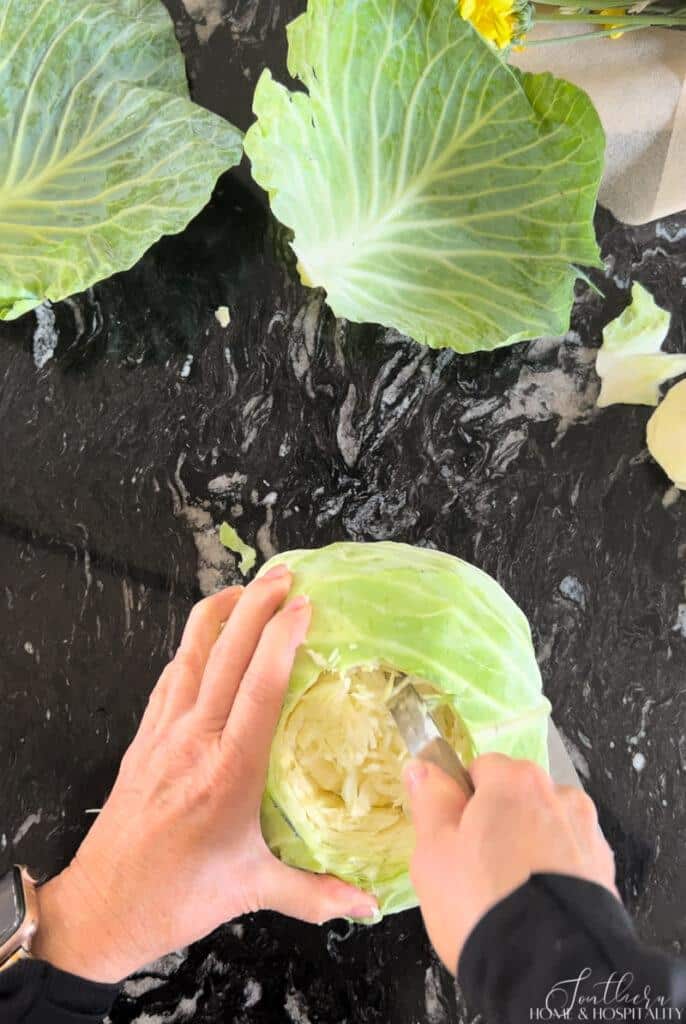
5. When you’re about halfway down, flip the cabbage over and repeat from the bottom, drawing another jar outline and carving out toward the middle.
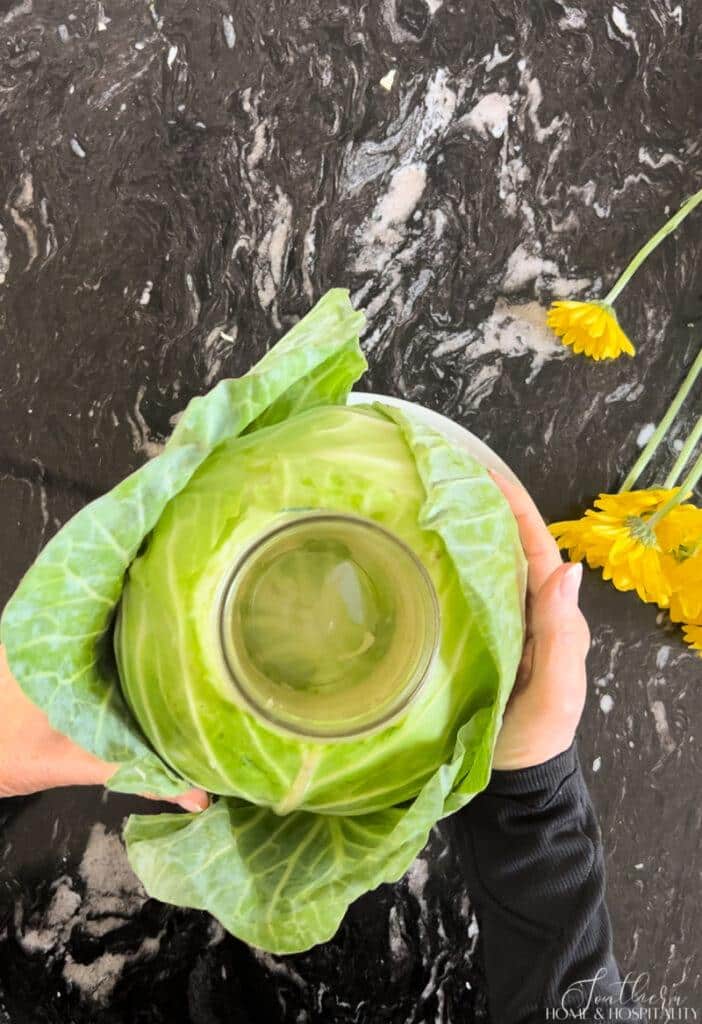
6. When you’ve hollowed out the center of the cabbage all the way through, place the cabbage back on its bottom and push the mason jar into the hole.
I had to test it a couple of times, and go back and carve a little more to make the jar fit.
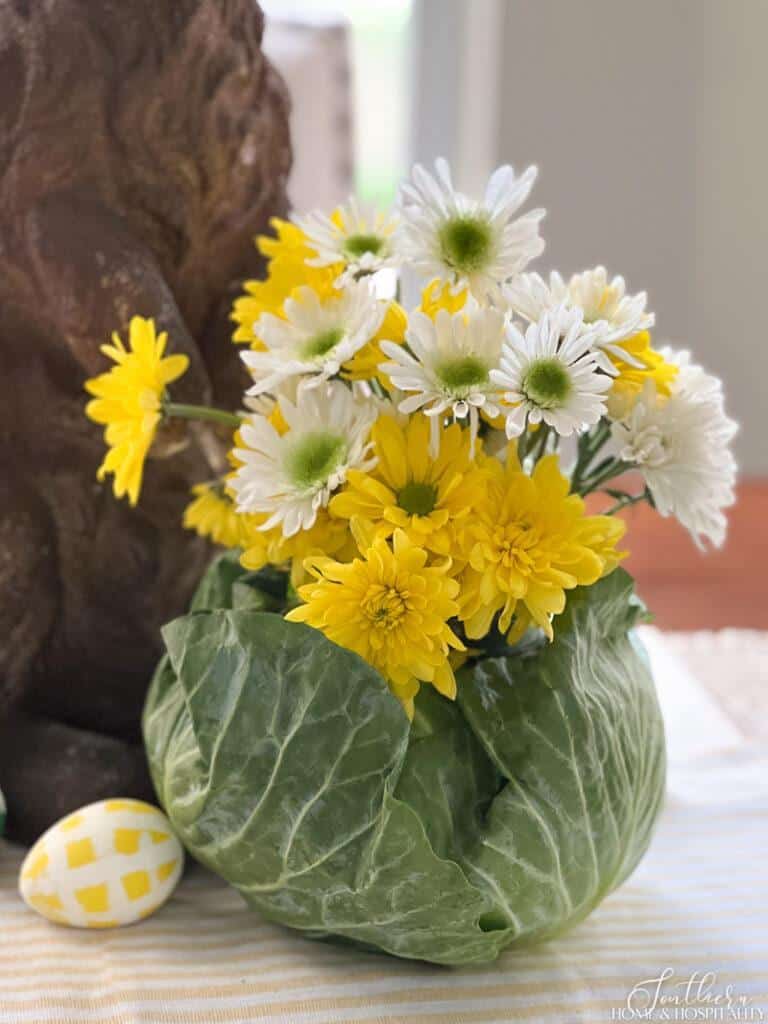
7. Lay out the outer leaves that you set aside and place the cabbage in the middle. Wrap them back around and secure with floral pins. (Or if you don’t have floral pins, bend some floral wire into a “u” shape.)
8. Fill the mason jar with a little water.
9. Arrange your flowers to complete this floral centerpiece, placing shorter flower stems around the bottom edge to cover the top of the mason jar and the cut cabbage edge.
Ideas For This DIY Floral Cabbage Centerpiece.
- Substitute the green cabbage for red cabbage for an even more colorful display.
- Experiment with different flower color combinations. Bright blooms look amazing in this arrangement.
- Accent with greenery for drama.
- Add some parsley for a garden look.
- Mix in carrots complete with green tops for an Easter theme.
- Tuck in some colored Easter eggs.
When to use a cabbage as a flower vase.
It’s not only cute as a button for a spring or Easter tablescape, but would also make a lovely addition for:
- Mother’s Day
- St. Patrick’s Day
- Bridal shower
- Baby shower
- Tea party
- Beatrix Potter or Peter Rabbit theme birthday party
How Long Will a Cabbage Vase Last?

I made this cabbage vase arrangement for my Easter house tour, then wrapped it in a damp paper towel, put it in a plastic grocery bag, and stored it in the fridge.
The two photos above are the cabbage vase five days later and it looked virtually the same for 2-3 hours. The top edges of the outer leaves were the only area that started looking a little less than crisp as the day went on.
My best recommendation if you want to make the cabbage vase ahead of time, is to do it the day before so the outer leaves won’t wilt on you, and store it overnight in a damp paper towel and plastic bag in the refrigerator like I did.
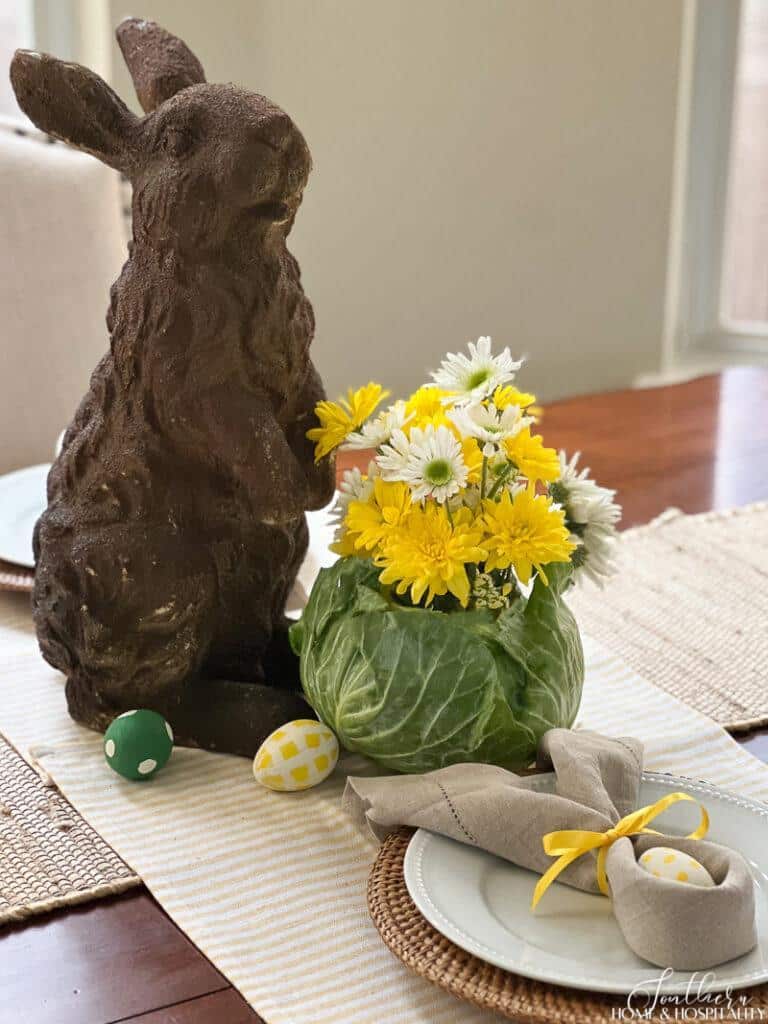
This easy table touch is so adorable, maybe it did charm Peter Rabbit’s pants off (is that why he never has any on with his wee little coat??—sorry couldn’t resist that one😂).

Before you go:
As always, I appreciate your visit, comments, and shares here on the blog! I’d love it if you also follow along with me on Pinterest, Instagram, Facebook, TikTok, and YouTube so you won’t miss any of my inspiration and ideas.
Don’t forget to sign up for updates to keep in touch.
If you’re not already a member of the SH&H family, I’d love to have you join me! You’ll not only get email updates, but you’ll have exclusive access to all the bonus materials in my free subscriber-only library, like this:
Pin it to remember it!
If you’ve enjoyed this post, please pin and share this on Pinterest:
This is the cutest centerpiece idea ever!!! Thank you for sharing!
Thanks Heidi!!
Super cute idea! I love it.
Thank you Renae!
That’s adorable!
Thanks so much Susan!!