

How to Update an Outdated Entertainment Center Without Replacing It

Inside: See how I transformed a dark, dated entertainment center with paint, hardware, wallpaper, lighting, and a few simple styling changes instead of replacing it.
The outdated entertainment center had to go. At least, that’s what I thought when I walked into my “new-to-me” house for the first time.
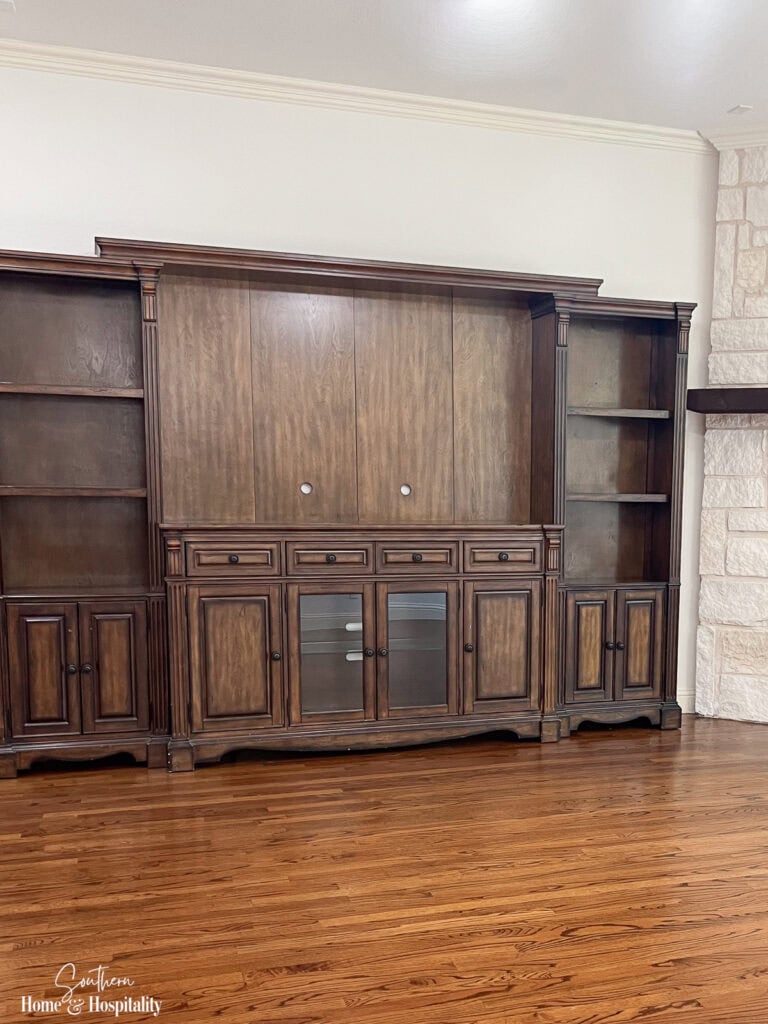
The focal wall of the living room was filled with a very big, very brown, very early 2000s wall unit that had been left by the previous owner. To be fair, it had its good points. It fit the wall perfectly, offered storage (which is always a plus), and was in great shape. But me being me, I just couldn’t get past how dark it was, how dated it felt, and how much it seemed to weigh down the whole area. Every time I walked into the living room, it’s all I could see.
I went back and forth over whether it should stay or go. But the more I thought about it, the more replacing it felt like I was just creating different problems. Custom built-ins weren’t in the budget and a TV console would’ve looked lost on that big wall. This piece was too functional to get rid of just because I didn’t like the old world finish. Besides, who was going to take this outdated mammoth off my hands besides the dump?
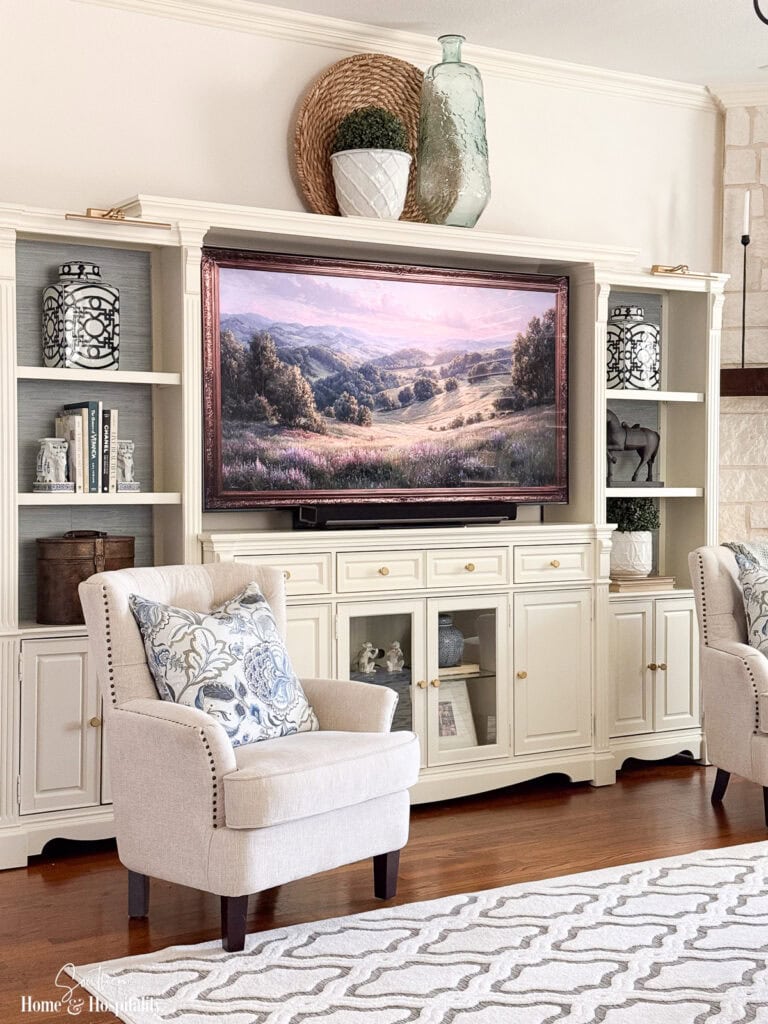
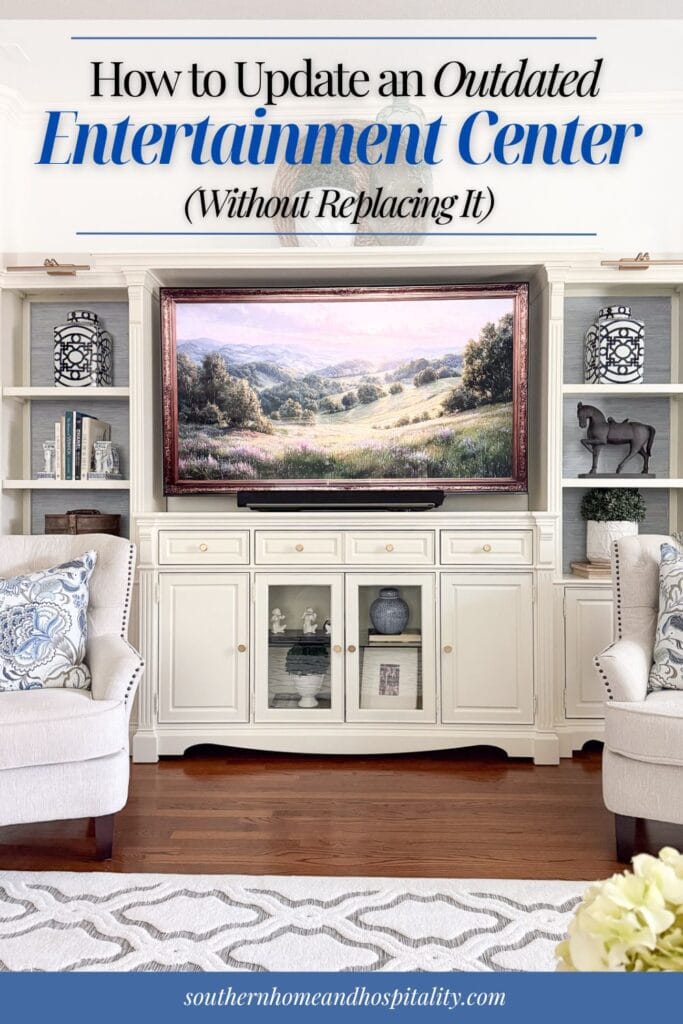
Since I already owned it, I decided to try and make it work with a few affordable updates instead. A coat of paint and new hardware came right away. Most recently, I added peel-and-stick grasscloth wallpaper to the back panels and finished it off with rechargeable picture lights. Looking at it now, I’m so glad I gave it a chance!
If you have an entertainment center, wall unit, or built-ins that make your room feel a little dated, don’t assume replacing them is your only option. Sometimes a little makeover is all it takes to make you see a piece you already own in a completely different way.
This post contains Amazon and other affiliate links for your convenience. As an Amazon Associate I earn from qualifying purchases. If you purchase something through any link, I may receive a small commission, at no extra charge to you. I only recommend products that I love or would purchase for myself. See my full disclosure here.
Can You Update an Outdated Entertainment Center Without Replacing It?
Yes—you absolutely can, and often it makes more sense.
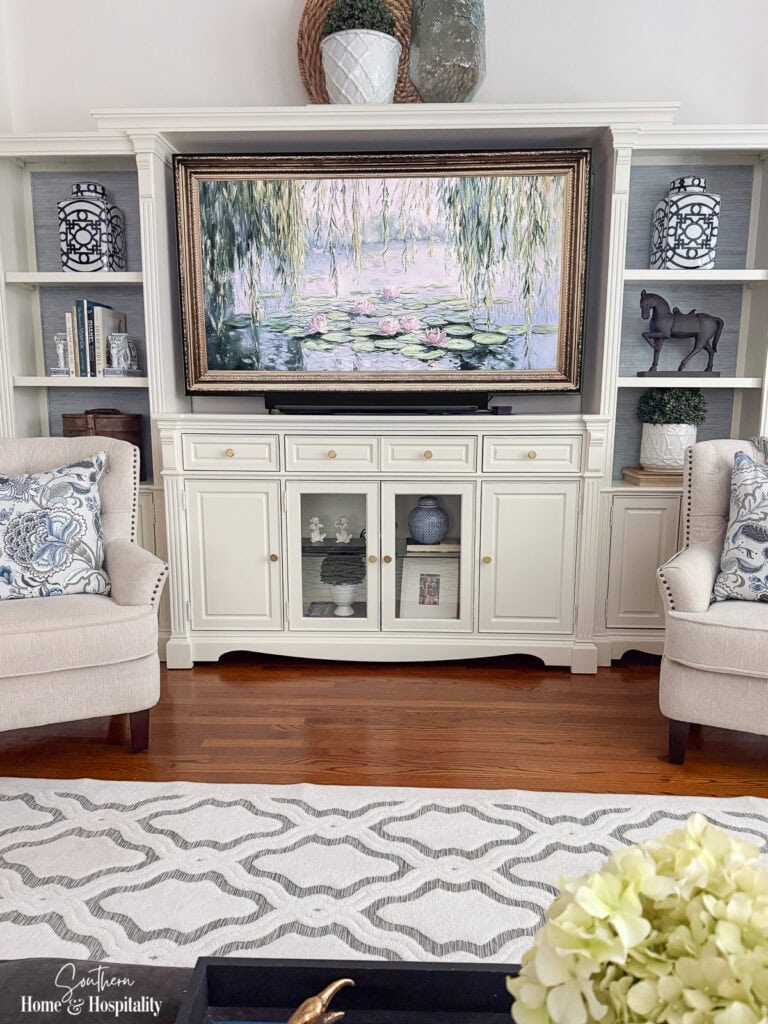
If the structure is solid and it still fits your space, there’s no real need to replace it just because it feels dated. Simple changes like paint, new hardware, wallpaper, lighting, and refreshed styling can completely transform how it looks in the room.
I didn’t want to replace mine with something smaller or invest in new built-ins, so I just began updating it one step at a time. Each change made it look less like the dark entertainment center I’d inherited and more like something that belonged in my home.
By the time I was done, it didn’t look like the same piece at all! If you’re thinking about doing something similar, I’ll walk you through the updates in the order I’d actually do them, because some make a bigger difference than the rest.
1. Paint Your Entertainment Center to Completely Change Its Look.
If you’re only going to make one update, make it paint.
Without question, painting my entertainment center made the biggest difference. Before, all I noticed was this big, dark entertainment center taking over an entire wall:
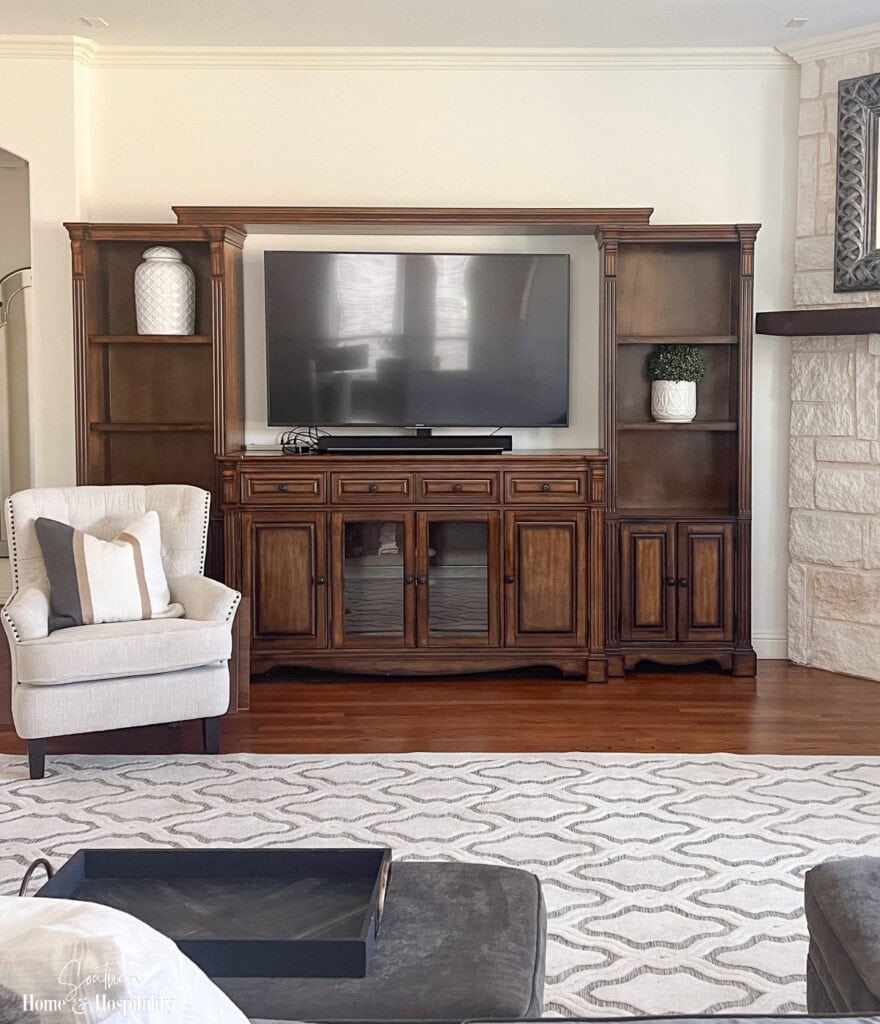
Before painting:
- The dark finish dominated the room.
- It felt like a large piece of old world style furniture.
- My eyes went straight to it every time I walked into the room.
After painting, the piece started blending in with the rest of the room instead of drawing all the attention:
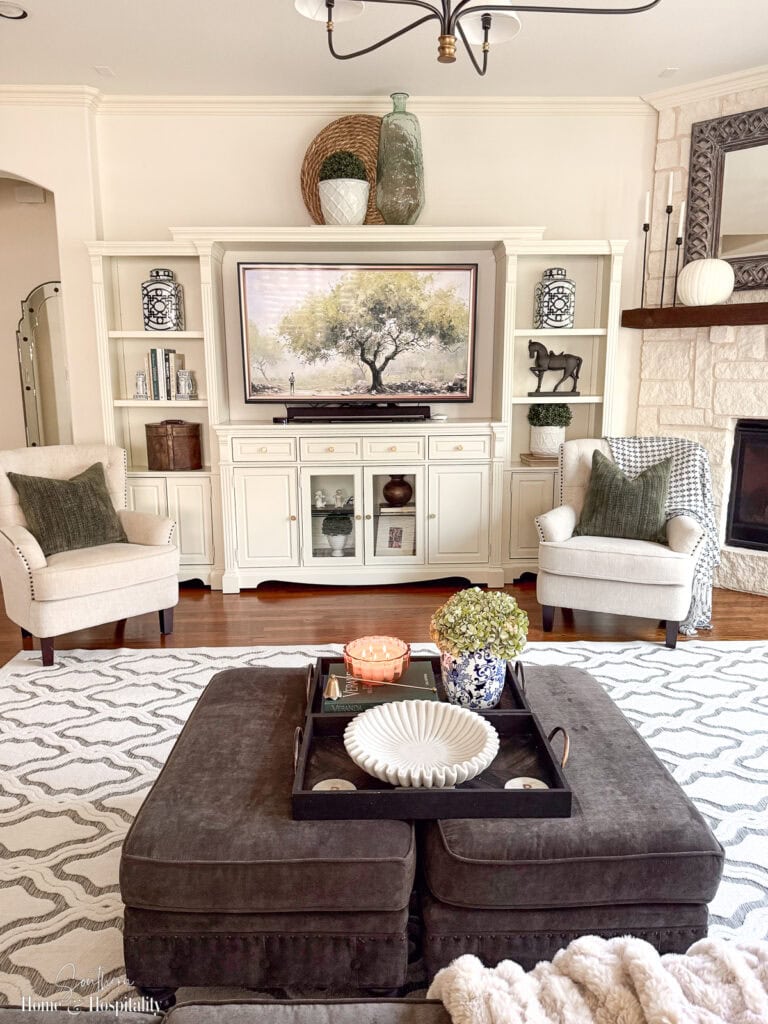
After painting:
- It blended in with the trim and surrounding walls.
- It felt lighter and more like custom built-ins.
- The focus shifted to the room as a whole instead of the entertainment center itself.
Looking back, I probably could’ve stopped right there and already felt like keeping it was worth it. Every update that came afterward just made it a little better.
Why I Painted It the Same Color as the Trim.
One of the best decisions I made was having the entertainment center painted the same color as the trim throughout my house instead of choosing a contrasting color.
My goal wasn’t to turn it into a statement piece. I wanted to mimic the look of custom built-ins and fool the eye a little by taking focus away from the entertainment center itself. It immediately lightened the room and also let the things I actually wanted to be noticed take center stage instead.
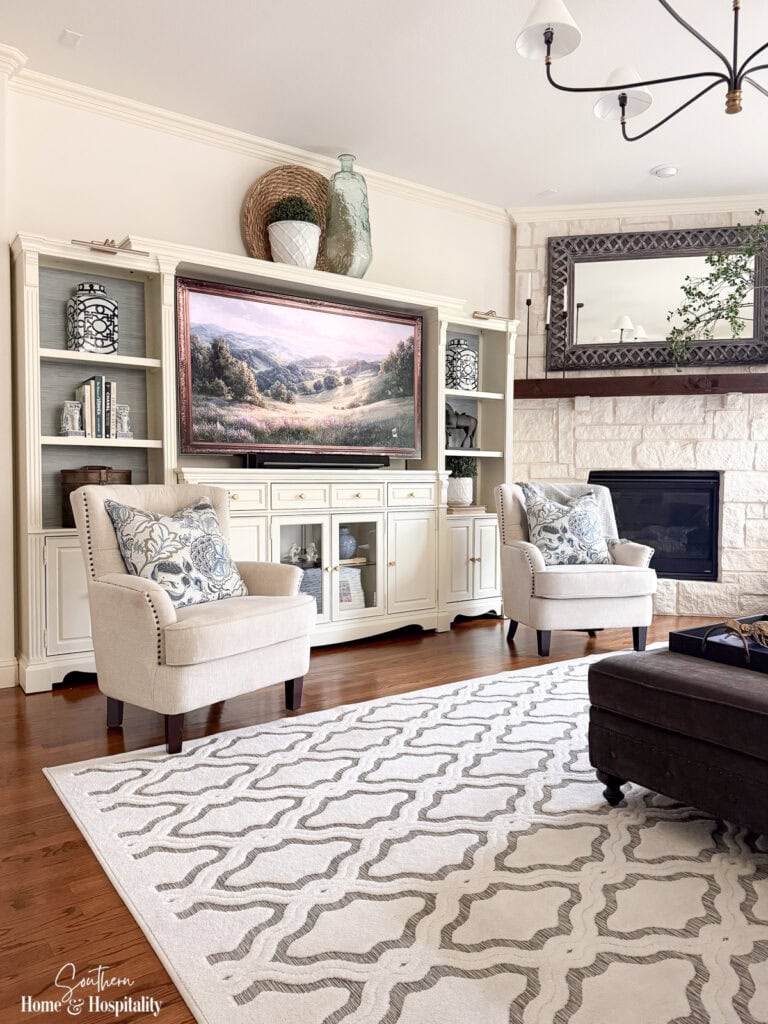
What Color Should You Paint an Entertainment Center?
There’s no single right answer. The best color depends on the look you’re trying to achieve.
- To create the look of built-ins: Paint it the same color as your trim or surrounding woodwork for a seamless, custom appearance.
- To brighten a dark room: A soft white or warm neutral can make the entire space feel lighter.
- To make it a focal point: A deep charcoal, navy, or another rich color gives it the look of a statement furniture piece.
For me, matching the trim was exactly the right choice because I wanted the room to feel lighter and the entertainment center to take a step into the background instead of being the first thing everyone noticed.
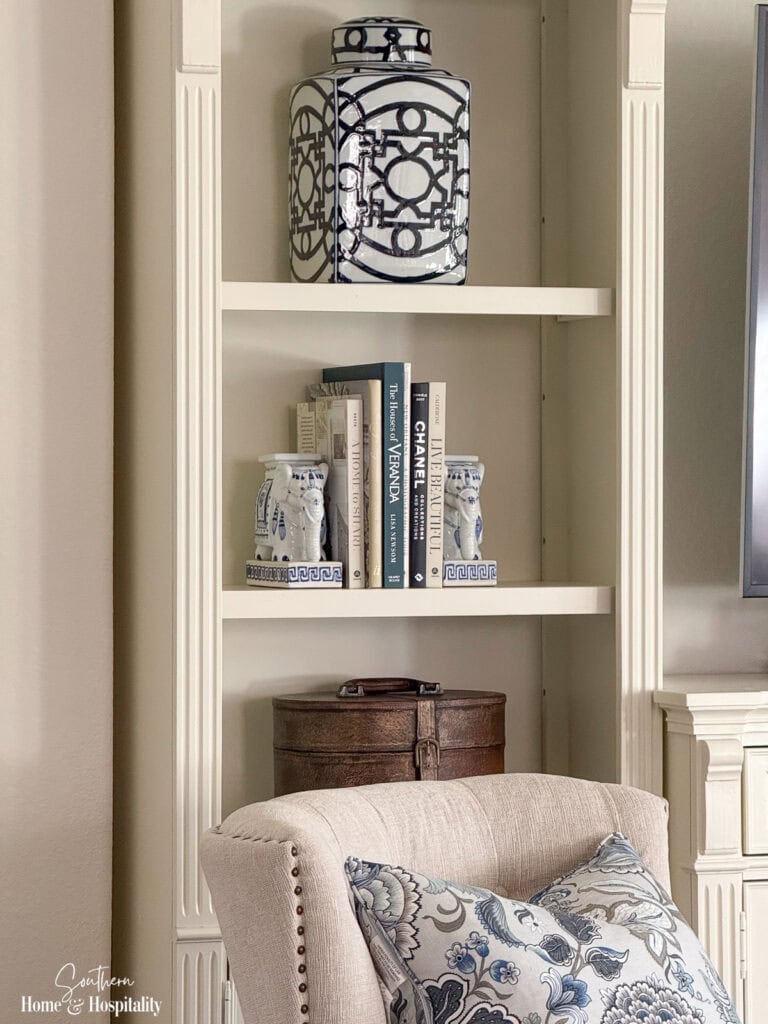
My biggest takeaway: If your entertainment center feels too dark, bulky, or dated, paint is the update I’d spend money on first. It completely changed how I felt about mine and made every other improvement stand out even more.
2. Replace Outdated Hardware for an Instant Update.
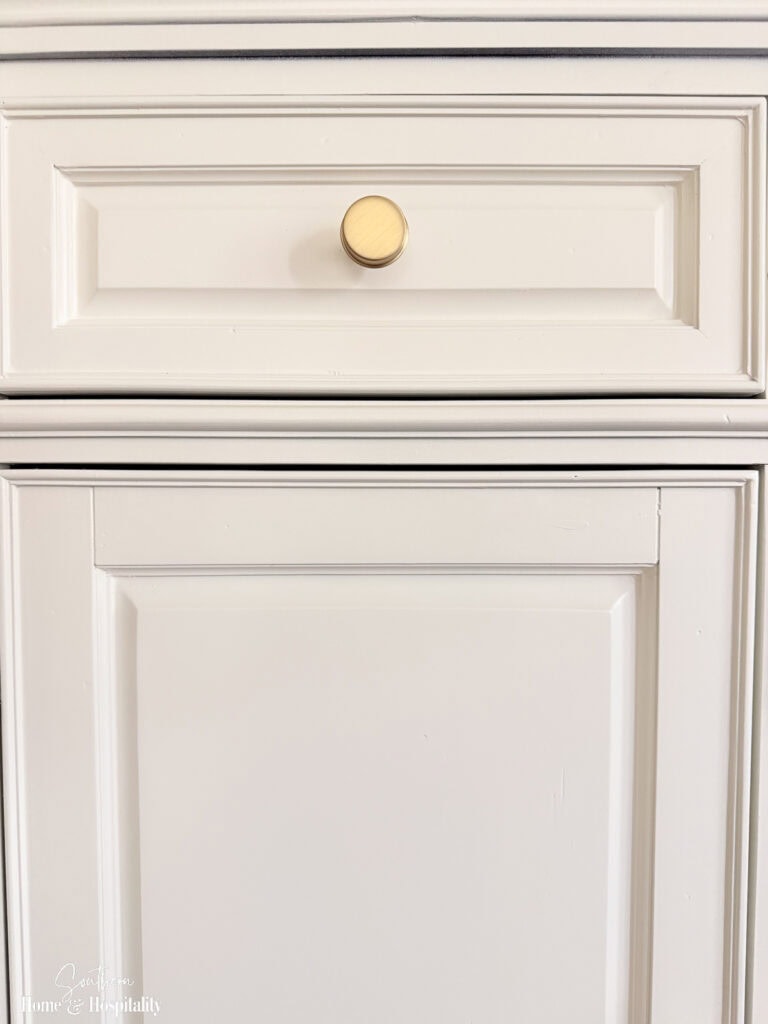
After painting, replacing the hardware was the next change that made the biggest impact. Cabinet hardware is a lot like jewelry for furniture. You might not notice it at first, but you definitely notice what a difference in style the right updated knobs can make.
The original hardware had an ornate, traditional look. It wasn’t terrible, but swapping it for something simpler and more current helped reinforce the cleaner, custom look I was trying to create.
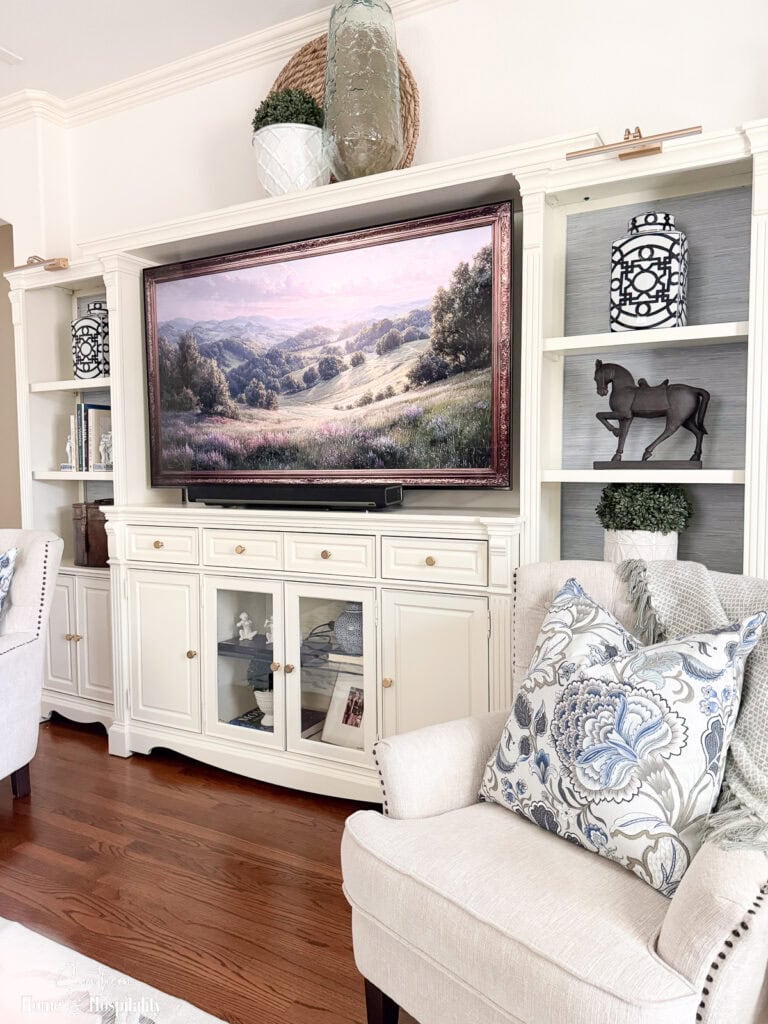
I replaced the original dark knobs with simple brushed gold knobs I picked up at Home Depot. Their clean lines felt much more current, and the warm finish tied in nicely with some of my lighting and other accents in the room. It didn’t cost much, but paired with the new paint, it was exactly the fresh, finishing touch the entertainment center needed.
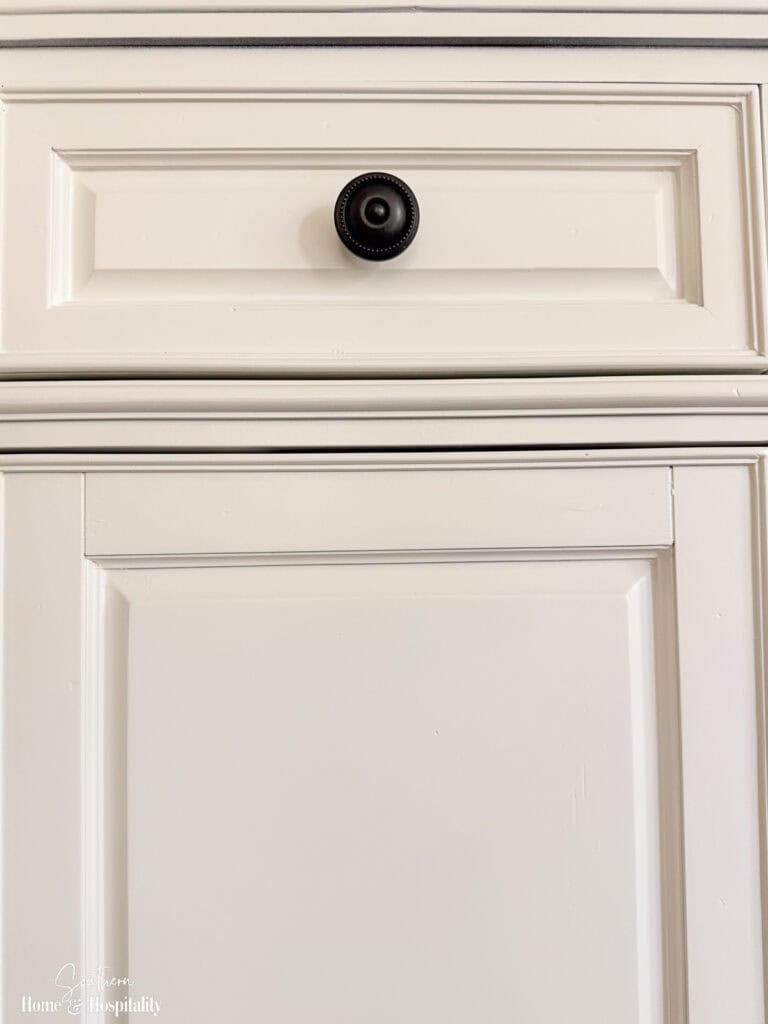
How to Choose New Hardware.
If you’re replacing the hardware on your own entertainment center, think about the overall style of your room before choosing new knobs or pulls.
- For a classic look: Polished nickel, antique brass, or simple black hardware all work well.
- For a modern style: Choose clean lines with minimal detail.
- For a more traditional room: Look for classic shapes, but skip anything overly ornate that might feel dated a few years from now.
If your existing hardware is in good shape but only the finish is outdated, you may even be able to spray paint it instead of replacing it. In my case, new hardware was worth the investment because it brought the style I was after.
My takeaway: New hardware won’t completely change an entertainment center on its own, but after painting, it’s one of those finishing touches that can help change the dated style.
3. Add Wallpaper to the Back Panels for Depth and Interest.
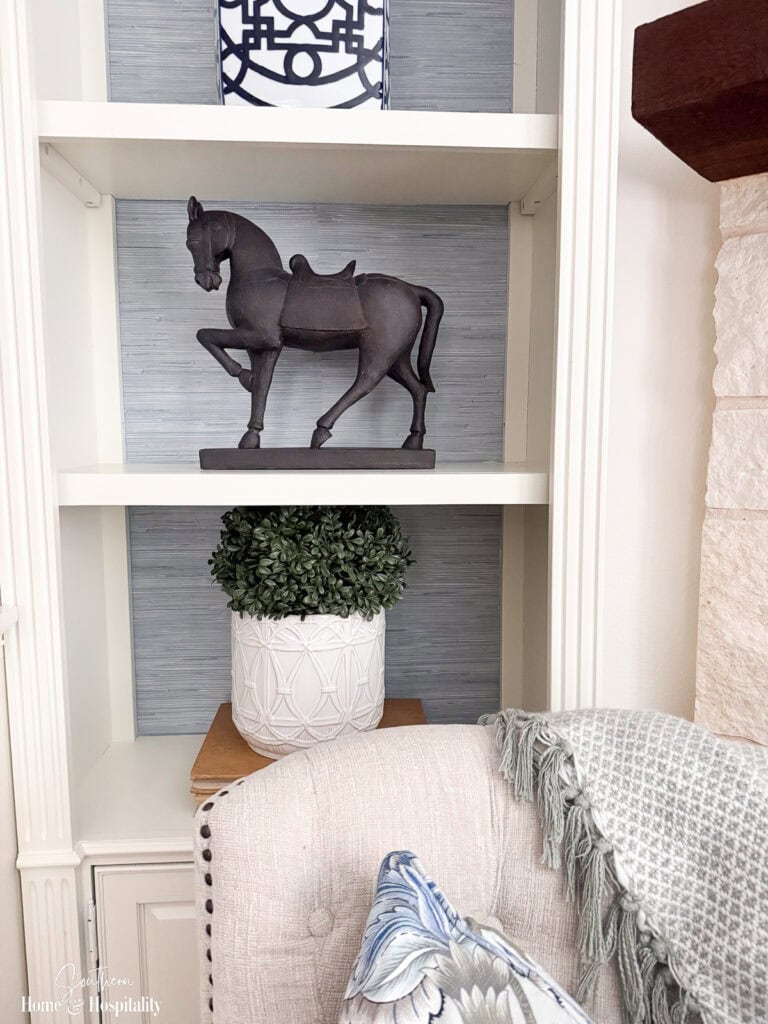
After painting the entertainment center and replacing the hardware, I lived with it that way for quite a while. I loved how much lighter and less dominant it looked, but over time I realized I wanted to add a little interest.
That’s when I decided to line the back panels with faux grasscloth peel-and-stick wallpaper.
It wasn’t a dramatic change, but it gave the entertainment center the layered look I love in traditional decorating. Instead of the shelves feeling like a flat painted backdrop, the wallpaper added warmth, texture, and just enough depth to make the piece feel more custom.
If you’d like to see exactly how I installed it, I shared the entire process in the post, Adding Wallpaper to the Back of Shelves: An Easy Way to Add Depth and Interest.
Why I Chose Faux Grasscloth.
I knew I wanted something timeless that would work with my Southern traditional style. One of the things I like most about grasscloth is that it doesn’t compete with what’s displayed on the shelves. From across the room, you notice the texture more than the pattern, so it creates interest without overwhelming the accessories.
This faux grasscloth has the look and texture of natural grasscloth without the higher price or permanent commitment. Using a peel-and-stick version also meant I could install it myself and change it later if I ever wanted a different look.
Tips for Choosing Wallpaper for Shelf Backs.
If you’re thinking about adding wallpaper to the back of your own entertainment center or bookshelves, here are a few things I’d keep in mind.
- Choose texture over a bold pattern if you want a look that will stand the test of time.
- Order a sample first. What looks perfect on a small swatch can feel very different once it’s covering an entire shelf.
- Think about your decorating style. The wallpaper should support the overall look you’re creating, not become the main attraction.
- Peel-and-stick wallpaper is a great option if you want an easier installation and the flexibility to update it later.
My biggest takeaway: I loved my entertainment center after it was painted, but adding wallpaper to the back panels gave it the extra layer of warmth and character that made it feel truly finished.
4. Add Lighting for a Custom Look.
My recent addition to the entertainment center was a pair of rechargeable picture lights.
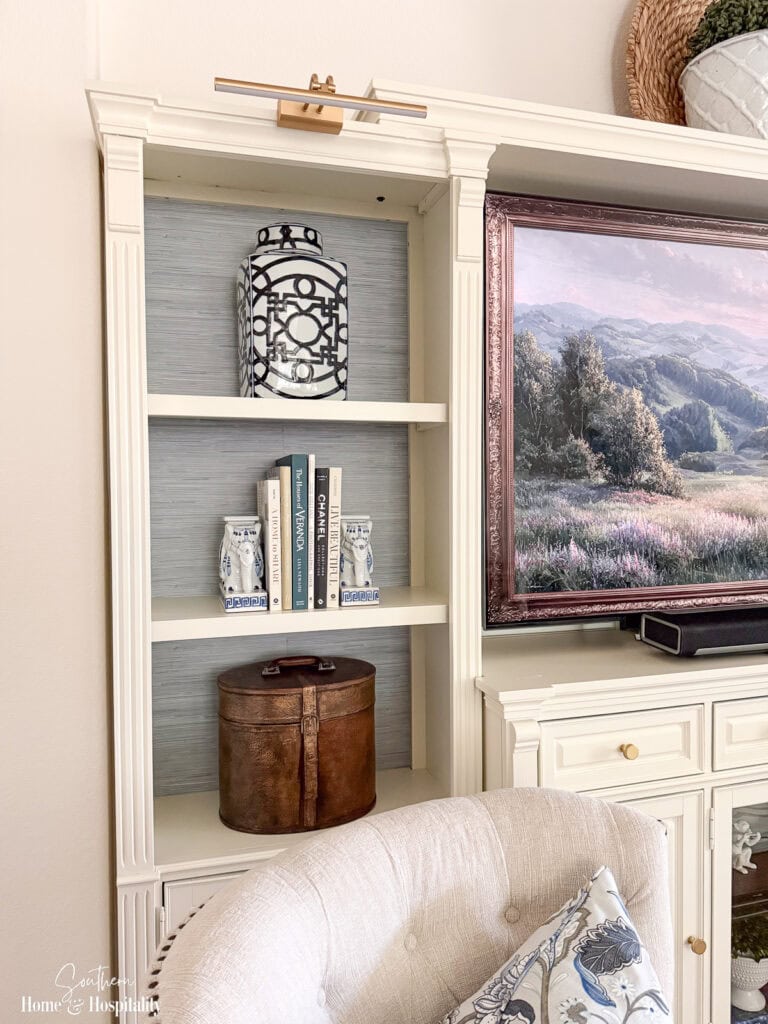
I’ve always loved the look of picture lights over built-in bookcases, but that used to mean hiring an electrician and running new wiring. Thanks to inexpensive rechargeable picture lights, that’s no longer the case.
Time will tell whether they become a permanent part of the entertainment center, but for now I’m enjoying the change. I attached them with Command Picture Hanging Strips instead of screws, so I can live with them for a while before deciding whether they’re here to stay. Just like the peel-and-stick wallpaper, I like knowing I’m not permanently committed.
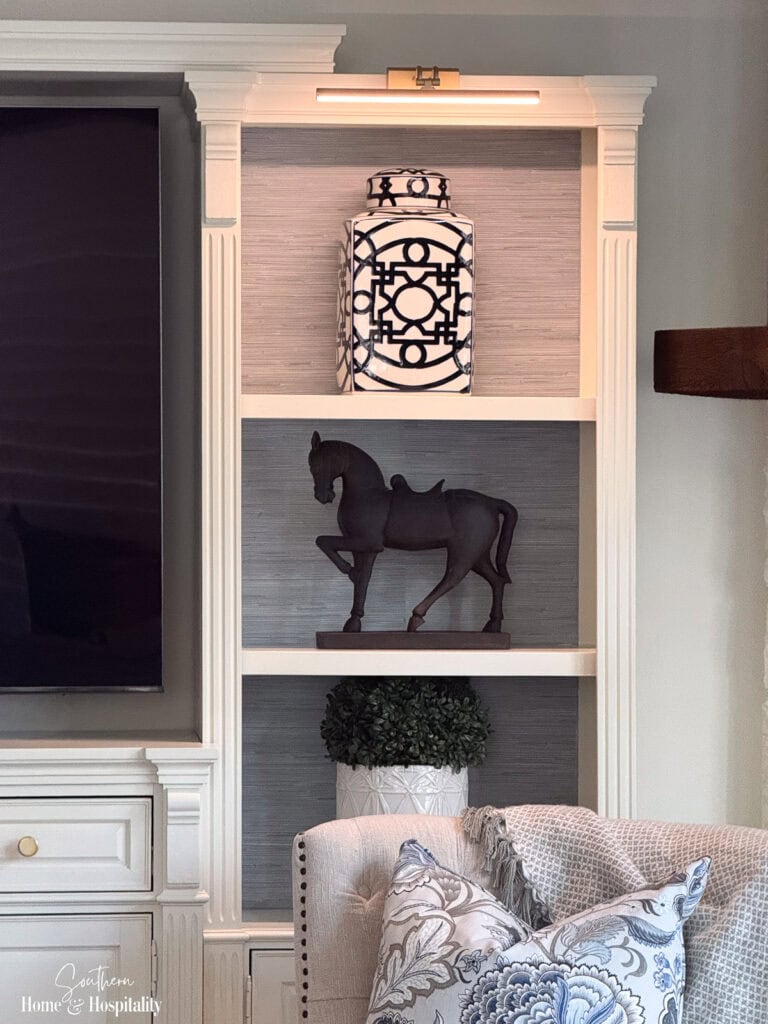
Other Ways to Add Lighting to an Entertainment Center.
Picture lights aren’t the only option if you’d like to glow up an outdated entertainment center.
- Rechargeable puck lights tucked under shelves can spotlight decorative accessories.
- LED strip lighting works well if you prefer a cleaner, more modern look.
- Battery-operated accent lights are another simple option that doesn’t require wiring.
- A table lamp placed on an open shelf or beside the entertainment center can add another layer of light and help balance the room.
The best choice depends on your decorating style, your budget, and how subtle or dramatic you’d like the lighting to be.
My takeaway: Lighting isn’t a must, but it’s another way to personalize an entertainment center and give it a more custom look.
5. Style the Shelves Like a Decorator.
Once the entertainment center itself is updated, the accessories are what give it personality.
For me, that meant choosing just a few select accessories from what I’ve slowly collected over the years and enjoy looking at, rather than trying to fill every inch of space. They reflect my Southern traditional style with a mix of blue and white pottery, books, leather, greenery and other favorites to create a layered, casual look.
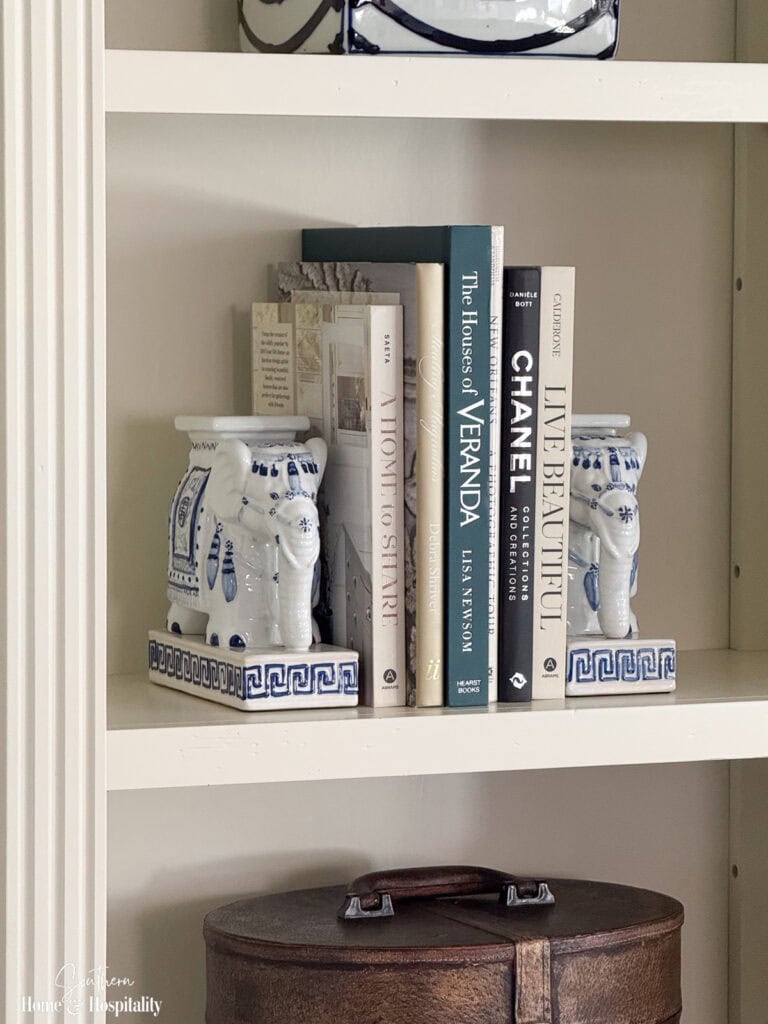
How to Style Entertainment Center Shelves.
When I’m decorating shelves, these are the things I keep in mind.
- Start with larger pieces first. Artwork, baskets, or larger vases help anchor each shelf.
- Layer instead of lining everything up. Lean a framed print behind a vase or place a small decorative object in front of a stack of books.
- Leave empty space. A little breathing room helps each grouping stand out.
- Mix materials. Combining pottery, wood, metal, glass, greenery, and books creates more interest than using all one material.
- Vary the heights. If everything is the same size, the shelves can look boring.
- Create a little contrast. Mix light and dark pieces and weave in a few accent colors so everything doesn’t blend together.
- Decorate with things you actually love. Family heirlooms, favorite books, travel finds, and collected pieces are more interesting than shelves filled entirely with brand-new decor with no connection to who you are.
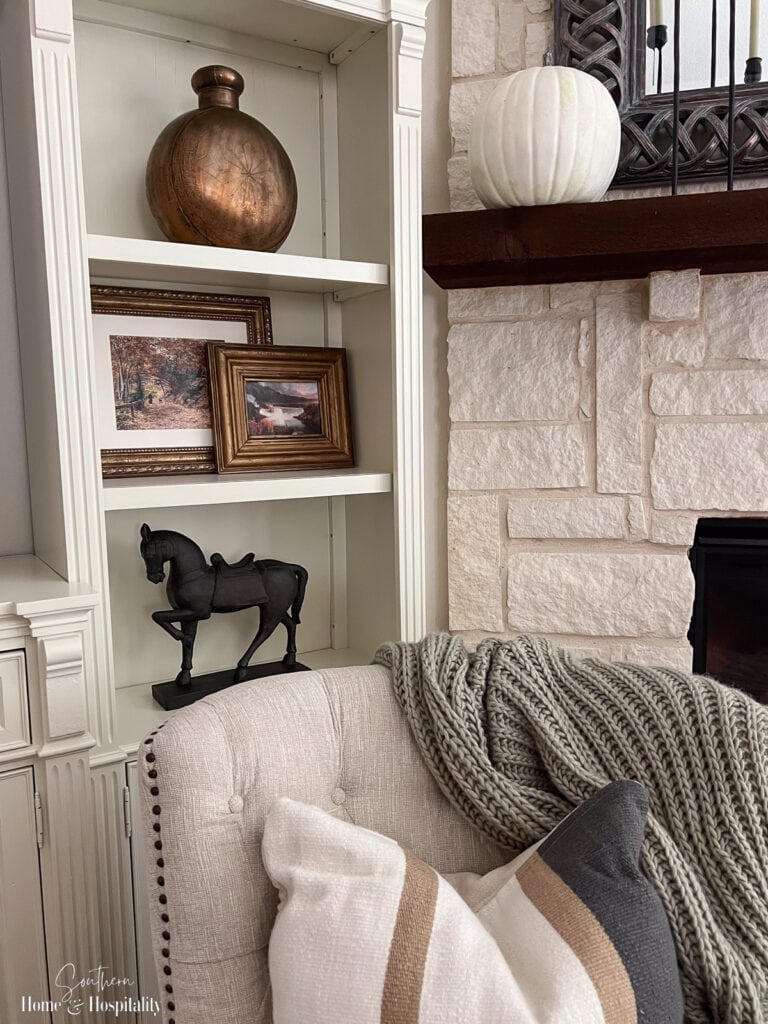
My takeaway: A beautifully styled entertainment center isn’t about acquiring more decor. It’s about arranging the pieces you already love in a way that gives each one a chance to shine.
Other Easy Ways to Update an Entertainment Center.
If paint, hardware, and wallpaper still don’t give you the look you’re after, here are a few other ideas to consider.
- Remove decorative appliqués or trim for a cleaner, simpler look.
- Add decorative molding to flat cabinet doors for a more custom look.
- Add feet or a furniture base to give a more custom furniture appearance.
- Install cabinet lighting or LED strip lights inside shelves.
- Swap adjustable shelves for thicker wood shelves.
- Replace the back panel with beadboard or tongue-and-groove planks instead of wallpaper.
- Turn the TV opening into display space if you no longer use it for a television.

Frequently Asked Questions:
Are entertainment centers still in style?
Traditional dark oak entertainment centers aren’t as popular as they once were, but that doesn’t mean they have to look outdated. Many homeowners are updating existing entertainment centers with paint and modern finishes so they resemble custom built-ins or wall units that fit in with today’s decorating styles.
Can you modernize an old entertainment center?
Yes! In many cases, an older entertainment center can be completely transformed without replacing it. Paint, updated hardware, wallpaper, new lighting, and thoughtfully styled shelves can give a dated piece a much more current look.
How do you make a large entertainment center look less bulky?
A few simple changes can make a big difference. Painting the entertainment center a light color or the same color as your trim or walls helps it blend into the room.
What can I do with an old entertainment center instead of throwing it away?
If the piece is well built, consider giving it a makeover before replacing it. You can update it with paint and new hardware, convert it into a display cabinet or bookcase, use it for storage, or repurpose it as a coffee bar, craft cabinet, or pantry in another room.
How much does it cost to update an entertainment center?
Simply replacing hardware is an inexpensive project. Adding wallpaper, lighting, and accessories can be affordable depending on what you choose. And while professionally painting an entertainment center is expensive, it’s still less than replacing it with custom built-ins.
What should I put on entertainment center shelves?
A combination of books, baskets, pottery, greenery, artwork, and meaningful decorative items usually creates the most collected look. Rather than filling every shelf, vary the heights and textures of your accessories and leave a little open space so each grouping has room to stand out.
If you’re stuck looking at an older entertainment center and wondering whether it’s worth saving like I was, I hope this gives you a few ideas before you decide to haul it away.
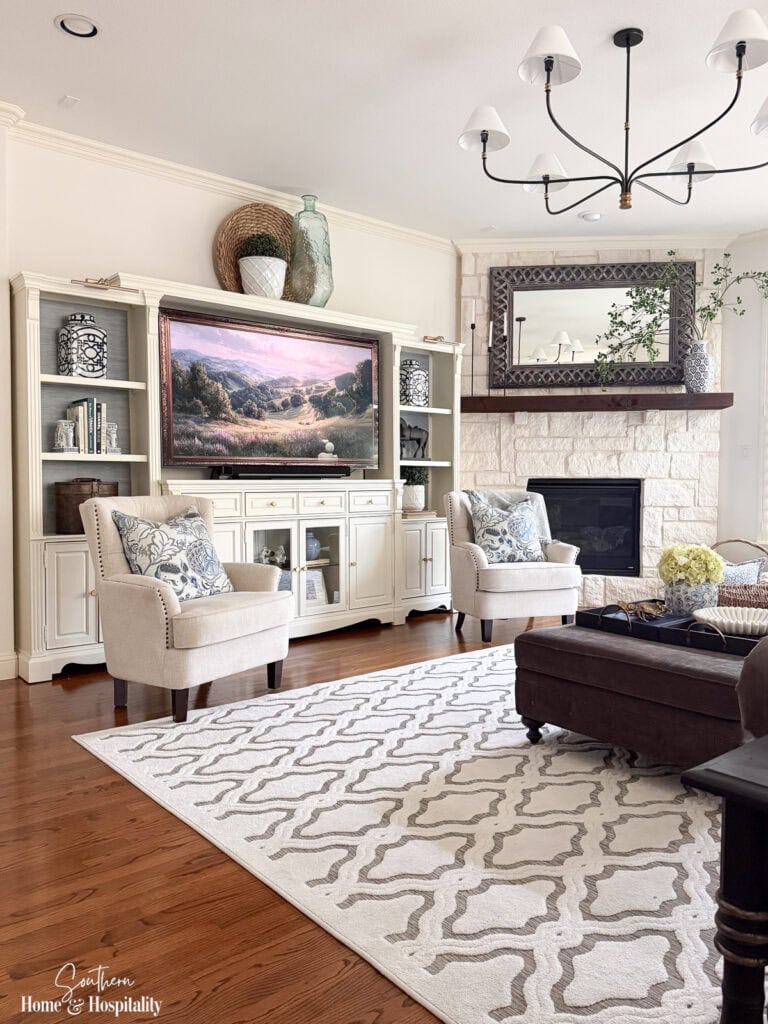
When I first walked into my house, I couldn’t imagine keeping this entertainment center. It felt dark, dated, and completely wrong for the style I wanted. After the updates, I can now see the room as a whole, and the brown wall unit that I was so laser focused on before is just another fixture in the background along with the walls, flooring, and cabinetry.
Turns out, the entertainment center only needed a makeover…and my thinking did too!

Before you go:
As always, I appreciate your visit, comments, and shares here on the blog! I’d love it if you also follow along with me on Pinterest, Instagram, Facebook, TikTok, and YouTube so you won’t miss any of my inspiration and ideas.
Don’t forget to sign up for updates to keep in touch.
If you’re not already a member of the SH&H family, I’d love to have you join me! You’ll not only get email updates, but you’ll have exclusive access to all the bonus materials in my free subscriber-only library, like this:
Pin it to remember it!
If you’ve enjoyed this post, please pin and share this on Pinterest:
Is that a TV? How did you makeover that?
It is a TV showing art from YouTube! In person it looks more lit up like TV would.
Love it!
Trying to talk the hubs into letting me have our old entertainment center for our Kitchen. Would be Perfect for storage and still let light thru for down into the den:)
Thanks Sue! It’s hard to just get rid of something just to buy something else for the same purpose!!
I love what you’ve done with your entertainment center. It’s beautiful, Kate! You always have so many great ideas!
Thank you, that’s so nice to hear!!
WOW! Beautiful!
Thank you for that nice comment!