

Adding Wallpaper to the Back of Shelves: An Easy Way to Add Depth and Interest

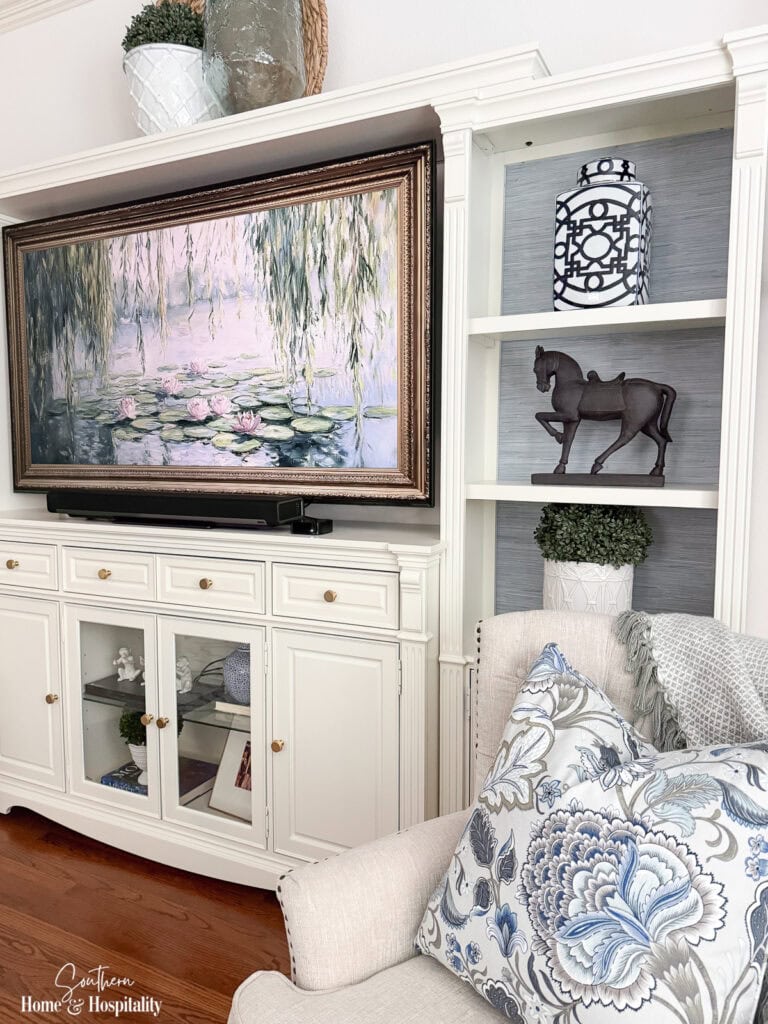
Inside: See how I used peel-and-stick grasscloth wallpaper on the back of my shelves to add depth, texture, and a more custom look to a hand-me-down entertainment center.
This post contains Amazon and other affiliate links for your convenience. As an Amazon Associate I earn from qualifying purchases. If you purchase something through any link, I may receive a small commission, at no extra charge to you. I only recommend products that I love or would purchase for myself. See my full disclosure here.
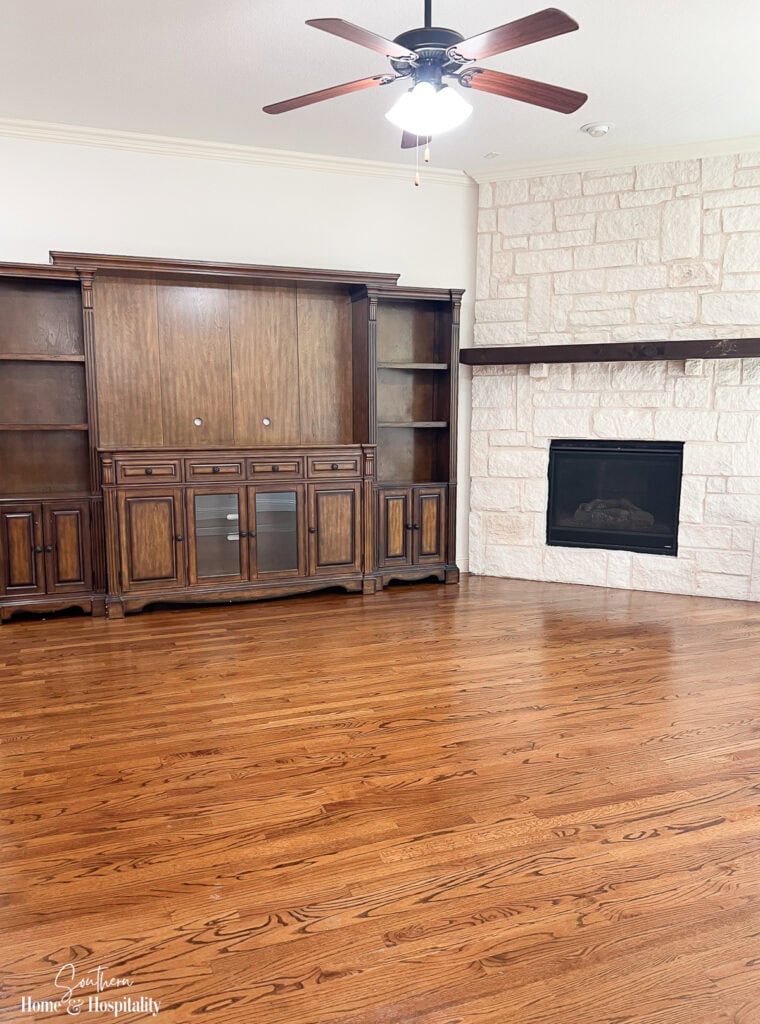
When I bought this house, it came with a giant brown entertainment center that took up most of the living room wall.
But…. it also happened to fit perfectly, provide plenty of storage, and give me bookshelves to decorate. And as someone who has never met shelves she didn’t want to style, that last part made me decide to adopt it as my own.
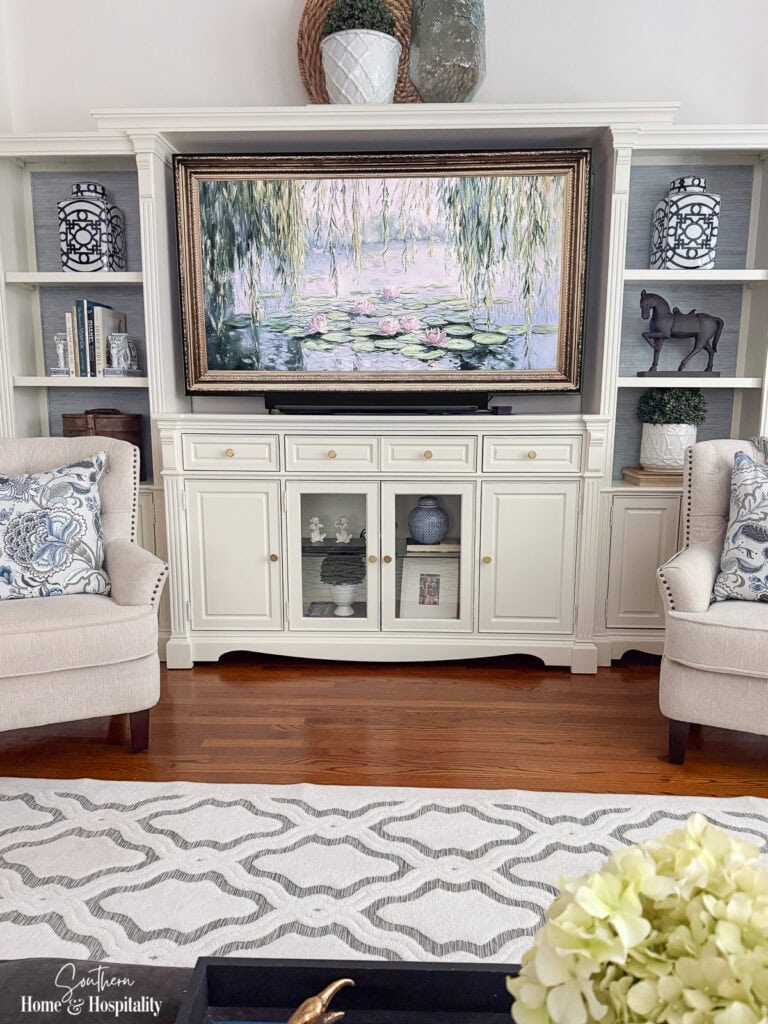
I’ve since painted it the trim color to make it appear a little more “built in” and replaced the hardware. And those shelves have given me a place to add personality to a room that doesn’t have many surfaces to decorate.
Even after those updates though, I felt like the wall unit could use a little something. The accessories were fine, but everything seemed to lack depth because the entertainment center and the walls were all the same color.
After seeing wallpaper used on the back of bookshelves and built-ins for years, I decided this piece might be the perfect place to finally give it a try.
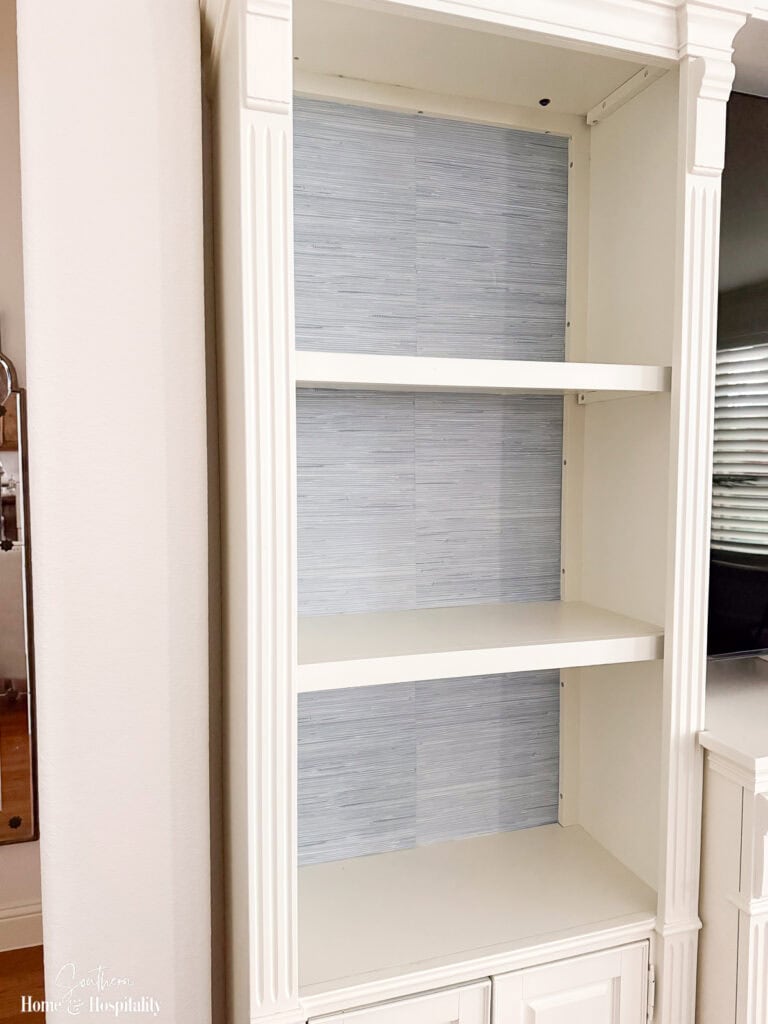
I chose a peel-and-stick faux grasscloth wallpaper in a neutral grayish blue because I wanted interest without a bold pattern. And because this was my first wallpaper project, I also liked knowing that if things went terribly wrong, I could peel it right back off and pretend the whole thing never happened.
Thankfully, that turned out not to be necessary.
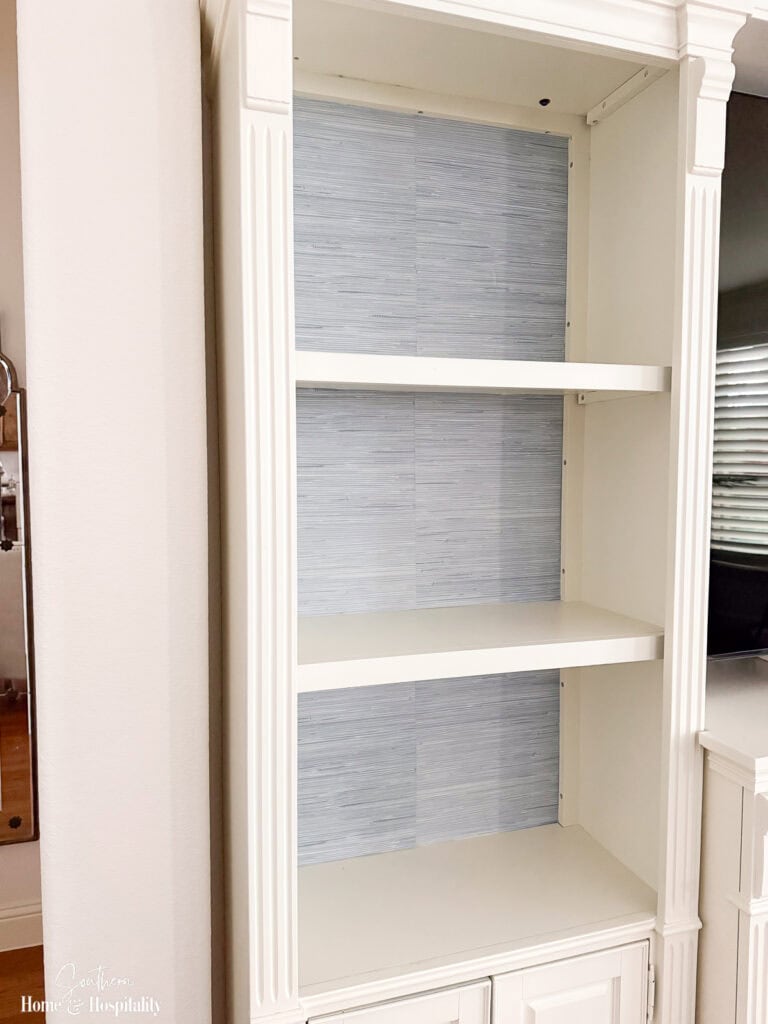
The finished result is subtle, but this little update makes everything on the shelves stand out more and gives the entire piece a more custom, layered look.
The One Thing That Almost Stopped Me From Doing This Project.
What almost talked me out of this project was when I realized my wallpaper wasn’t wide enough. Each shelf opening measures 23.5 inches wide, but the wallpaper I chose was only 20.5 inches wide. The project would take twice as long and I’d have to deal with a seam. As someone attempting this for the first time, that felt less than ideal.
Thankfully, the textured pattern of the faux grasscloth ended up disguising it surprisingly well! Unless you’re standing right in front of the shelves looking for it, the seam practically disappeared once the shelves were styled.
How to Add Peel-and-Stick Wallpaper to the Back of Shelves.
One of the things I liked most about this project was that it didn’t require many supplies or special tools.
Supplies Needed:
- Peel-and-stick faux grasscloth wallpaper (this Seagrass Mist is the exact wallpaper I used)
- Measuring tape
- Metal yardstick or straightedge
- X-Acto knife
- Plastic scraper or smoothing tool
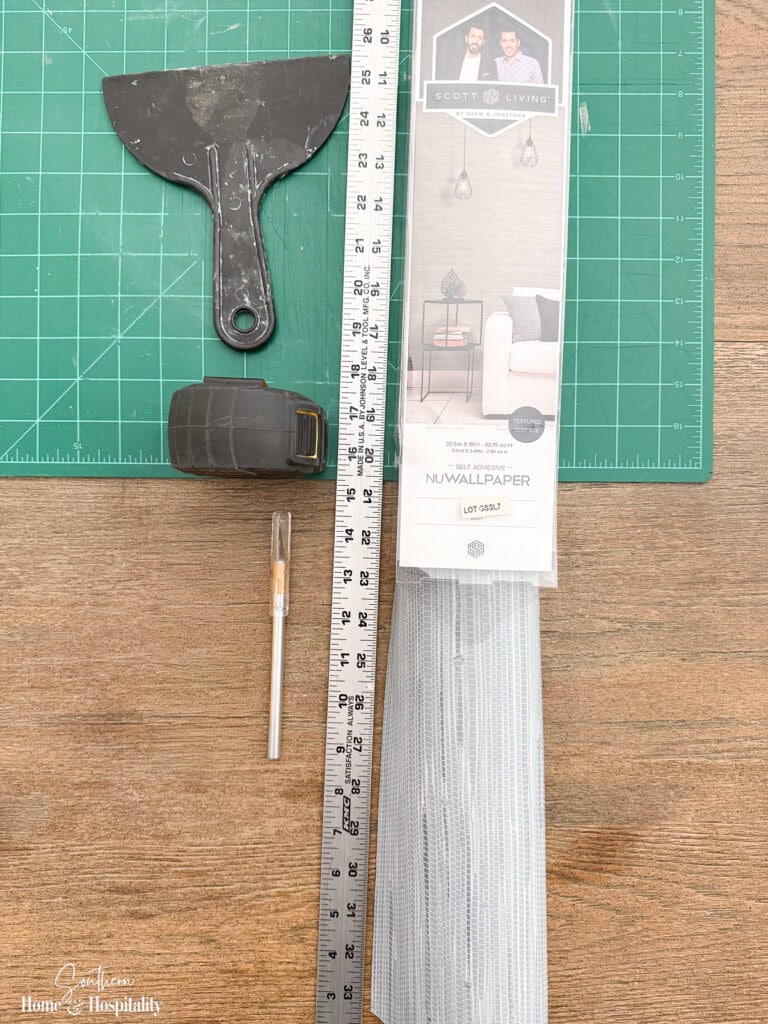
Step 1: Measure the Shelf Openings.
Before measuring, I wiped down the shelf backs to remove any dust and debris so the wallpaper would adhere properly. Then I measured the width and height of each shelf opening.
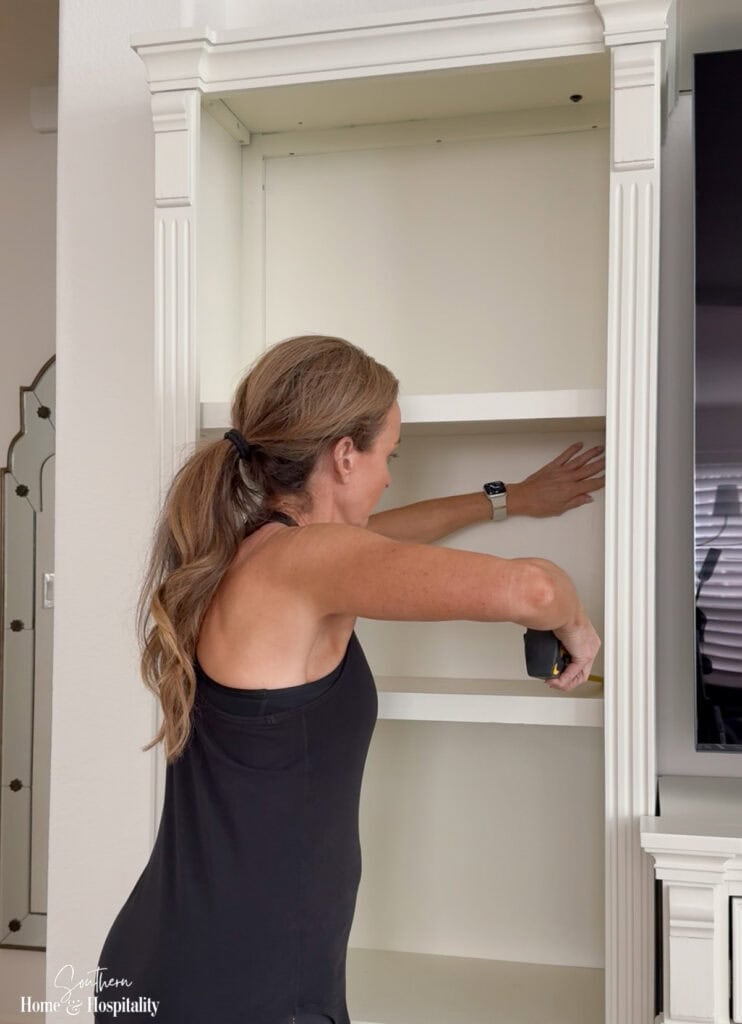
SH&H Tip: Don’t assume furniture or built-ins are perfectly square. Taking a few extra minutes to measure each opening is much easier than discovering you’re short on wallpaper after you start installing it.
Step 2: Cut the Wallpaper.
Before cutting anything, I had to decide where the seam would fall. Since each of my shelves required two pieces of wallpaper, I chose to place the seam in the center so it would look more intentional.
I cut each piece about 1/2 inch larger than the shelf opening on all sides. That extra material gave me a little room for adjustment and allowed me to trim for a cleaner fit after installation.
Using a metal ruler as a guide, I measured and marked the wallpaper on the backing paper side before cutting. An X-Acto knife and cutting mat made it easy to create clean, straight cuts.
Rather than trying to cut through the wallpaper in one pass, I made several light passes with the knife until it cut completely through. The edges turned out much cleaner that way and there was less slippage of the knife or ruler.
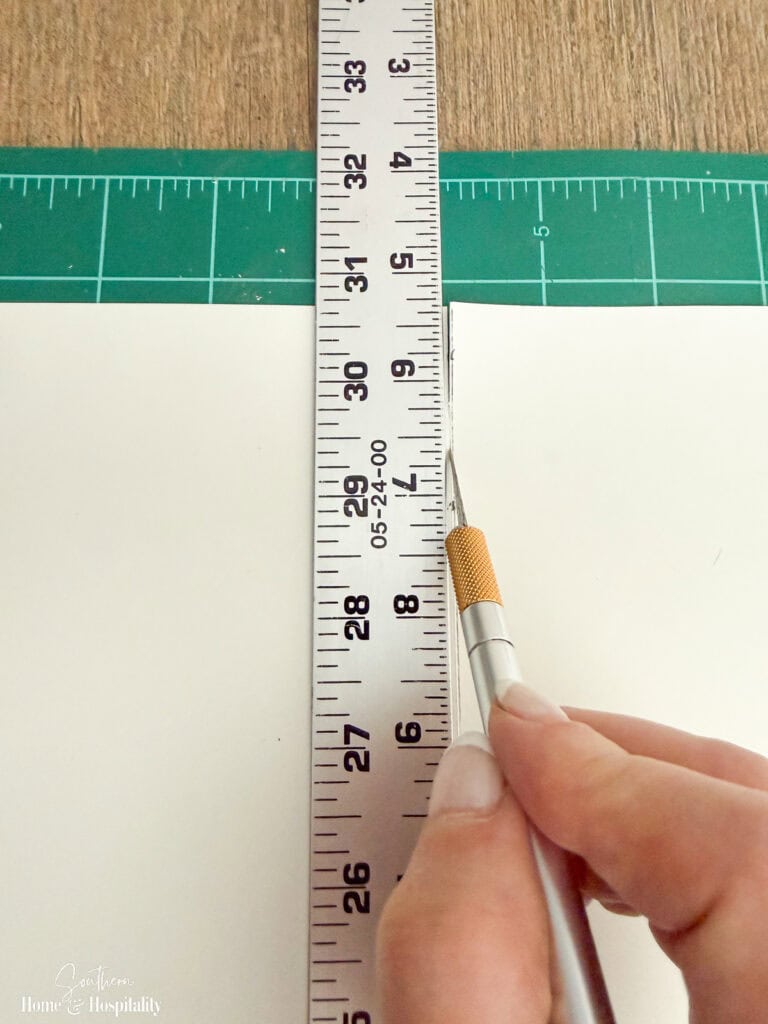
As I cut the wallpaper, I labeled the back of each piece so I could keep track of which shelf it belonged to and which edge would be used at the seam. Since the factory-cut edges are the straightest, I placed those together in the center and saved the trimmed edges for the outside of the shelf opening.
Step 3: Apply the First Piece.
Once everything was cut, it was time for the part I had been dreading.
I removed the backing paper and positioned the first piece on the shelf back, started at the center seam and worked outward. Using a plastic scraper, I smoothed the wallpaper as I went to help remove air bubbles and wrinkles.
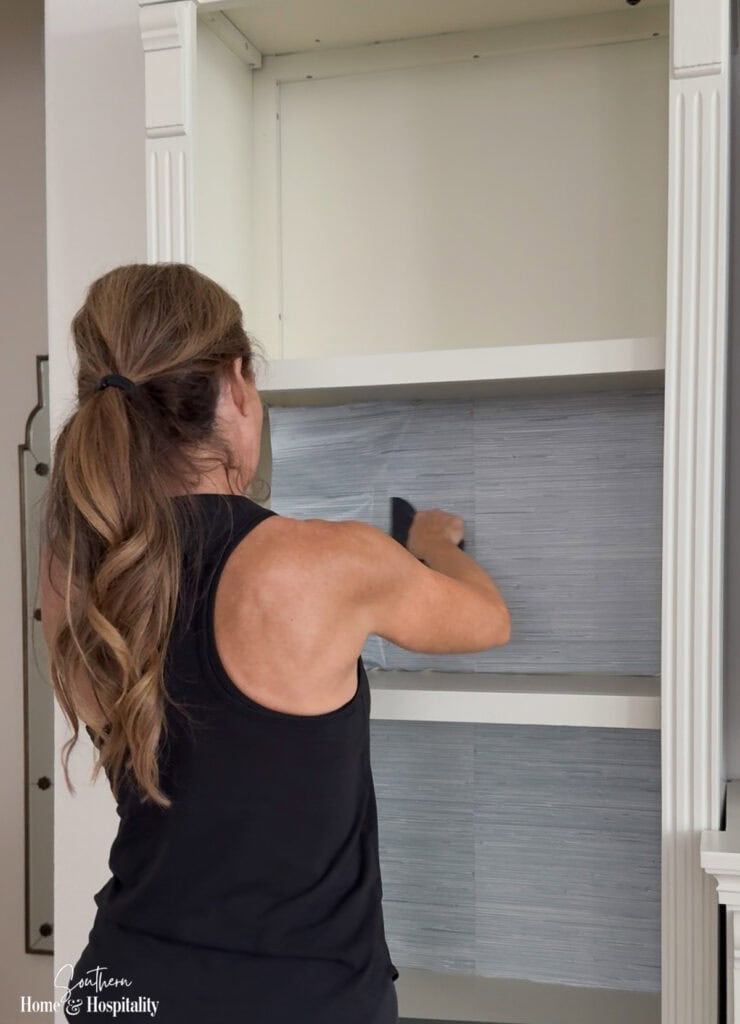
Don’t worry if it isn’t perfect the first time. I had to pull sections back and smooth them out more than once before I was happy with the placement. Fortunately, I found peel-and-stick wallpaper is very forgiving.
Step 4: Add the Second Piece.
After the first piece was in place, I repeated the process with the second piece and carefully aligned the seam in the center of the shelf.
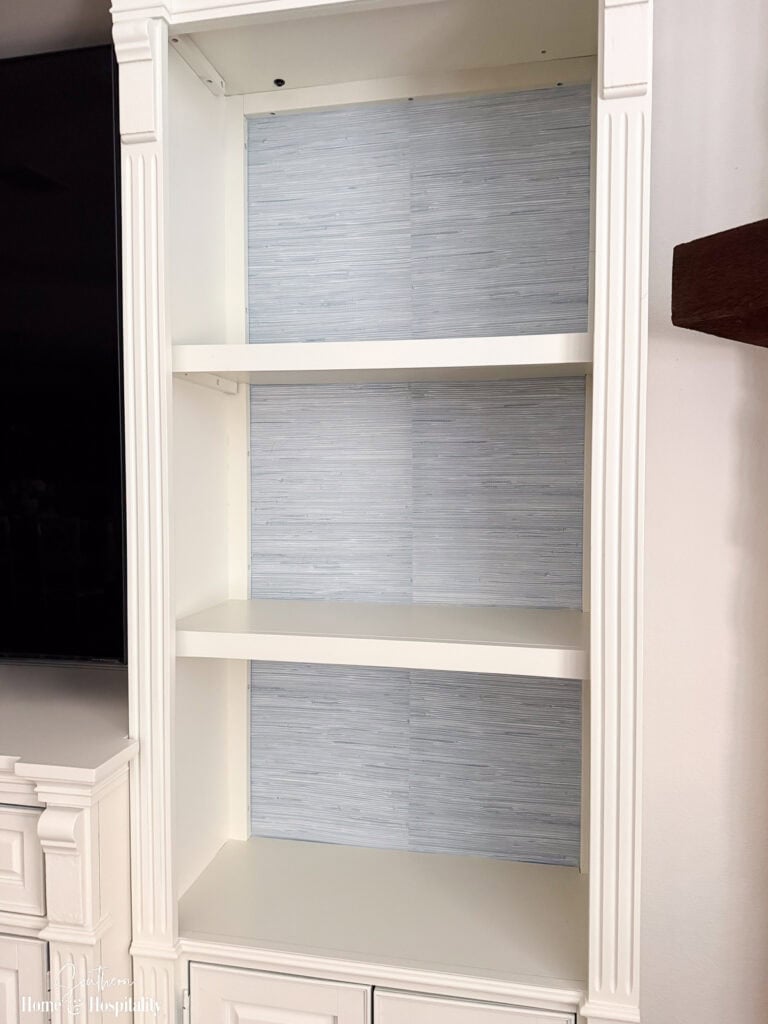
This was the part I was iffy about, but the faux grasscloth texture did a great job disguising the seam. Up close you can see it, but from normal viewing distance with accessories in front, you don’t really notice it.
Step 5: Trim the Excess.
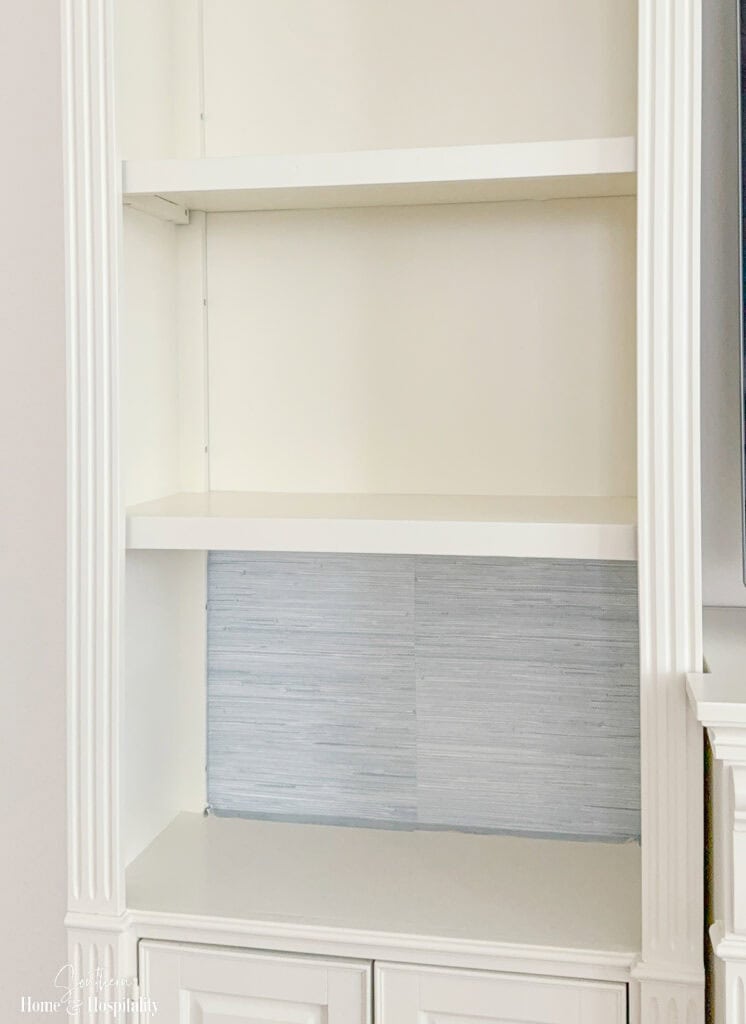
After both pieces were installed, I used the X-Acto knife and a smaller ruler to trim the excess wallpaper around the outer edges. Take care not to cut into your shelving—X-Acto knives are sharp.
Step 6: Repeat for the Remaining Shelves.
Like many DIY projects, the first section took me the longest. That’s where I figured out the best way to position the wallpaper, smooth out bubbles, and align the seams. The remaining shelves were mostly a matter of repeating the same process.
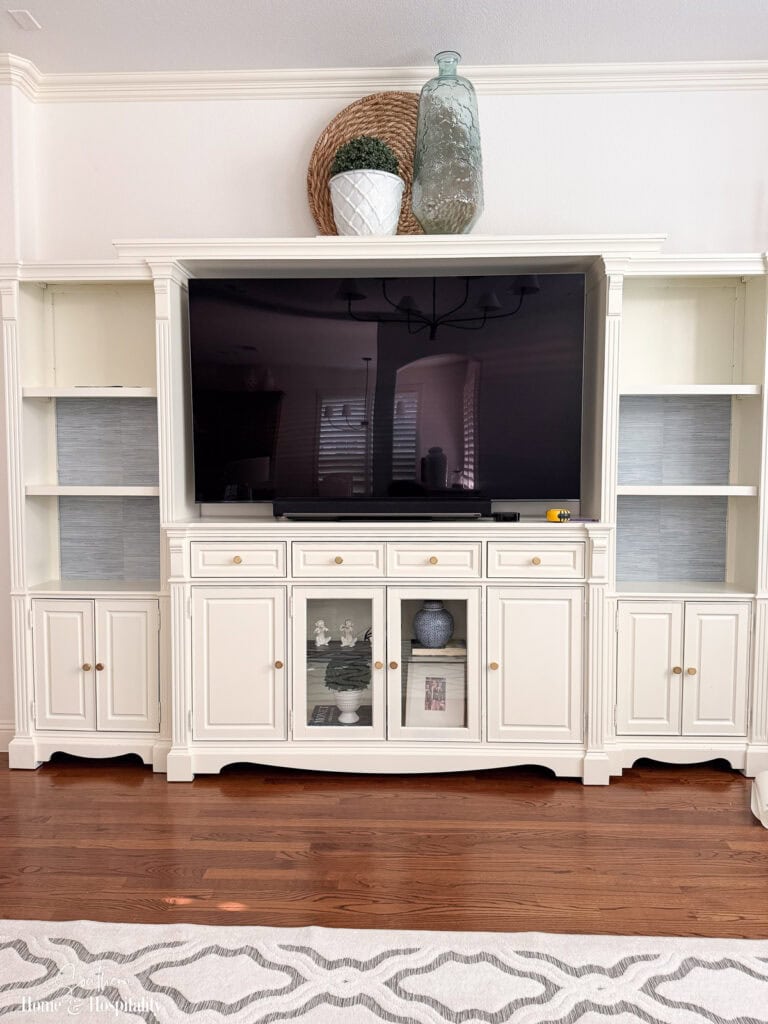
Step 7: Style the Shelves.
Once the wallpaper was installed, all that was left was putting everything back where it belonged.
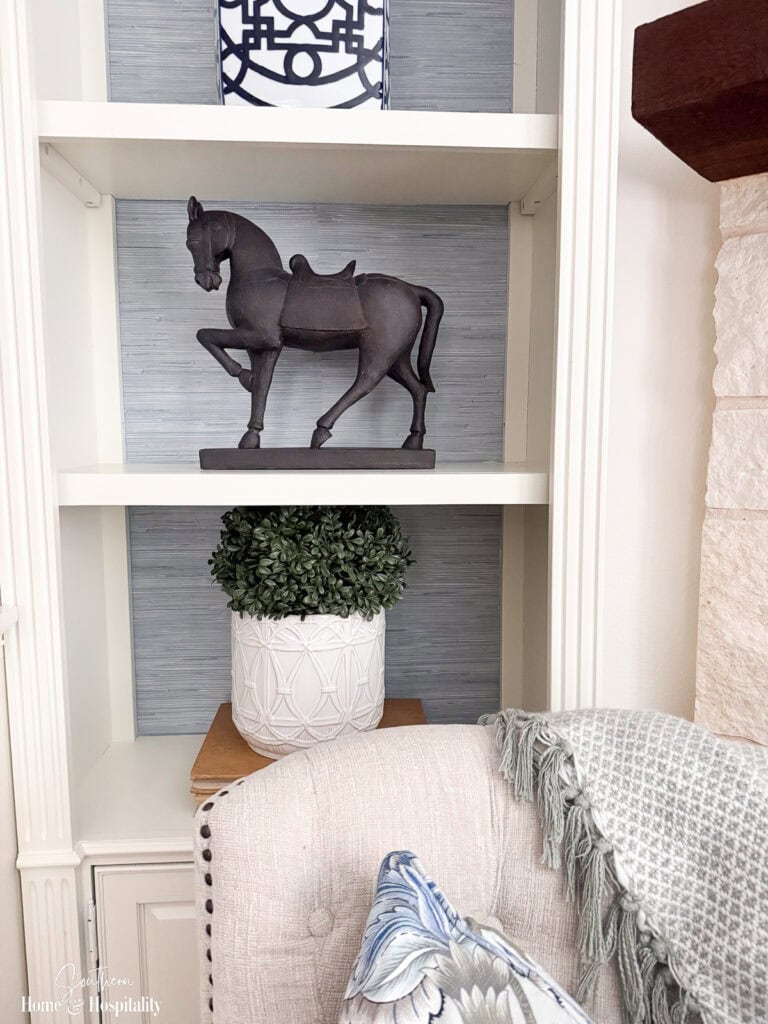
This is when I really started to see the difference. The books, horse, pottery, and blue-and-white accessories stood out more against the textured background, and the shelves immediately felt more layered and curated.
Bookshelf Wallpaper Before and After.
Looking at the before and after photos together, the difference is more noticeable than I expected.

Adding the faux grasscloth wasn’t some big “wow” moment that transformed the room, nor was it intended to. Instead, it gave the shelves a little more interest and helped the books, baskets, and decorative accessories stand out.
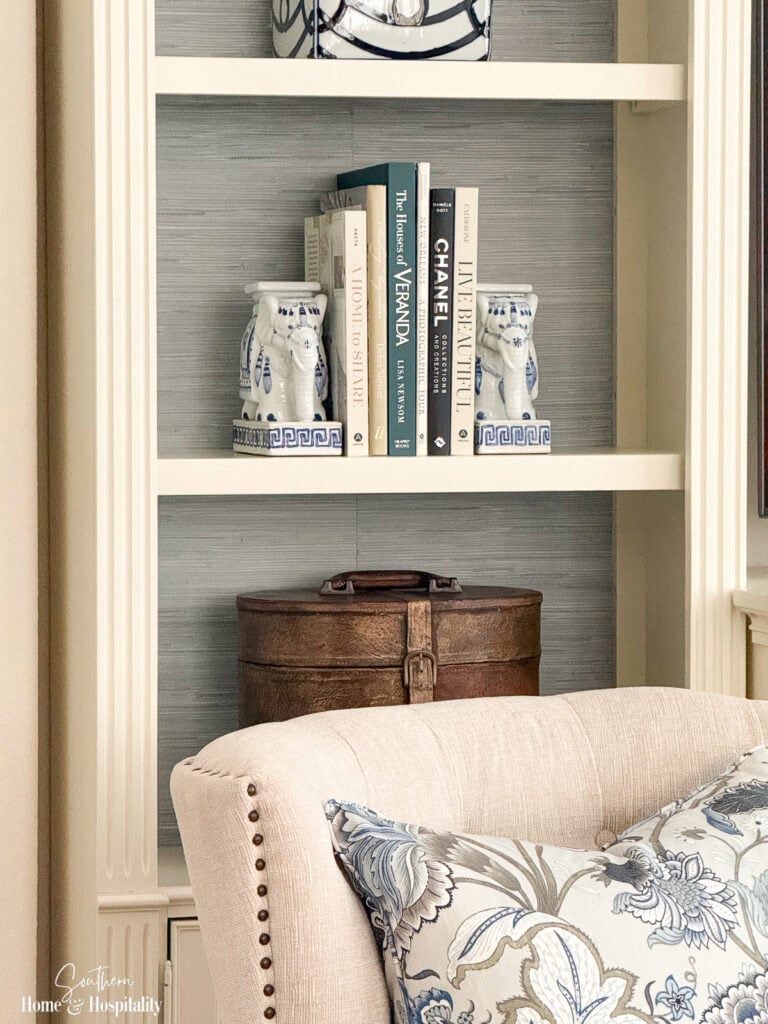
What surprises me most is how much difference a simple textured background can make. The shelves still feel uncluttered and neutral, but they no longer look quite as flat.
Is Wallpaper on the Back of Shelves Worth It?
For me, the answer is yes.
Not because the wallpaper itself is particularly dramatic, but because it was such an easy way to upgrade this entertainment center.
The same accessories I had in the shelves before now stand out more against the textured background, and the items in front just feel more special—like they have more presence.
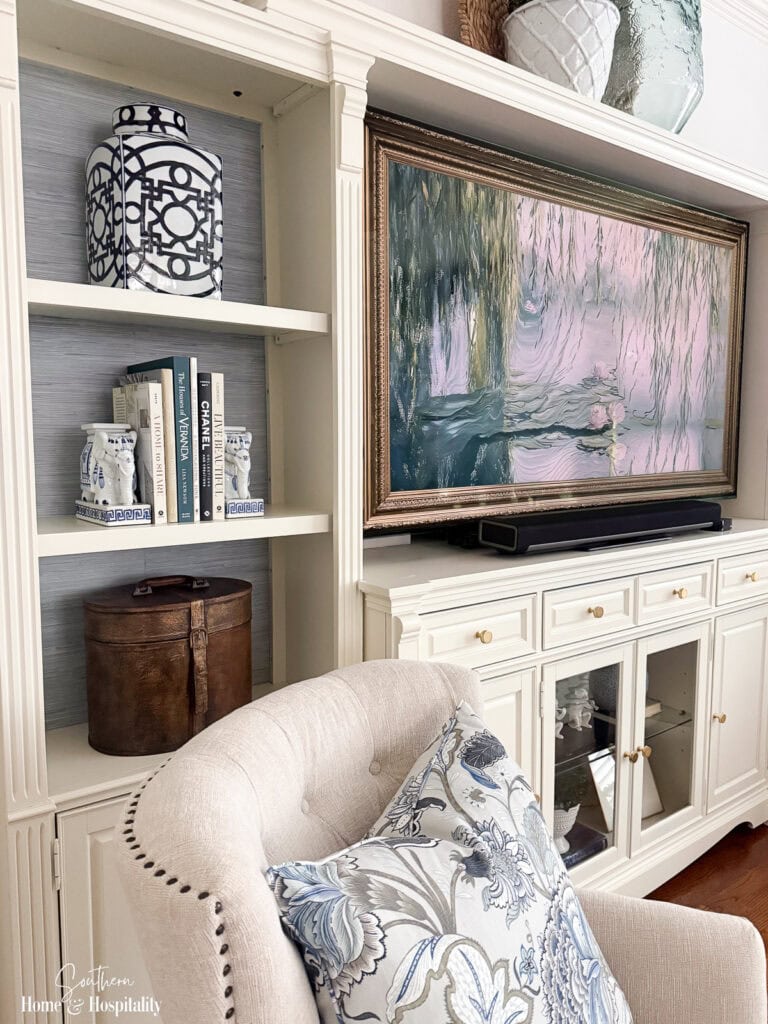
I was a bit concerned this wallpaper would come out too “blue” and draw too much attention. But after it was up, I was so pleased by its soft, neutral color.
If you’re considering wallpapering the back of bookshelves, built-ins, or an entertainment center, I’d absolutely do it again. It’s a relatively inexpensive project, it’s beginner-friendly, and you can knock it out in an afternoon.
I’d have to say this hand-me-down entertainment center is fitting in more and more around here.

Before you go:
As always, I appreciate your visit, comments, and shares here on the blog! I’d love it if you also follow along with me on Pinterest, Instagram, Facebook, TikTok, and YouTube so you won’t miss any of my inspiration and ideas.
Don’t forget to sign up for updates to keep in touch.
If you’re not already a member of the SH&H family, I’d love to have you join me! You’ll not only get email updates, but you’ll have exclusive access to all the bonus materials in my free subscriber-only library, like this:
Pin it to remember it!
If you’ve enjoyed this post, please pin and share this on Pinterest:
This project deserves an A+! I’ve been thinking about doing the same thing to built-in shelves in our keeping room. I don’t even know if I have them styled correctly. The gray blue color would also work for us, as the rug has some gray-aqua in the pattern. Peel and stick wallpaper is wonderful. I used it as a backsplash in the kitchen because the frame around the appliance garage would not allow for the depth of tiles. It’s too bad that a scrubbable type is not yet made, ( to my knowledge). I also wish that a peel and stick wallpaper was made with a Pacific cloth side, to line a silver closet. Using spray glue, I’m gluing Pacific cloth to my measured and cut pieces of peel and stick regular wall paper. I was torn between buying the cheapest wallpaper I could find, or one that I knew would peel safely. I’ll let you know how this project turns out. Don’t expect this information anytime soon.. For now, it’s a back burner project.
Thank you for sharing your decorating and design life with us. This sort of thing has always interested me. i wish you lived closer so you could see our house and I could get your input. Your tastes are similar to mine and your blog is delightful!
I’d love to hear how your project turns out when you get around to it. Thank you so much for the kinds words today Mary!💗