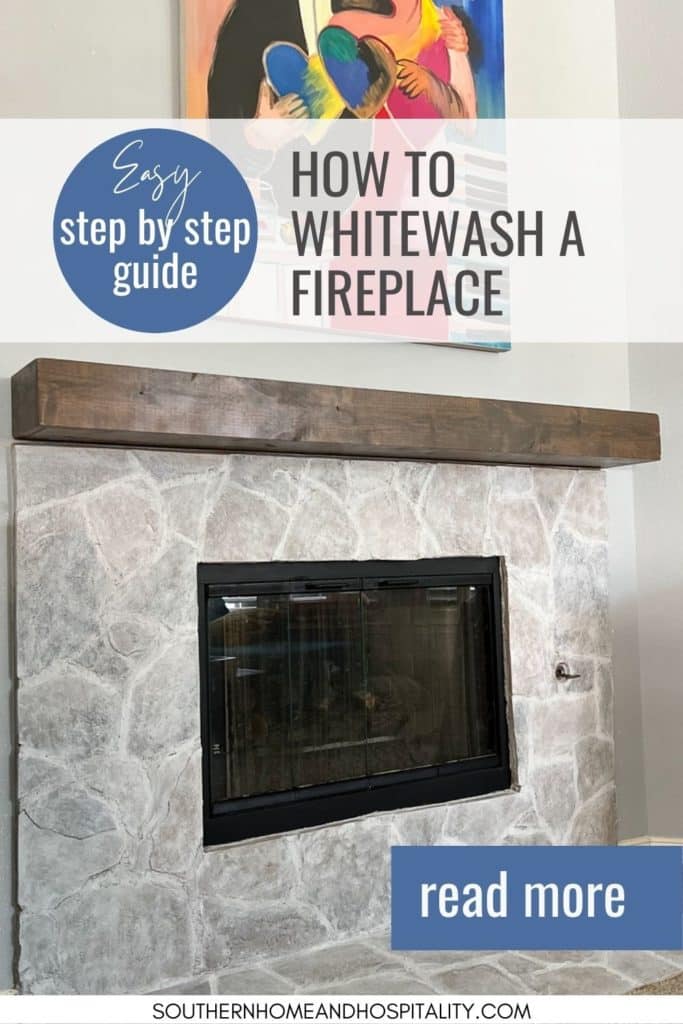
How To Whitewash A Fireplace: Easy Step By Step Guide
Inside: Whitewashing a fireplace surround is an easy way to update old, dark stone or brick. It can be a little scary, but it’s actually a very simple DIY project with this step-by-step tutorial to get you started!
It’s hard to love your living room when the very focal point is the thing you hate the most.
Unless we build from scratch and get to pick every detail in our home just to our liking, we all have to live with something that just sticks in our craw every time we look at it.
The thing that keeps us from enjoying the whole room. Because that’s all we can see.
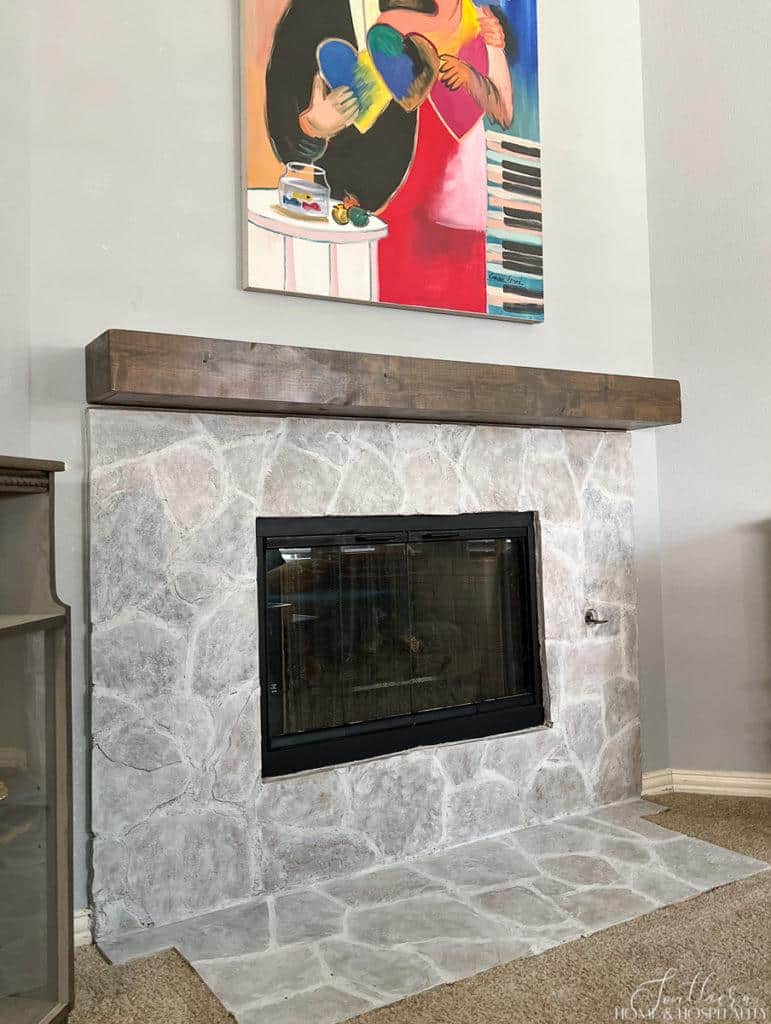
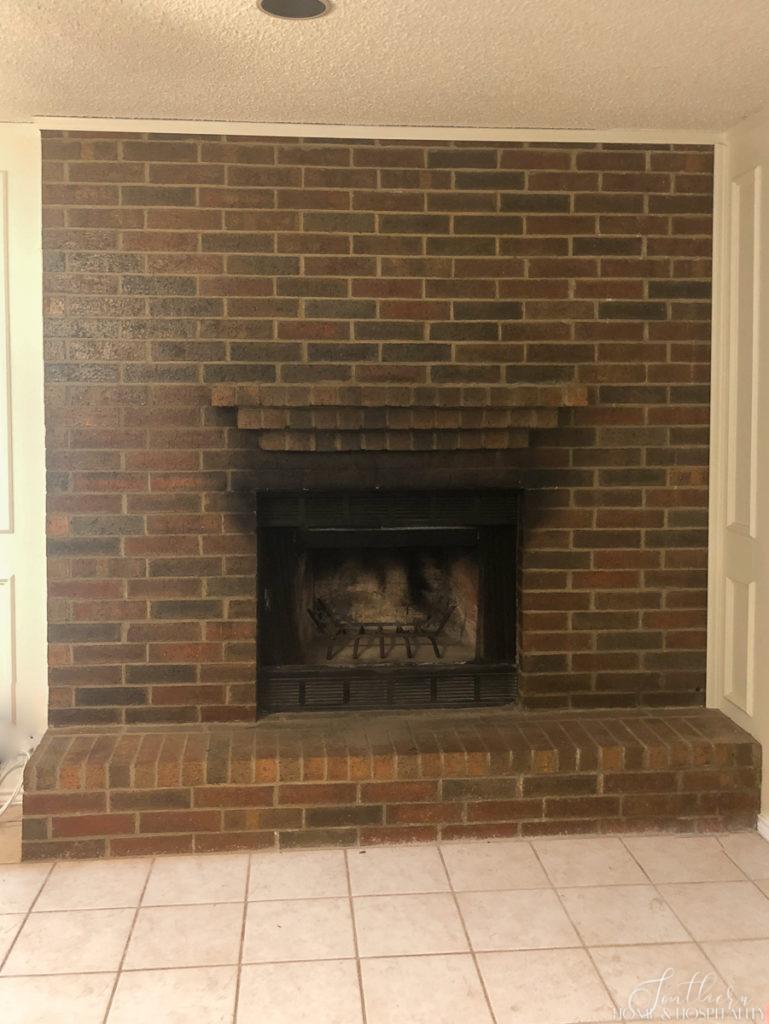
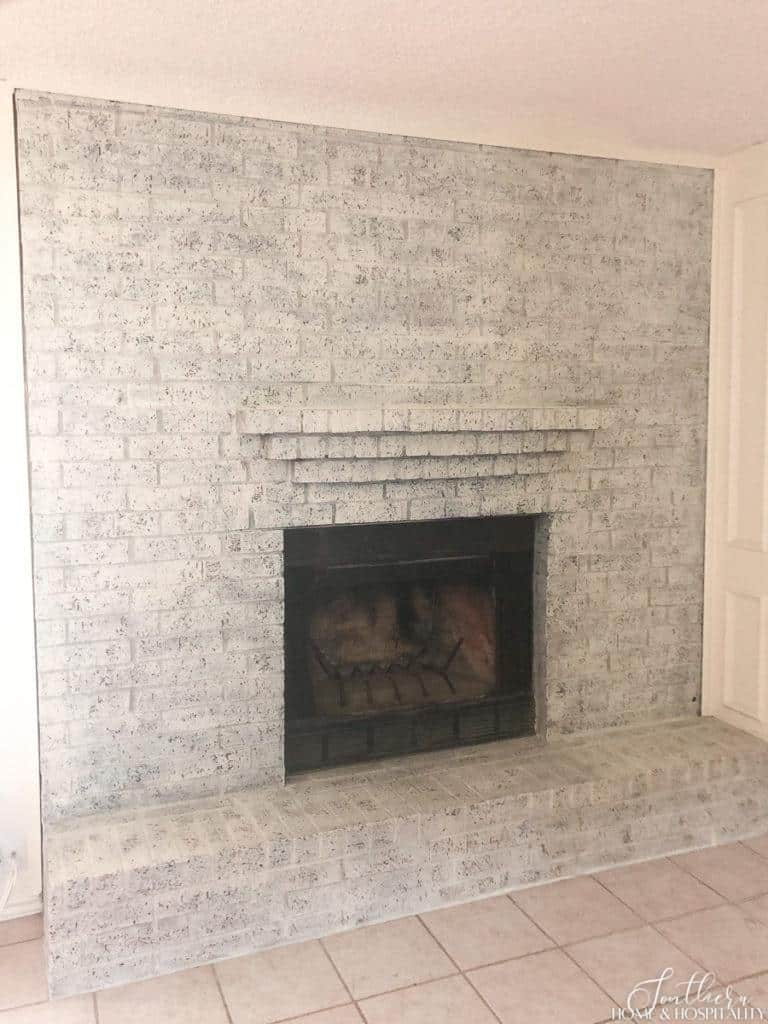
One of my good friends downsized recently and the sellers had updated their new home with a fresh gray and white color palette. But they left this sore thumb:
Dark, glossy, brown stone on the fireplace. And the surrounding light and bright colors in gray, cool tones made it look even darker. And orange. A golden, orange, dark hole.
The solution?
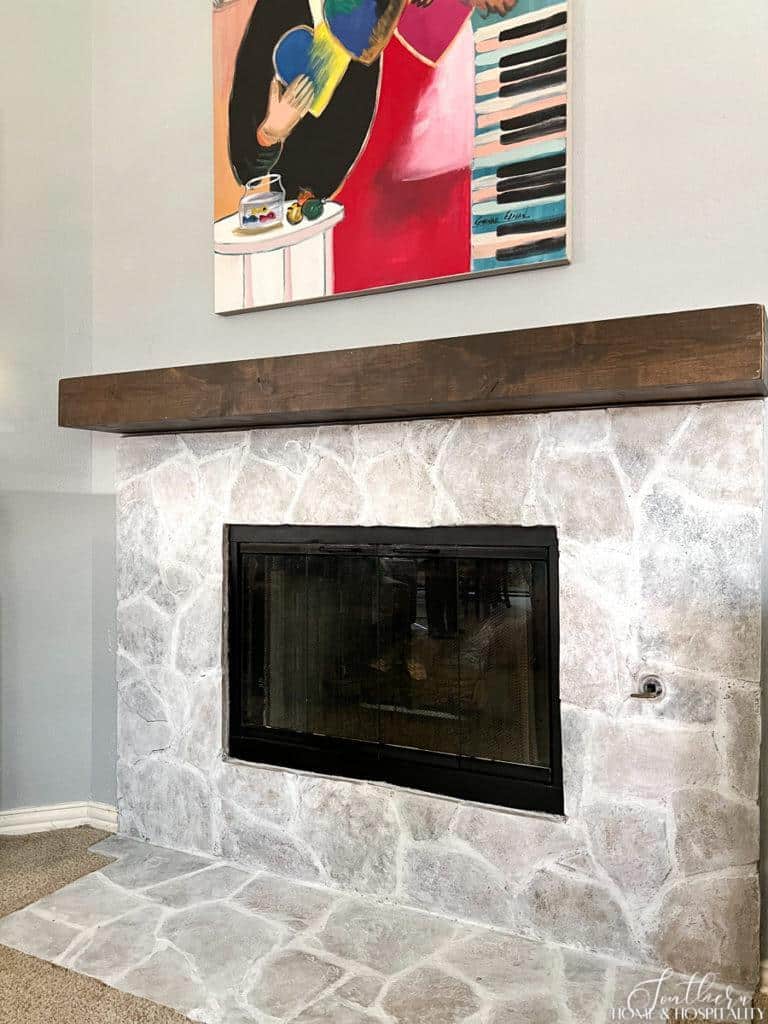
A can of paint and a few hours. No special painting skills are even required. And now it fits right into the room seamlessly.
Let me show you just how easy this fireplace makeover is!
This post contains Amazon and other affiliate links for your convenience. As an Amazon Associate I earn from qualifying purchases. If you purchase something through any link, I may receive a small commission, at no extra charge to you. I only recommend products that I love or would purchase for myself. See my full disclosure here.
Supplies for whitewashing a stone fireplace.
- Water-based white latex paint in a matte or flat finish
- Water
- Mixing container
- Large paint brush
- Small paint brush
- Rags
- Drop cloths
- Painters tape
- Disposable gloves
How do you prep the fireplace?
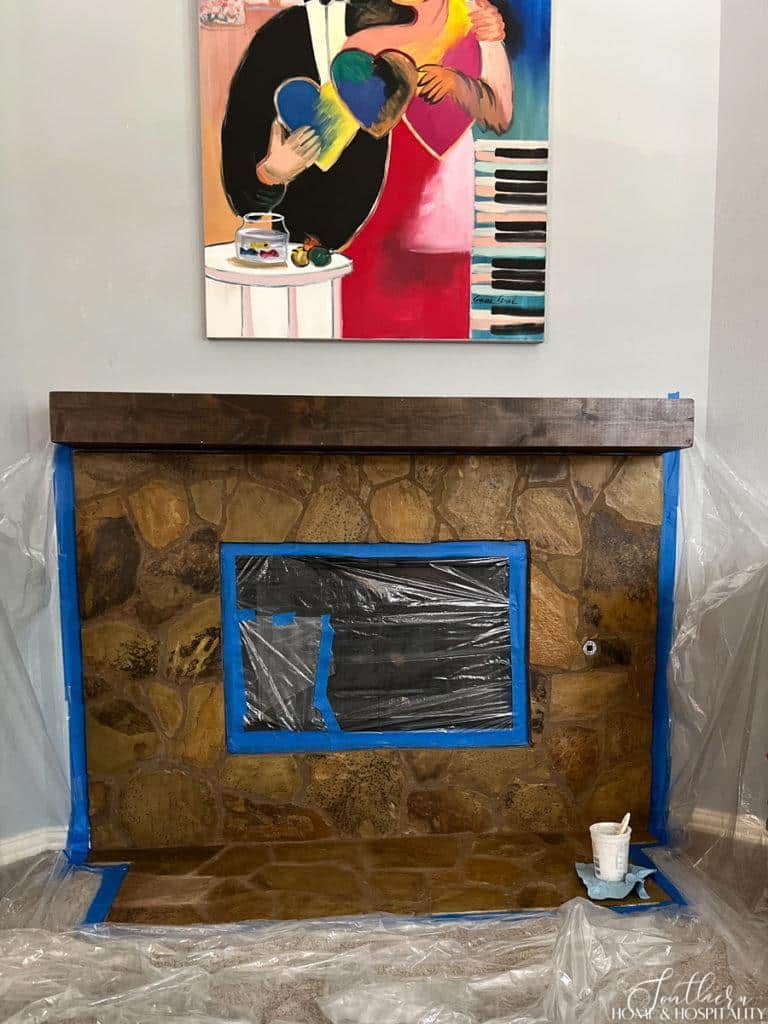
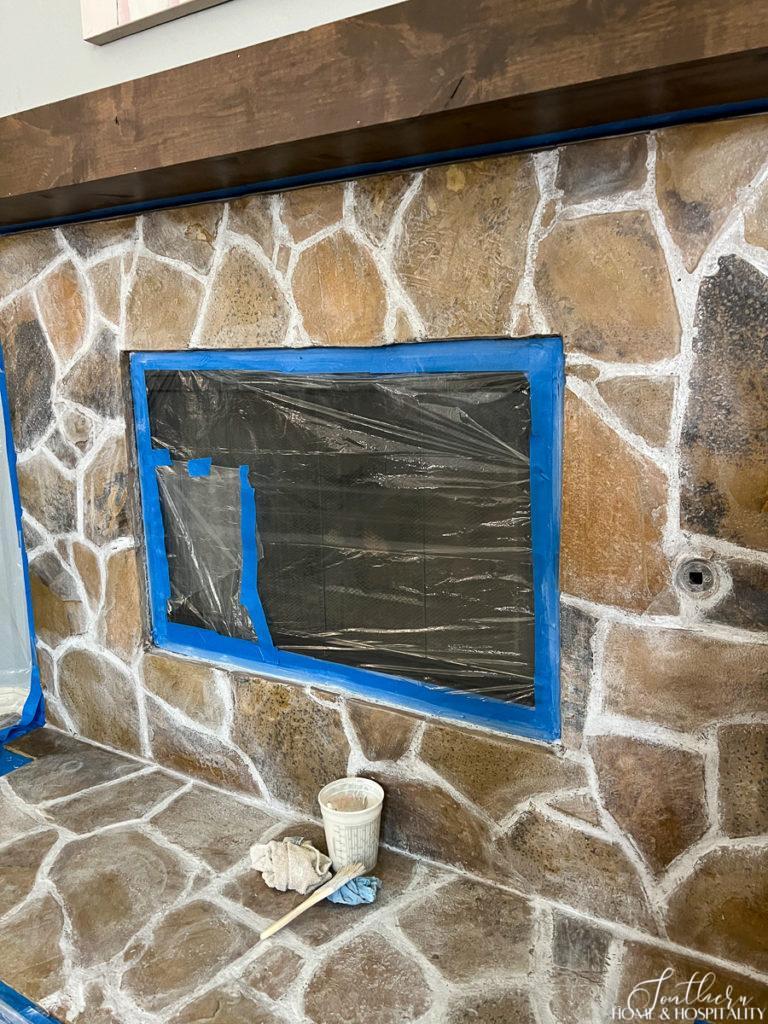
The first step in prep is to clean the stone. This fireplace stone had been sealed so it was pretty easy in this case—we just wiped it down with a wet rag. For more porous, rough, or sooty fireplace surrounds, you can also clean it with TSP. (Let the stone dry before applying the paint.)
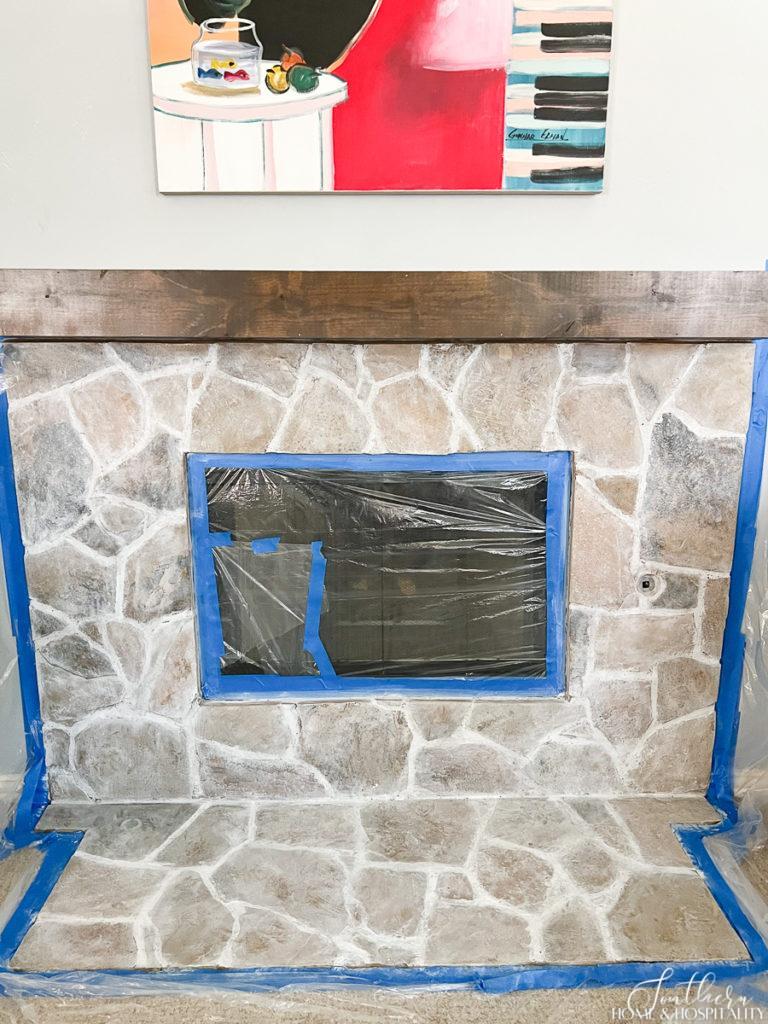
Next, cover the walls, floor, and firebox to protect them during the whitewashing process. This is a very drippy, splattery project so protect or move everything in the surrounding area. I used a plastic drop cloth and painters tape:
Tip: Have all of your supplies handy because your hands will be covered in paint during this process. The gloves on the supply list are a good idea—truth be told I’m usually not very good about it and I was really glad I wore them.
The simple steps to whitewash natural stone (or brick).
Step One: Mix the whitewash solution.
I bought a quart of this Rustoleum “Chalked” paint in Linen White because it has a very matte finish. If you already have flat white paint, it will work fine. You’ll want matte with no sheen because that helps the stone to look natural, not painted.
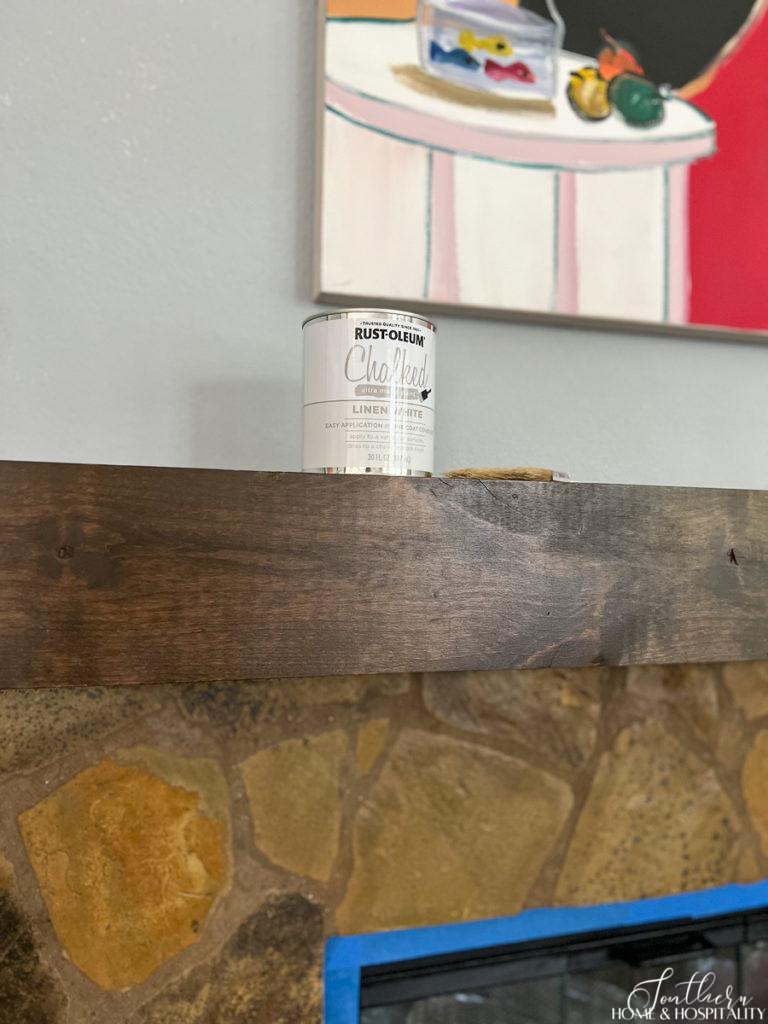
The glossy sealer on this stone made this fireplace even more unappealing and orange. Rustic stone should be just that. Rustic. The matte finish paint helped solve this sheen issue.
(The former owner of our home also did this to the slate and brick floor in our kitchen which I had to deal with🤷♀️😭.)
The whitewash “recipe” is this:
A 50/50 half paint to half water ratio.
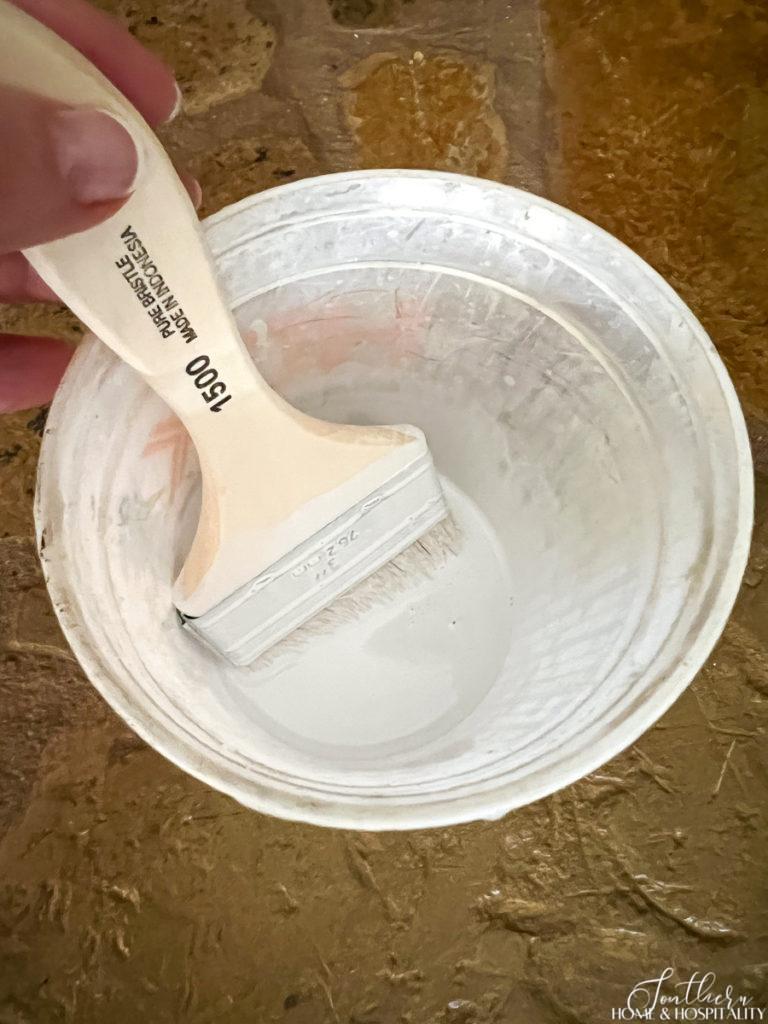
Mix the paint and water well in a plastic paint container or tupperware that you can easily hold while you whitewash. How much whitewash to mix will depend on how large your area is. I barely used any of the quart of paint for this small area.
Step Two: Paint in the mortar lines first.
I’m going to say this second step is optional. I wanted to make sure the grout lines came out more white than the stone so I painted the white wash onto the mortar first with the smaller brush.
Some will get on the stone but that’s ok. I wiped away most of what got on the stone during this step.
Step Three: Apply the whitewash mixture to the stone.
1. Dip the large paintbrush into the mixture about 1/2 to 1/3 of the way up the bristles and drain a little bit of the excess in the side of the container to help avoid some of the dripping.
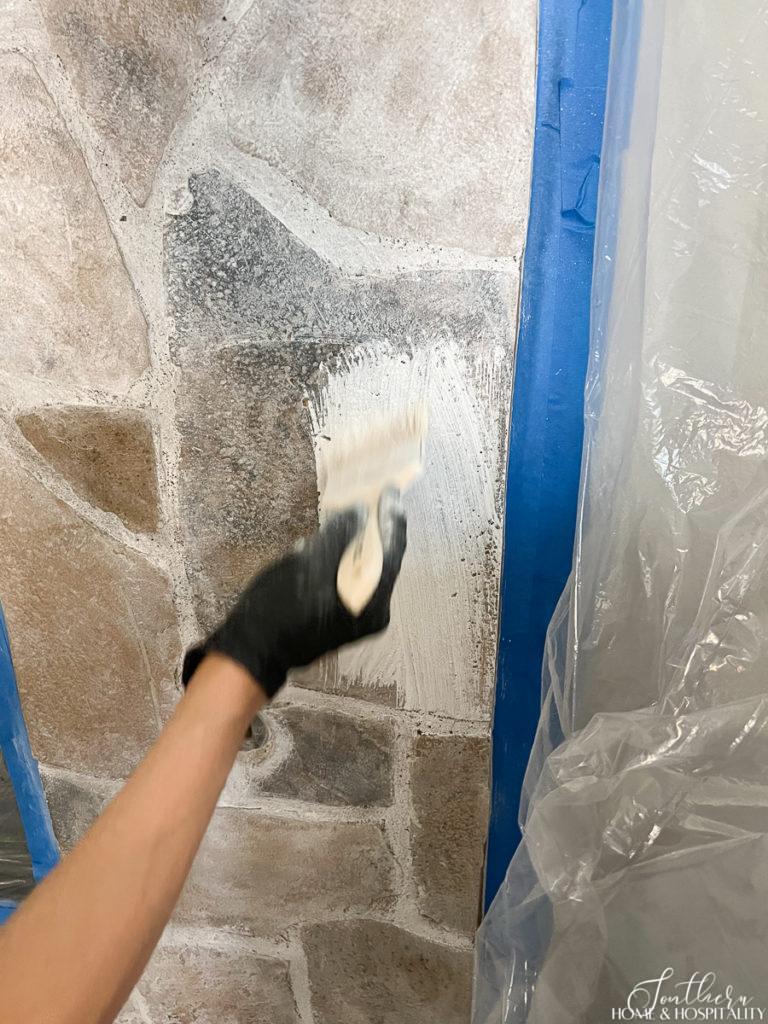
2. Start with a small section at the top and paint the mixture on the stone. Starting at the top keeps you from dripping on areas you’ve already done. Check for drips and wipe off with a rag.
Tip: If your stone is super rough or you are whitewashing on brick, use a paintbrush with very stiff bristles and stipple the whitewash mixture into crevices that painting over won’t get to.
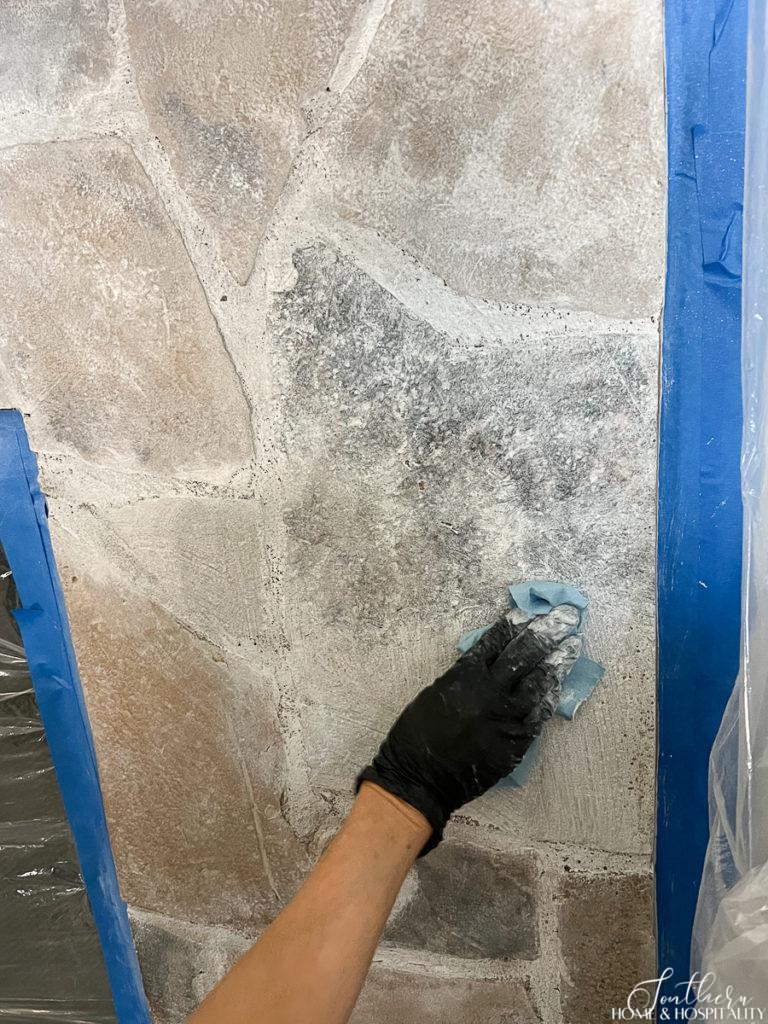
3. Then do the “dab” and “blot“. Dab the paint with a rag. This technique creates more dimension than wiping the paint off. Depending on how porous your stone is, it will grab the paint differently, so you’ll get to know your stone as you work on it. Just experiment to get familiar with how the stone is soaking up the paint. (I think the sealer on this one made it hold slightly less.)
4. Make sure to continue to work in small sections, painting and blotting as you move down the fireplace, and wiping off the dripping paint as you go. Small sections are necessary so the paint won’t set before you get to mottle it, erasing the brushstrokes.
After you’ve made your way all the way down through the hearth, go back and make sure you’ve covered all of the edges around the firebox or sides with the small paint brush.
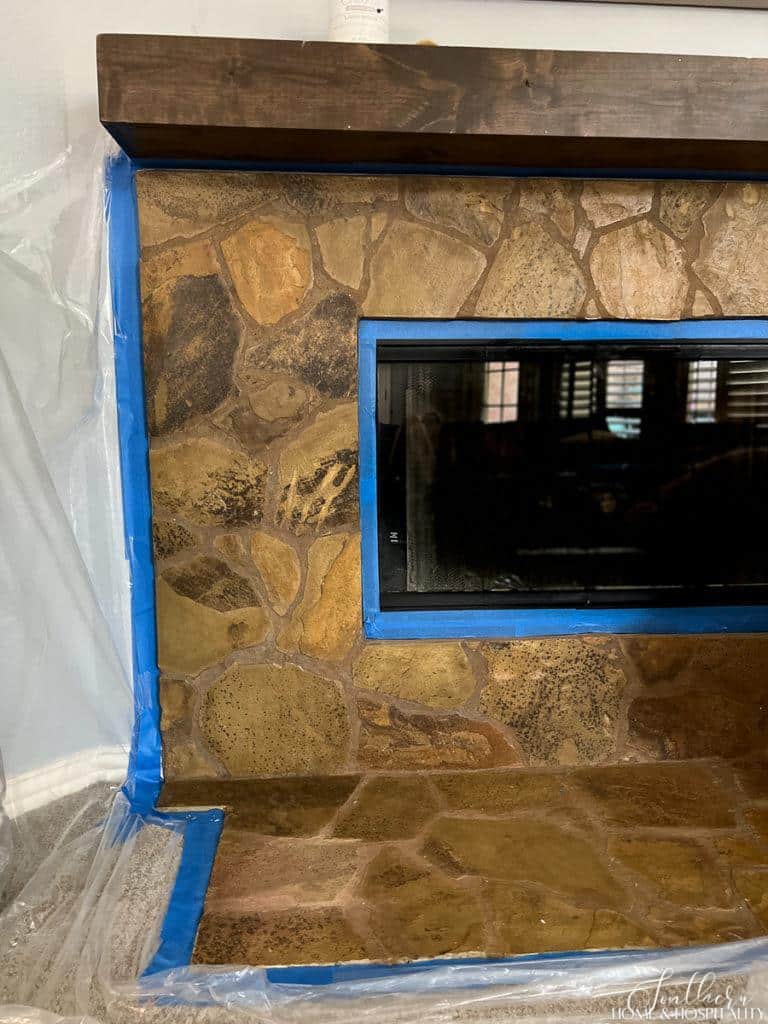
5. After completing the first layer, you’ll still see a lot of brown showing through:
Stand back and assess and repeat with more layers until you’ve achieved the desired effect you want. It’s helpful to take a break in between or even overnight.
My friend didn’t want the stone totally white, so I applied one more layer of whitewash following the same steps. Then we picked out a few stones that need extra attention to finish it up.
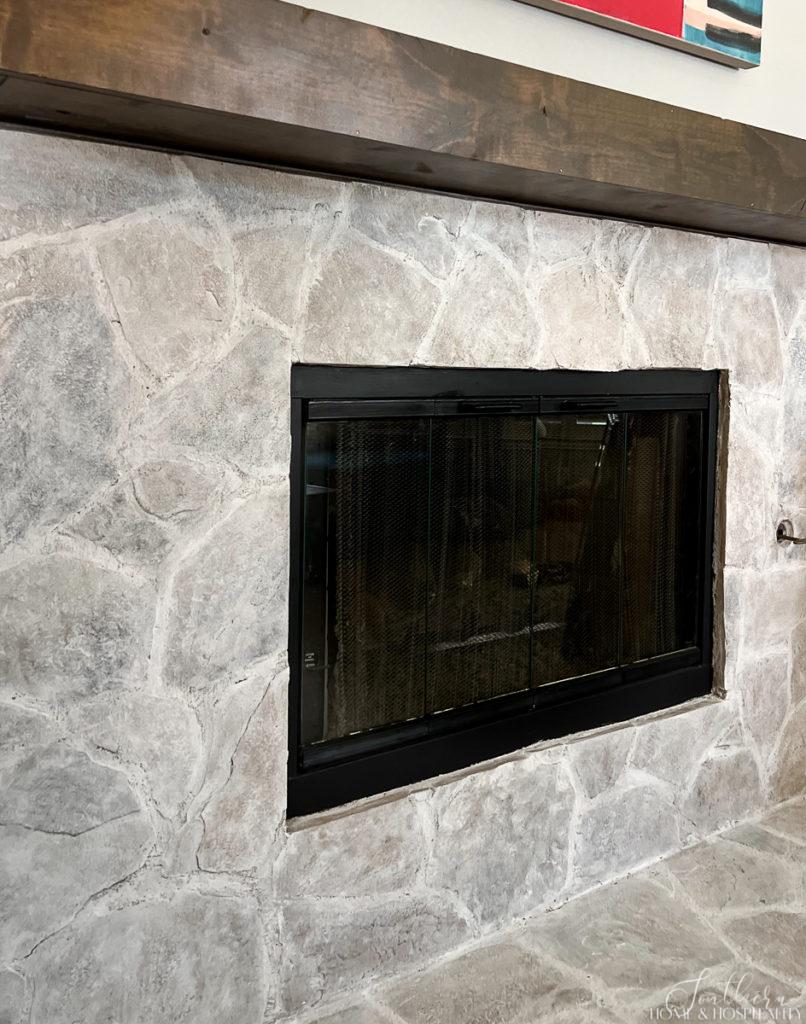
We left it at this point, agreeing that if she wanted to go even whiter I would come back and apply even more. (She ended up being happy with it like this because she likes still being able to see a bit of the stone’s color.)
Additional tips.
- You should be able to complete at least your first coat in one day. If you have a large area, you may want to let it sit overnight before applying the finishing layers so you don’t overtire and you can stay consistent.
- Have LOTS of rags available. Once they have a good bit of paint on them you’ll want to switch out or you’ll be dabbing on more paint than dabbing off.
- Staining pads are another handy tool you can use to wipe up drips.
- If a drip starts to set before you can wipe it, scrub it with a wet rag. You’ll remove your whitewash from that stone but it’s no big deal to touch up one or two stones.
- If you feel like you’ve applied too much paint in an area, you can also wipe this with a wet rag or mist with water and wipe. The beauty of water-based paint!
- If you want the end result to be white stone, you can adjust the equal part paint mixture to a higher ratio of paint and less water. Don’t leave out the water altogether though—you may end up with painted stones that look a solid color, but not natural.
- If you have a large area and a partner, assign one person to paint and the other to dab so the look will stay consistent.
Whitewashing a brick fireplace is just as easy.
I’ve also used this same whitewashing technique on fireplace brick for a home staging client. Their living room had very little light and the dark red brick fireplace looked dirty and outdated. To upgrade this all-important room in selling a house, they hired me to whitewash the brick before it went on the market.
I’ll say the brick surface took a lot longer than the stone because the texture of the brick is very porous and rough. And also because of all of the mortar joints. And this original brick color was dark. But it still wasn’t difficult. And I didn’t have the luxury of going back the next day so I did the whole thing in about four hours.
And the whitewash brick fireplace did make a huge difference in the family room, so it was totally worth it!
If you’re updating the fireplace to sell your home, you might be interested in “How to Make Your House Smell Incredible: Real Estate Expert Secrets“.
Painting that first stone is the scariest because you think “what if I make it even worse than before?” I’m here to tell you that I have never heard of anyone that was sorry they did this project. Actually the opposite. They wish they hadn’t been afraid because whitewashing brick and stone is so dang easy.
If you have a stone fireplace that you don’t like, have I convinced you to go for it? If you do, show us in the comments!

Before you go:
As always, I appreciate your visit, comments, and shares here on the blog! I’d love it if you also follow along with me on Pinterest, Instagram, and Facebook so you won’t miss any of my inspiration and ideas.
Don’t forget to sign up for updates to keep in touch.
If you’re not already a member of the SH&H family, I’d love to have you join me! You’ll not only get email updates, but you’ll have exclusive access to all the bonus materials in my free subscriber-only library, like this:
Pin it to remember it!
If you’ve enjoyed this post, please pin and share this on Pinterest:
Hi! Great job! Thank you for sharing your experience and knowledge! I do have one question… Do you think I should prime (Kilz) the stone before applying the paint? Thanks!
Thank you Cathy! I wouldn’t prime it before unless you are totally painting the stone. We wanted some of the stone to show through. It also allows some leeway for corrections and touchups!
Such a
Beautiful transformation. It’s gorgeous.
Thank you Renae!!