

Cheesy Southern Sausage Balls with Pepper Jelly Dip

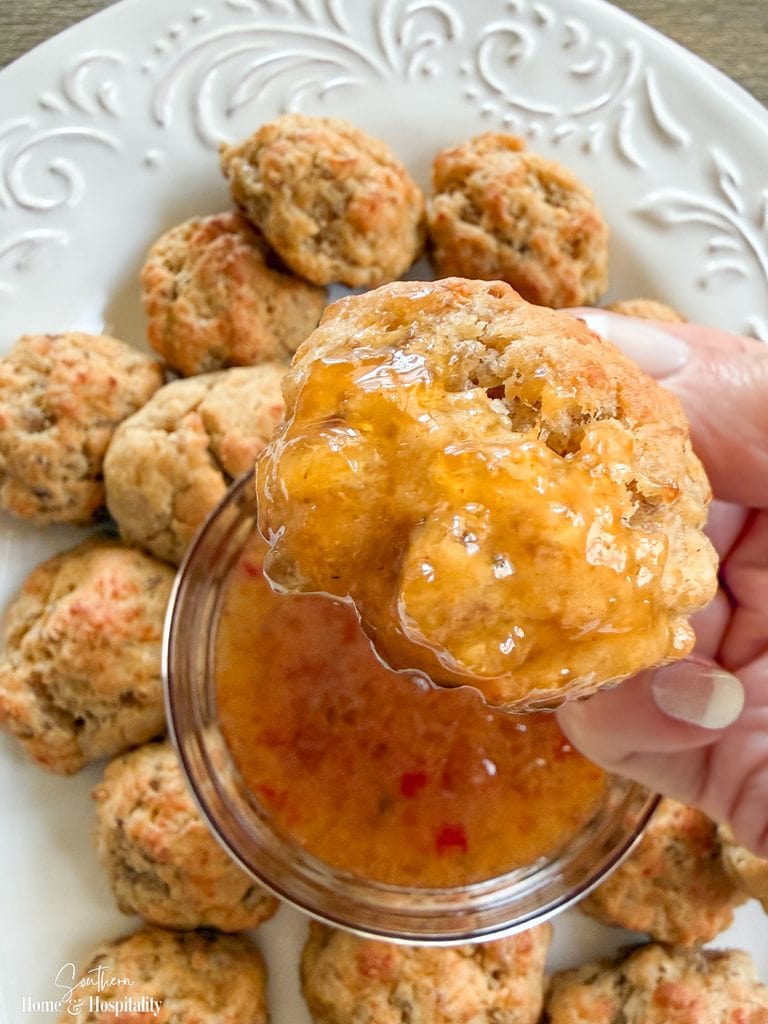
Inside: These easy cream cheese sausage balls with Bisquick and sharp cheddar are even better dipped in a sweet and tangy pepper jelly-Dijon sauce!
This post contains Amazon and other affiliate links for your convenience. As an Amazon Associate I earn from qualifying purchases. If you purchase something through any link, I may receive a small commission, at no extra charge to you. I only recommend products that I love or would purchase for myself. See my full disclosure here.
I’m not sure how I’ve managed to live in the South my entire life without ever making sausage balls, but somehow I have. As many times as I’ve eaten them at parties, it had never occurred to me to try making them myself.
And now I get why they’re such a Southern standby. For some reason, anything served in a bite-sized ball always seems to be a hit at a party. Maybe it’s because they’re so easy to grab and eat while you’re standing around talking. These are also ridiculously simple to make ahead and work just as well for a football watch party as they do on a holiday appetizer table.
I did do a little experimenting with my first batch (because why make things easy on me). I found out there’s a bit of a tradeoff between taste, texture, and how much the sausage balls spread. The amount of Bisquick really does make a difference.
And since I love the sweet and savory combination of pepper jelly with sausage and sharp cheddar, I added a simple pepper jelly and Dijon dipping sauce. The Dijon adds just enough tang to balance the sweetness of the jelly without covering up all that cheesy sausage goodness.
Ingredients for Cream Cheese Sausage Balls.
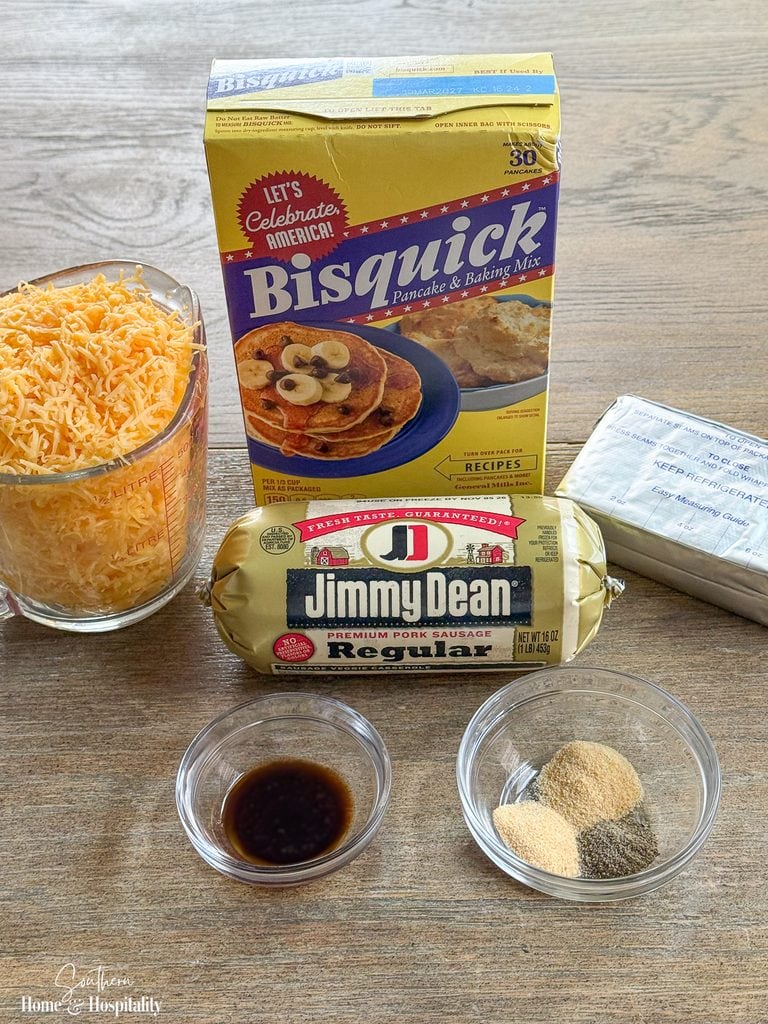
For the Sausage Balls:
- 1 lb. regular pork breakfast sausage
- 8 oz. full-fat cream cheese, softened
- 8 oz. sharp cheddar cheese, freshly grated (about 2 cups)
- 2 cups Original Bisquick baking mix
- 1 teaspoon Worcestershire sauce
- ½ teaspoon garlic powder
- ½ teaspoon onion powder
- ¼ teaspoon black pepper
For the Pepper Jelly-Dijon Dip:
- ½ cup red pepper jelly
- 1 tablespoon Dijon mustard
A couple of ingredients are worth mentioning before you get started:
- Grate the cheddar yourself. Pre-shredded cheese contains anti-caking ingredients that keep it from clumping in the bag. That coating can affect how smoothly the cheese melts and incorporates into the mixture, so I prefer freshly grated cheese here, especially since sausage balls can already tend to be dry.
- Let the cream cheese soften. It will be much easier to evenly combine with the sausage and the rest of the ingredients.
How to Make Sausage Balls with Cream Cheese and Bisquick.
1. Mix the Sausage and Cream Cheese.
Preheat the oven to 375°F.
Add the sausage and softened cream cheese to a large mixing bowl along with the Worcestershire sauce, garlic powder, onion powder, and black pepper. Mix until everything is evenly combined.
SH&H Tip: I used my stand mixer with the paddle attachment on low speed, which made it much easier. But you can also mix everything by hand.
2. Add the Cheese and Bisquick.
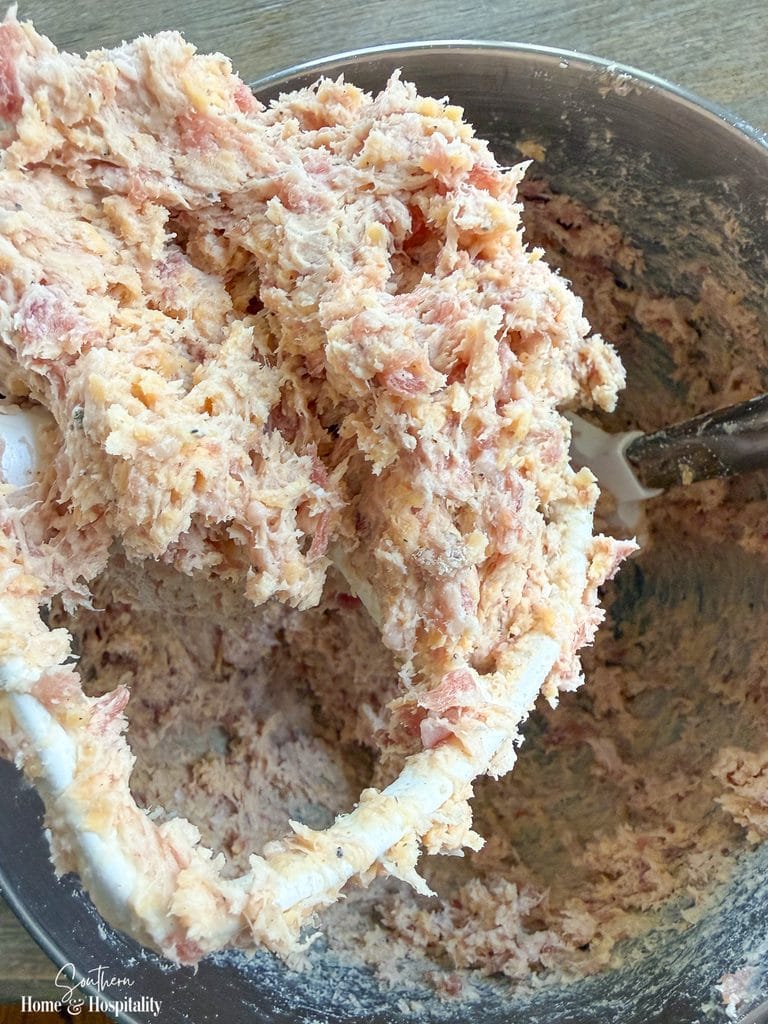
Add the freshly grated cheddar and Bisquick and continue mixing on low just until everything is incorporated.
The mixture will be thick and a little sticky, but it should hold together easily when you roll it.
3. Form the Sausage Balls.
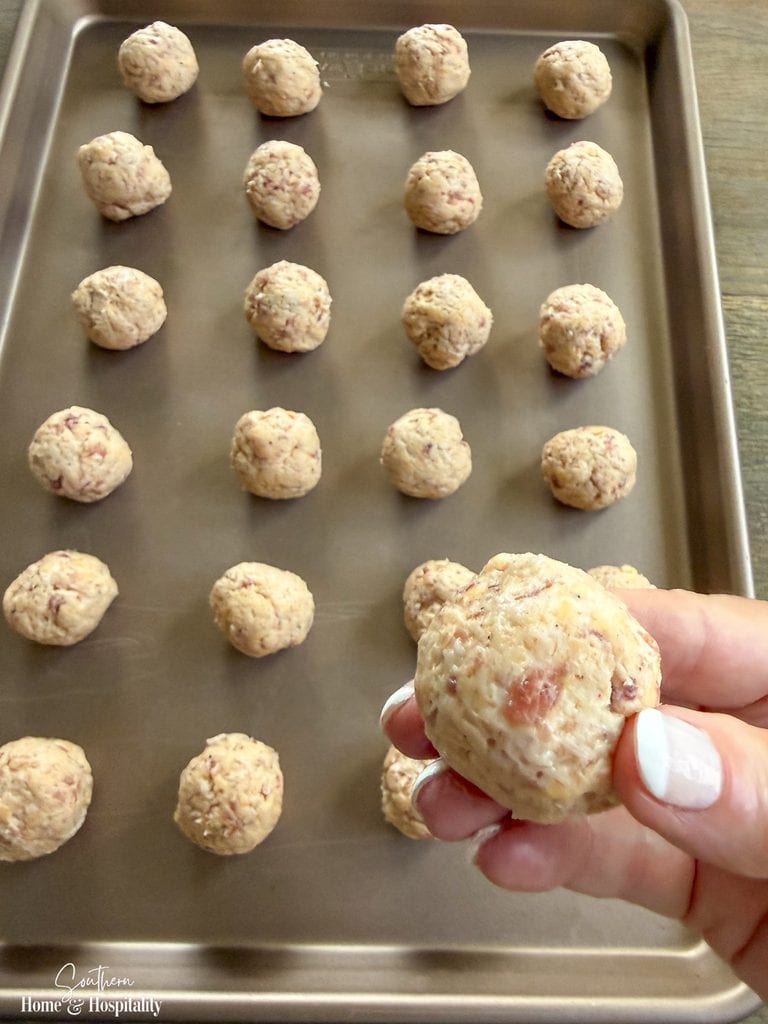
Scoop out small portions of the mixture and lightly roll them between your hands to form balls about 1¼ inches in size. Place them about an inch apart on a baking sheet.
4. Chill Before Baking.
Place the baking sheet in the freezer for about 10 minutes, or refrigerate for 30 minutes.
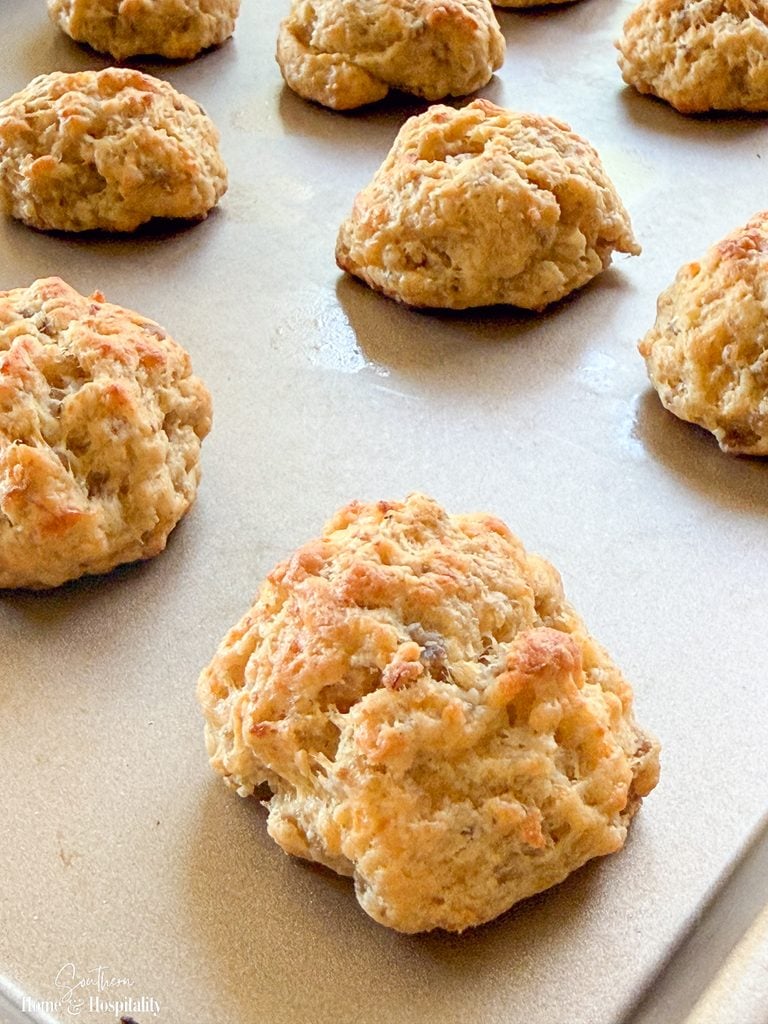
This step is worth the extra few minutes. Chilling firms up the sausage, cream cheese, and cheddar before they hit the hot oven, which helps keep the sausage balls from spreading as much while they bake.
5. Bake the Sausage Balls.
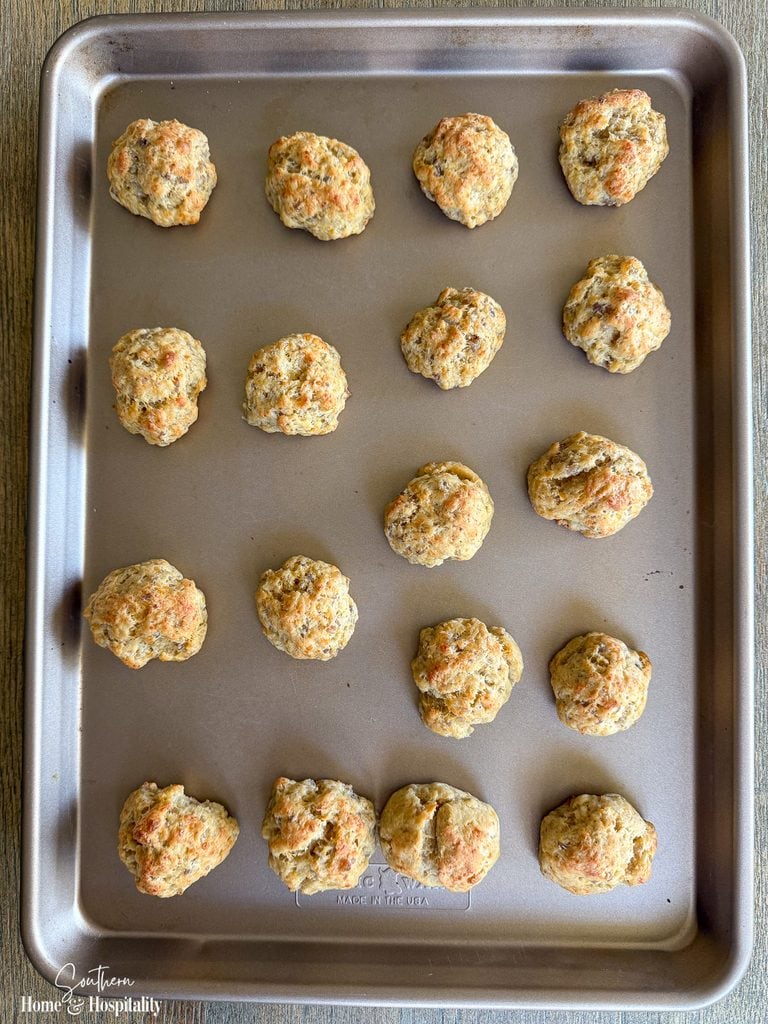
Bake at 375°F for 18–20 minutes, or until they’re cooked through and beginning to turn golden brown.
Mine were ready at 18 minutes, so I’d start checking them then rather than automatically leaving them in longer. Overbaking is one of the easiest ways to end up with dry sausage balls.
6. Make the Pepper Jelly-Dijon Dip.
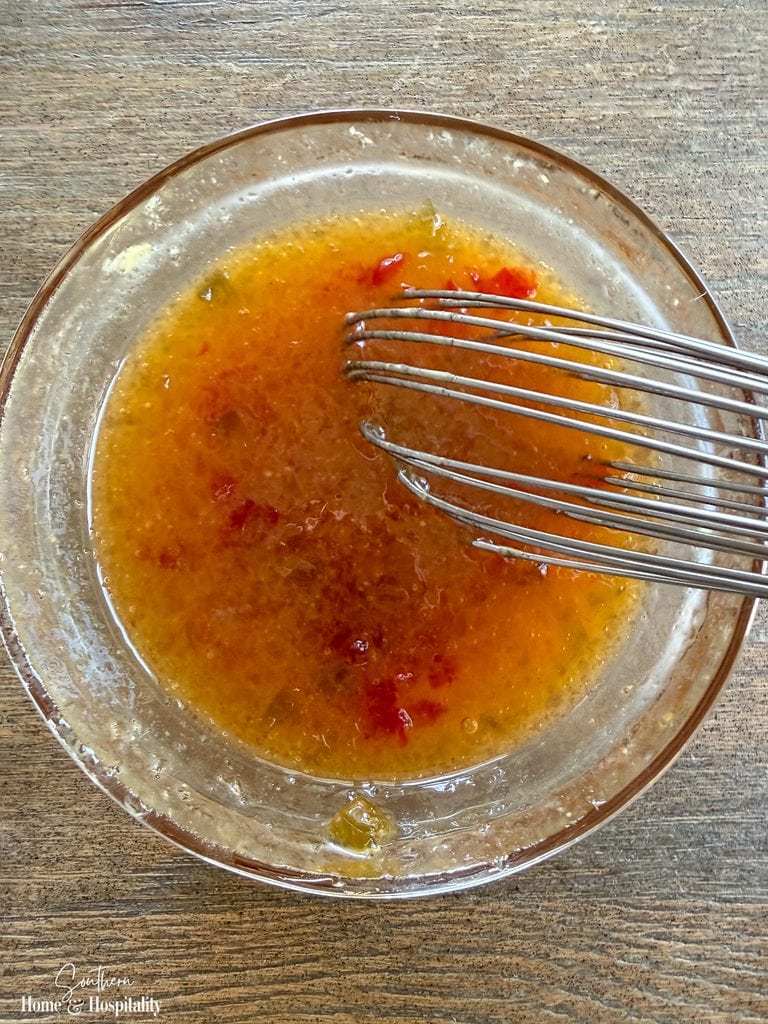
While the sausage balls bake, combine ½ cup red pepper jelly with 1 tablespoon Dijon mustard. Warm the pepper jelly slightly first if needed to make it easier to stir.
The dip is still on the sweet side with this ratio, with just enough Dijon to add a little tang. If you’d like it less sweet, simply stir in a little more Dijon to taste.
For the exact measurements and condensed instructions, you’ll find the printable recipe card just below.
Cheesy Southern Sausage Balls Recipe.
Cheesy Southern Sausage Balls with Pepper Jelly Dip
Ingredients
Sausage Balls
- 1 lb. regular pork breakfast sausage
- 8 oz. full-fat cream cheese softened
- 8 oz. sharp cheddar cheese freshly grated (about 2 cups)
- 2 cups Original Bisquick baking mix
- 1 teaspoon Worcestershire sauce
- ½ teaspoon garlic powder
- ½ teaspoon onion powder
- ¼ teaspoon black pepper
Pepper Jelly-Dijon Dip
- ½ cup red pepper jelly
- 1 tablespoon Dijon mustard
Instructions
Make the Sausage Balls
- Preheat the oven to 375°F.
- Add the sausage and softened cream cheese to a large mixing bowl along with the Worcestershire sauce, garlic powder, onion powder, and black pepper. Mix until evenly combined.
- Add the freshly grated cheddar and Bisquick. Mix just until everything is incorporated. The mixture will be thick and slightly sticky.
- Scoop out small portions of the mixture and lightly roll between your hands to form balls about 1¼ inches in size. Arrange about 1 inch apart on a baking sheet.
- Place the baking sheet in the freezer for 10 minutes or refrigerate for 30 minutes. This helps reduce spreading during baking.
- Bake for 18–20 minutes, or until cooked through and beginning to turn golden brown. Begin checking at 18 minutes to avoid overbaking.
Make the Pepper Jelly-Dijon Dip
- Combine the red pepper jelly and Dijon mustard, warming the pepper jelly slightly first if needed to make it easier to stir. For a less-sweet dip, add a little more Dijon to taste.
- Serve the sausage balls warm with the pepper jelly-Dijon dip on the side.
Notes
- Cheese: I recommend grating the cheddar from a block. Pre-shredded cheese contains anti-caking ingredients that can affect how smoothly it melts and incorporates into the sausage mixture.
- Make ahead: Form the sausage balls ahead of time and refrigerate until ready to bake.
- Freezing: Unbaked or baked sausage balls can be frozen in an airtight freezer-safe container for up to 3 months.
- Reheating: Reheat refrigerated sausage balls in a 350°F oven for about 8–10 minutes, or until heated through.
- Sausage: Hot breakfast sausage can be substituted for regular sausage if you prefer more heat.
My Tips for the Best Sausage Balls.
Get the Bisquick Amount Right.
I learned this one firsthand. I started my first batch with 1¾ cups of Bisquick, and those sausage balls spread more and had a denser, more sausage-forward texture.
Before baking the rest of the mixture, I added a little more Bisquick. That batch spread less and came out lighter and a little more biscuit-like. I preferred the second batch, which is why I settled on two cups for this recipe.
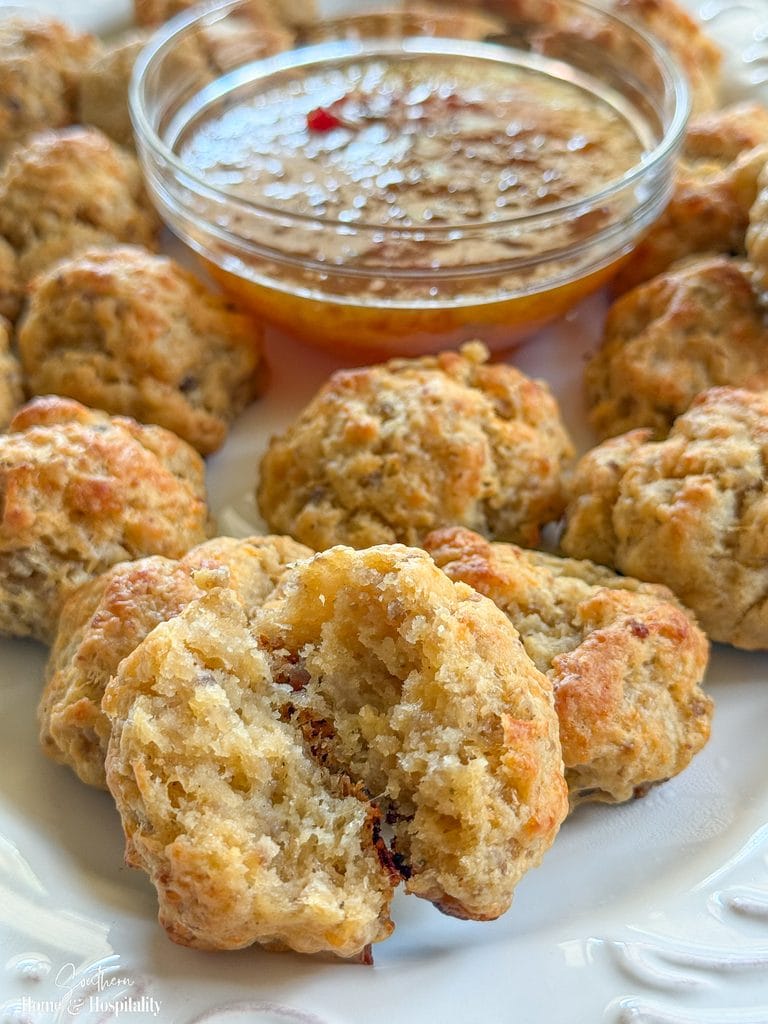
There’s definitely a tradeoff here. Less Bisquick gives you more sausage flavor, while a little more helps the balls hold their shape and gives them a lighter texture.
Grate the Cheese Yourself.
I know grabbing a bag of shredded cheddar is easier, but this is one of those recipes where I think grating a block is worth the extra minute or two. It melts more smoothly into the sausage mixture, and we’re trying to keep these as tender as possible.
Don’t Skip the Chill.
Once the balls are formed, give them about 10 minutes in the freezer or 30 minutes in the refrigerator before baking. This firms everything back up and helps reduce spreading once they go into the hot oven.
It won’t magically turn every sausage ball into a perfectly round little sphere, as my photos will prove. But it does help keep them from spreading quite as much.
Start Checking Them at 18 Minutes.
Mine were done at the low end of the baking time. Since sausage balls can become dry when they’re overbaked, I’d check them at 18 minutes and only give them additional time if they need it.
Sausage Ball FAQs.
Can You Make Sausage Balls Ahead of Time?
Yes. You can mix and shape the sausage balls ahead of time, arrange them on a baking sheet or in an airtight container, and refrigerate them until you’re ready to bake.
That lets you get the messy part out of the way and simply put them in the oven shortly before you want to serve them.
Can You Freeze Sausage Balls?
Yes. Sausage balls can be frozen either before or after baking. To freeze them unbaked, form the balls and freeze them on a baking sheet until firm, then transfer them to a freezer-safe container or bag.
You can also freeze leftover baked sausage balls once they’ve cooled completely. Either way, they’ll keep well in the freezer for up to three months.
How Do You Reheat Sausage Balls?
Reheat sausage balls in a 350°F oven until warmed through, usually about 8–10 minutes if they’re coming from the refrigerator. I prefer reheating them in the oven because they stay a little firmer than they do in the microwave, although the microwave is certainly fine when you’re only reheating one or two.
Why Are My Sausage Balls Dry?
Using more baking mix than the recipe calls for or leaving the sausage balls in the oven too long can make them dry. Freshly grated cheese and cream cheese help keep this recipe tender, and I start checking mine at 18 minutes so they don’t bake any longer than necessary.
A Southern Appetizer Worth Keeping Around.
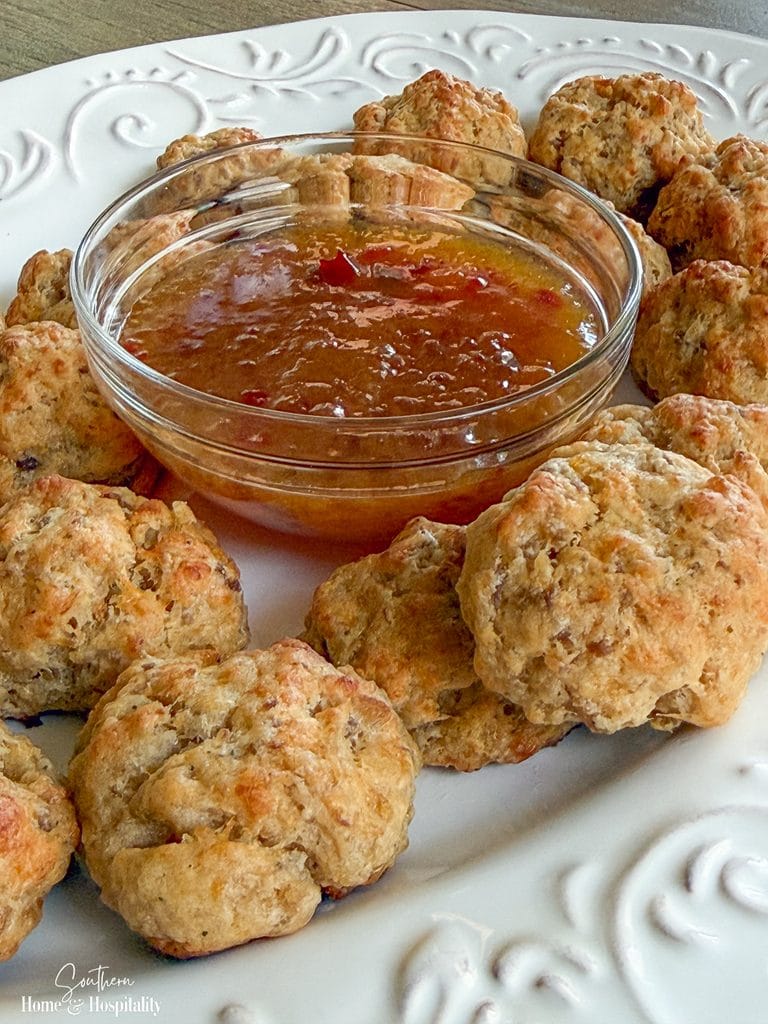
Now I understand why sausage balls are such a Southern favorite. After making them myself, I know this won’t be the last time.
I guess I was a little late to the sausage ball party. Better late than never!

Before you go:
As always, I appreciate your visit, comments, and shares here on the blog! I’d love it if you also follow along with me on Pinterest, Instagram, Facebook, TikTok, and YouTube so you won’t miss any of my inspiration and ideas.
Don’t forget to sign up for updates to keep in touch.
If you’re not already a member of the SH&H family, I’d love to have you join me! You’ll not only get email updates, but you’ll have exclusive access to all the bonus materials in my free subscriber-only library, like this:
Pin it to remember it!
If you’ve enjoyed this post, please pin and share this on Pinterest:

Kate, thanks for this recipe! It looks so yummy! I am going to make these sausage balls for a Grey Cup party we are going to. I love your recipes and have made so many of them. They are always so delicious!
Thank you so much! It makes me so happy to hear that you’ve enjoyed so many of my recipes! I think these sausage balls will be perfect for your Grey Cup party. Hope everyone loves them, and have a wonderful time!